

Social Proof
Show recent bookings, reviews, and enquiries as pop-up notifications on your website so visitors feel confident enough to book.
The Social Proof add-on helps you show small pop-up notifications on your website when someone books a trip, leaves a review, or sends an enquiry.
These pop-ups help new visitors feel more confident about booking with you. Say a traveler lands on your Annapurna Base Camp trek page and sees a small pop-up saying someone in London just booked the same trip. That's social proof at work.
To use the Social Proof add-on, you need the WP Travel Engine plugin installed and activated on your website. You also need version 5.0 or later.
Installing the Social Proof add-on
Installing this add-on works the same way as your other WP Travel Engine add-ons.
Need help with setup? Follow how to activate a Pro add-on license key for the full install and activation steps.
Once the add-on is installed and active, you can start setting up the notifications you want visitors to see.
Configuring the Social Proof add-on
All Social Proof settings are kept in one place.
In your WordPress dashboard, the admin area of your website, usually at yoursite.com/wp-admin, go to WP Travel Engine in the left-hand menu, then click Social Proof.
From there, you can create notifications, manage them, and control how they appear on your site.
Social Proof Dashboard
The Social Proof Dashboard gives you a clear view of all the notifications you have created.
It lists every notification you've made. It also shows how many times each notification has been viewed, how many people clicked on it, and its click-through rate, which is the percentage of viewers who clicked.
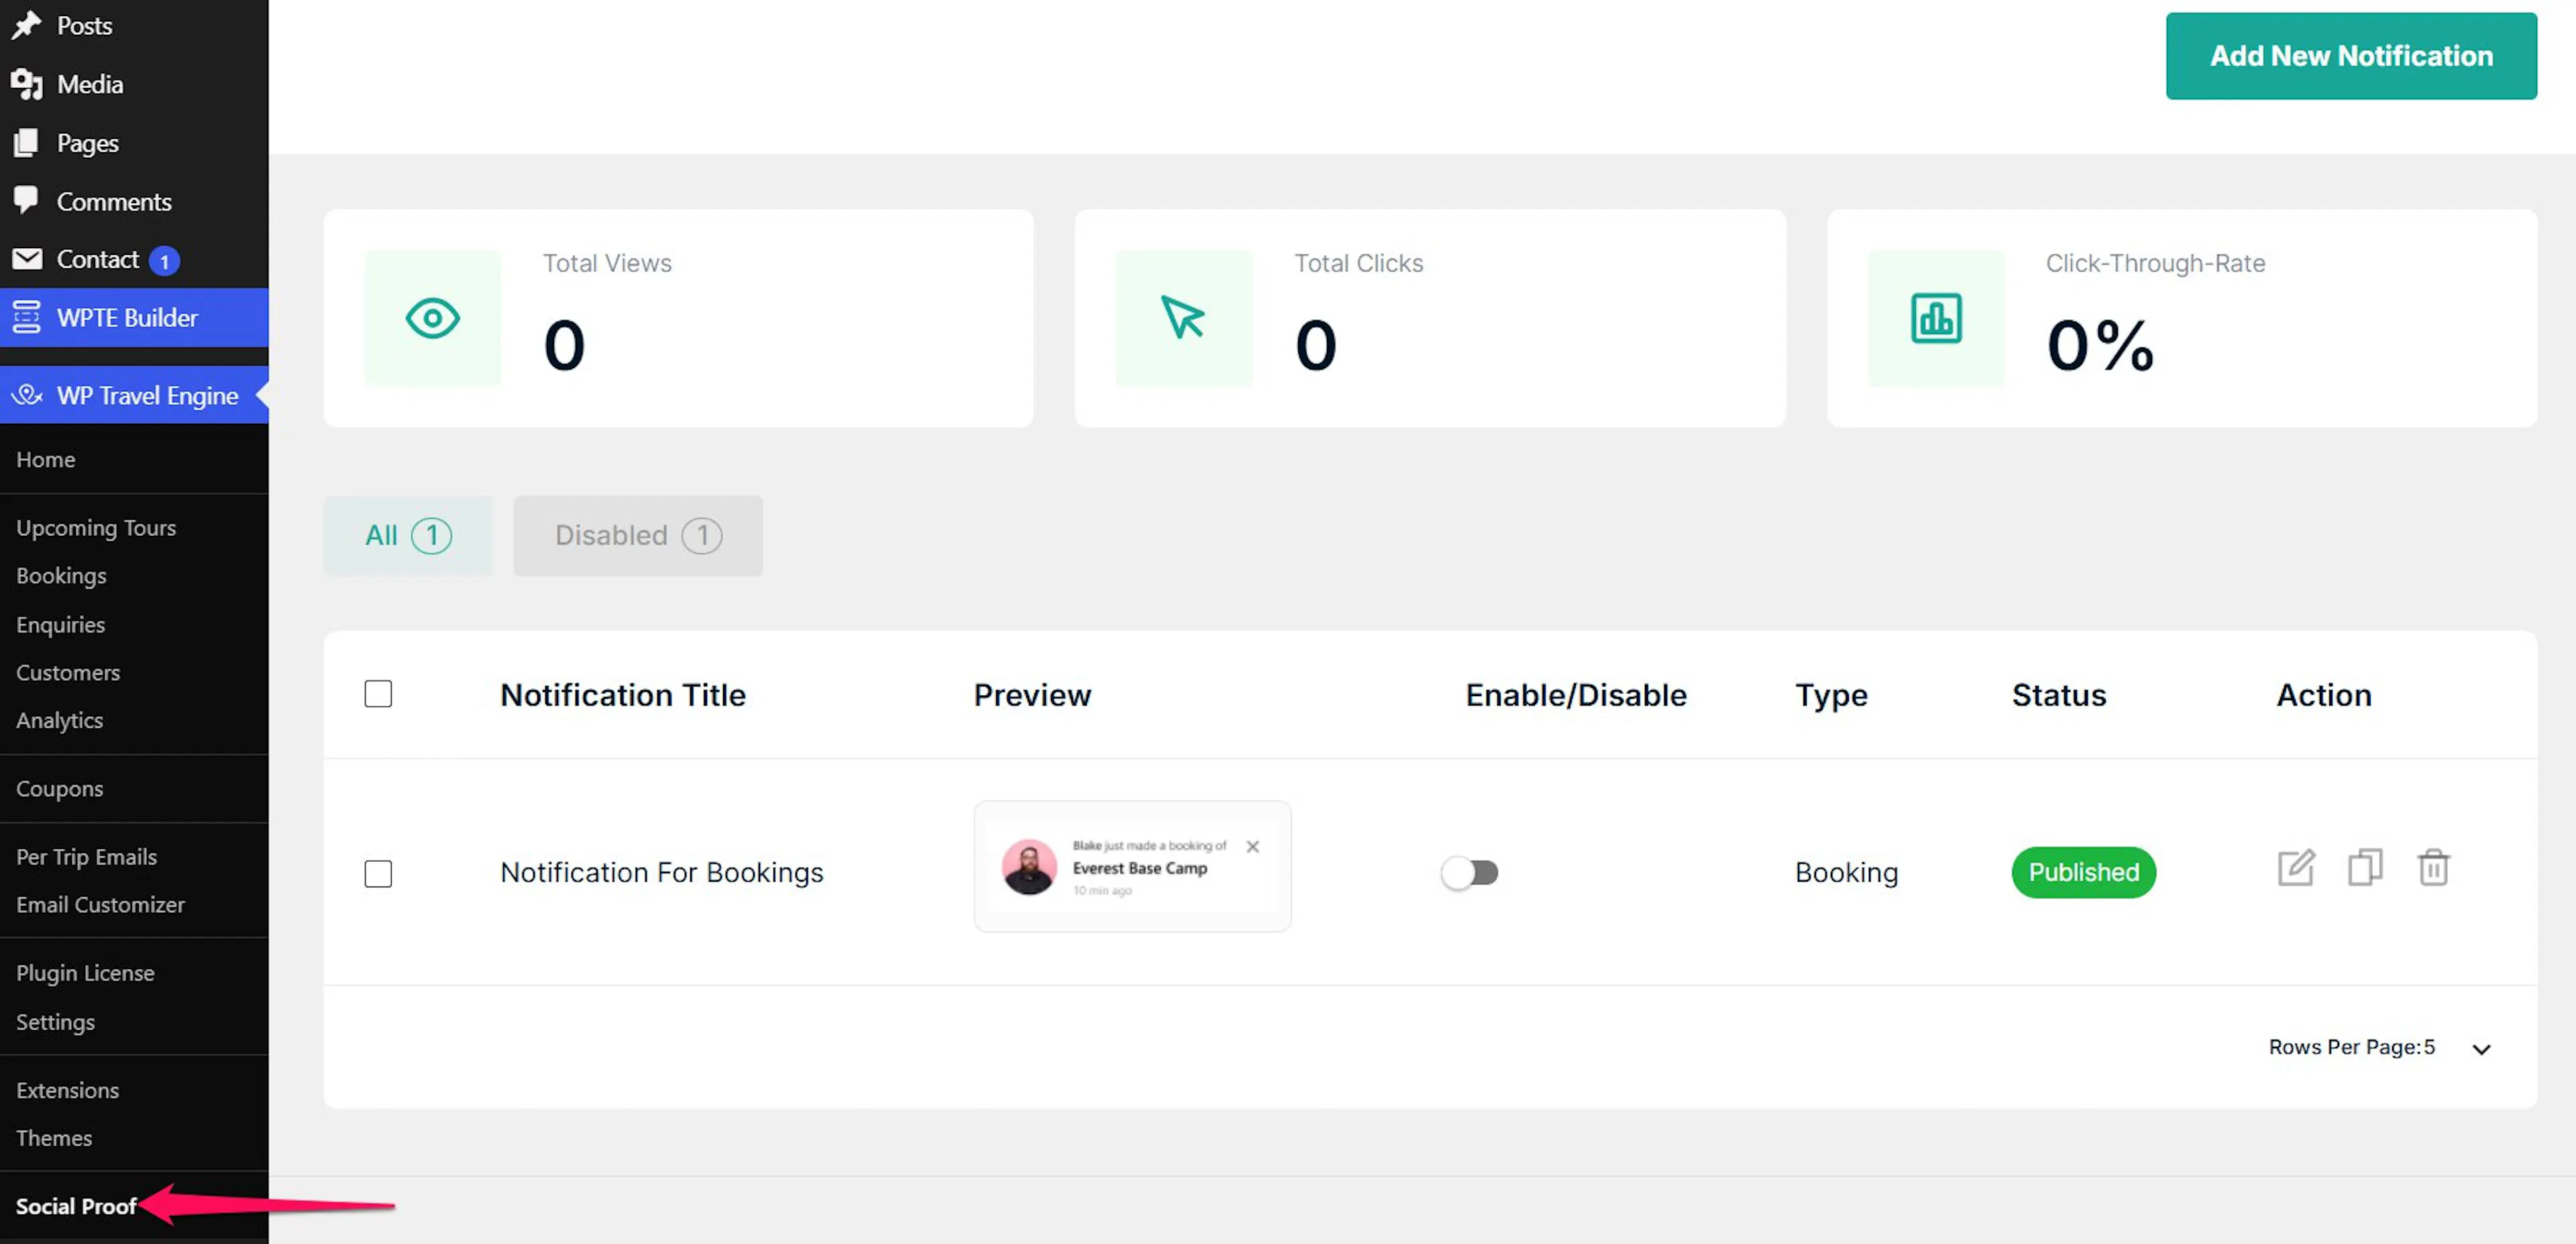
From this screen, you can turn notifications on or off. You can also edit them, delete them, or make a copy of them by duplicating them.
Once you know your way around the dashboard, the next step is choosing the kind of notification you want to show.
Notification Type
You can create three types of notifications with the Social Proof add-on.
Trip Booking
A Trip Booking notification appears whenever a customer books a trip on your website. It shows other visitors that real people are booking real trips.
Trip Review
A Trip Review notification appears when a customer leaves a review for a trip. To use this, you need the Trip Reviews extension installed and active.
Trip Enquiry
A Trip Enquiry notification appears when someone fills out the enquiry form on a trip page. It shows other visitors that people are interested enough to ask questions.
How to add a notification
Before you start, make sure the Social Proof add-on is installed and activated.
Open the notification editor
Go to the Social Proof Dashboard and click Add New Notification. You'll find it near the top of the page.
This opens the editor where you'll set up your pop-up.
Choose your notification settings
Set up the options for your notification one by one. More detail on each setting is listed below.
The image below shows what the editor looks like while you are setting up a notification.
Save your notification
Click Save as Draft or Publish when you're done.
Save as Draft keeps the notification saved but hidden. Publish saves it and makes it ready to display. Starting with a draft is a good idea while you test things out.
New notifications start turned off. You'll need to switch them on from the Social Proof Dashboard before they'll appear on your website.
Notification settings
These settings control what your pop-up says, where it appears, and who sees it.
- Notification Type: Choose what kind of activity triggers the pop-up - a booking, a review, or an enquiry.
- Notification Styles: Pick how the pop-up looks. A few design options are available so it matches your site.
- Content Editing: Write the text that appears in the pop-up. You can use Available Tags, which are special placeholders, to automatically fill in details like the customer's name or the trip they booked.
- Show Booking Of: This only appears for booking notifications. Choose whether to show bookings for all your trips or only for specific ones. Say you only want to show bookings for your most popular trek - this is where you'd pick that specific trip.
- Show on: Choose whether the pop-up appears on every page of your website or only on individual trip pages.
- Display for: Choose who sees the pop-up - everyone who visits, or only people who are logged in to an account.
- Position: Pick where on the screen the pop-up appears. For example, bottom-left keeps it visible without covering your trip photos.
- Notification Size: Set the maximum width of the pop-up in pixels. If you're not sure, the default size works well for most sites.
- Mobile Visibility: Turn this on to hide the pop-up on phones. Pop-ups can feel cramped on small screens, so this is worth considering if most of your visitors browse on mobile.
- Delay Before First Notification: Set how many seconds to wait before the first pop-up appears after someone opens your site. For example, set it to 5 seconds so the pop-up doesn't appear the instant someone lands on your page.
- Display For: Set how long each pop-up stays on screen before it disappears.
- Delay Between: Set how many seconds to wait between one pop-up and the next.
- Display the last: Choose how many of your most recent bookings, reviews, or enquiries to cycle through. For example, if you set this to 10, the pop-up will rotate through your 10 most recent bookings.
- Display from (in Days): Enter how far back to go when pulling bookings, reviews, or enquiries. For example, enter 30 to only show activity from the last 30 days.
Once these settings are in place, you can preview how the notifications will feel to your visitors.
Frontend view
Here is what visitors will see on your website when Social Proof notifications appear.
Each pop-up appears for a few seconds and then fades away, so it does not get in the way of the browsing experience.
If you're still stuck or have a question we didn't cover, our support team is happy to help. Reach out at our support page and we'll get you sorted.