

PayU Biz Payment Gateway
Install and connect the PayU Payment Gateway addon so travelers can pay for trips on your website using cards, internet banking, or PayPal.
Overview
PayU Payment Gateway is an addon for WP Travel Engine. An addon is a small extra plugin that gives your travel website more features.
It lets you accept trip and tour payments through PayU. PayU is one of the leading financial services in global growth markets.
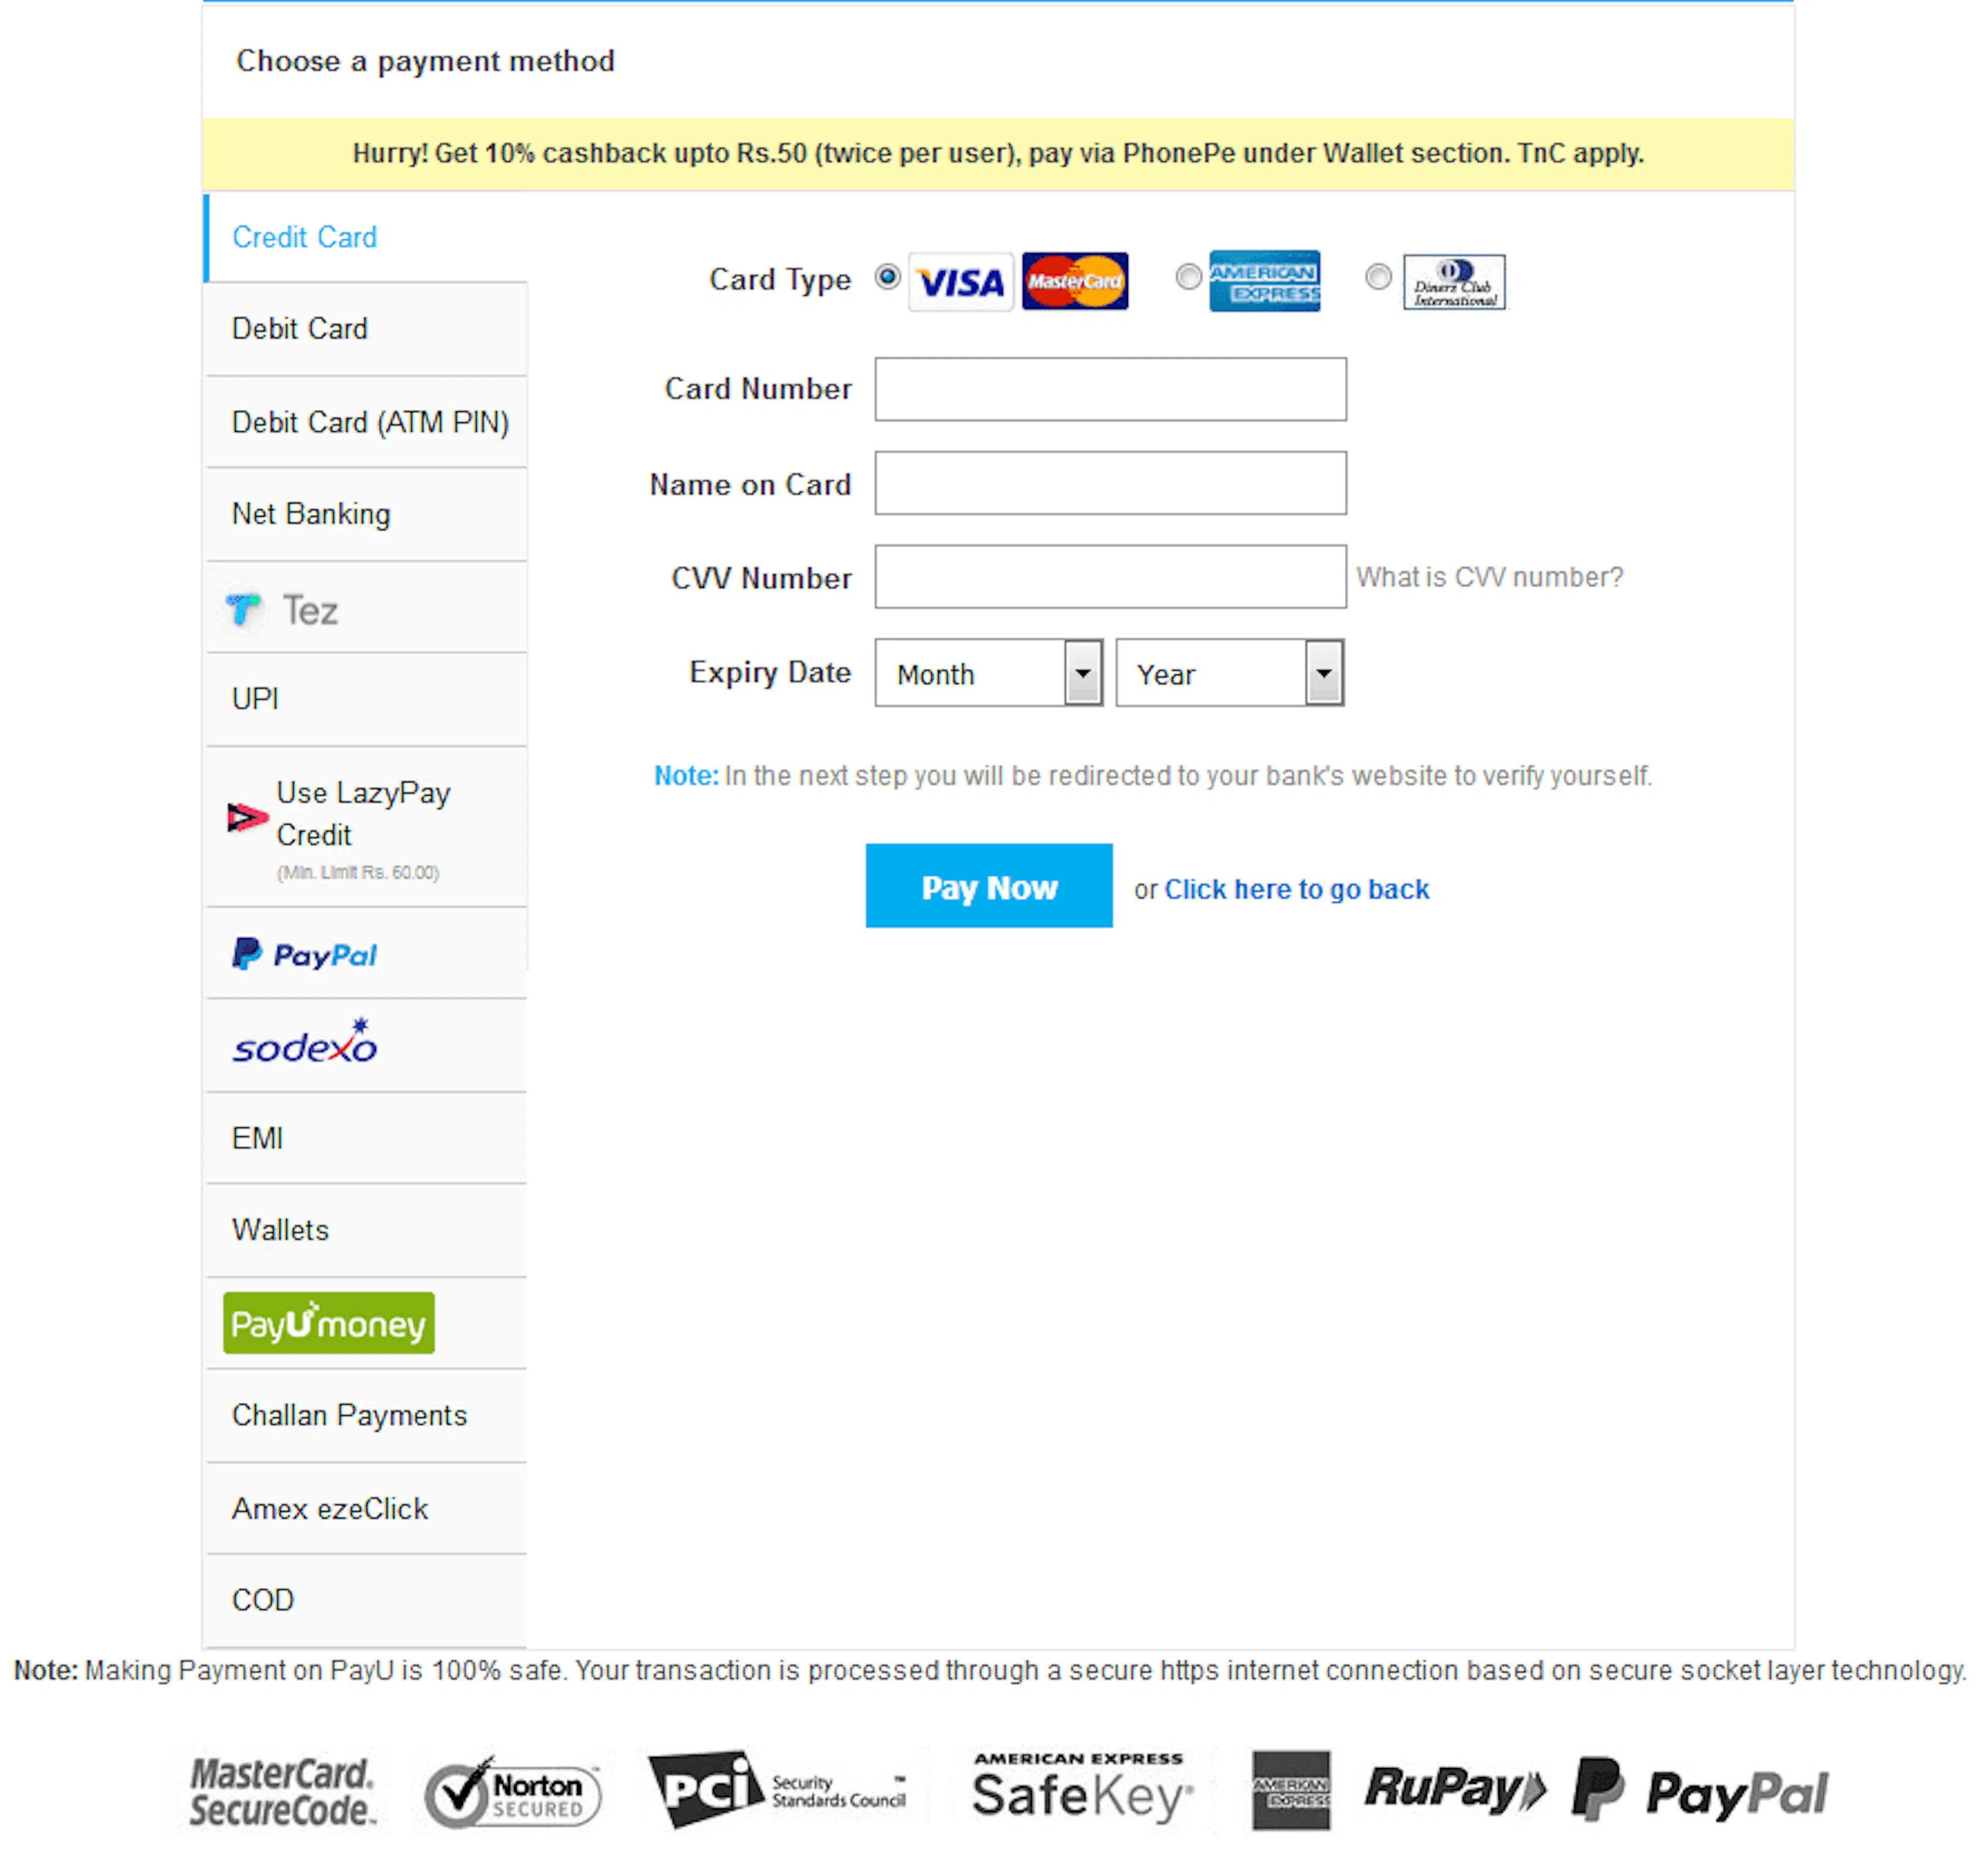
PayU Payment Gateway supports credit card, debit card, internet banking, and PayPal. Travelers can make card payments as well as direct payments through any associated bank.
If you run treks, day tours, or group departures, this gives your customers more than one way to pay at checkout. That can make it easier for them to finish a booking.
PayU Payment Gateway works with the WP Travel Engine plugin, so WP Travel Engine needs to be installed first.
If you need help installing addons, see How to Activate the Pro Add-on License Key.
Now that you know what the addon does, you can get everything ready before installation.
What you'll need before you start
A few things need to be in place before you connect PayU to your booking website.
- WP Travel Engine installed on your WordPress website
- PayU Payment Gateway purchased and installed
- An active merchant account with PayU
- Your Merchant Key
- Your Merchant Salt
Your Merchant Key is the ID PayU uses to recognize your business account.
Your Merchant Salt is a secret value PayU uses to help protect payment data when your website connects to PayU.
If you have not set up your PayU account yet, do that first. You will need the Merchant Key and Merchant Salt from PayU before the payment gateway can work on your site.
With those ready, you can install the addon in WordPress.
Installing the PayU addon
You will need the addon file from your account dashboard before you begin.
Download the extension
First, get the addon file you will upload to WordPress.
Download the PayU Payment Gateway extension from your dashboard. Save the file somewhere you can find it again, like your Downloads folder.
Upload the plugin folder
This step adds the addon to your WordPress site.
Upload the folder to /wp-content/plugins/. This is the folder on your website's server where WordPress stores plugins.
Activate the plugin
Once the addon is active, PayU will appear in your payment settings.
In your WordPress dashboard, open Plugins from the left sidebar. Find WP Travel Engine – PayU Payment Gateway and activate it.
After activation, the addon is installed and ready to connect.
Connecting PayU to your website
This is the part that links your website to PayU. Once you add your account details, your website can send travelers to PayU for real payments.
Open Payment settings
Start in the payment area of WP Travel Engine.
In your WordPress dashboard, go to Trips > Settings > Payments. You will find Trips on the left sidebar.
Select PayU
Now you will open the PayU settings for this gateway.
Look for PayU in the payment options. Click PayU to open its settings.
Enter your merchant credentials
This tells PayU that the payments belong to your business account.
Enter your Merchant Key and Merchant Salt in the matching fields. Save your changes when you are done.
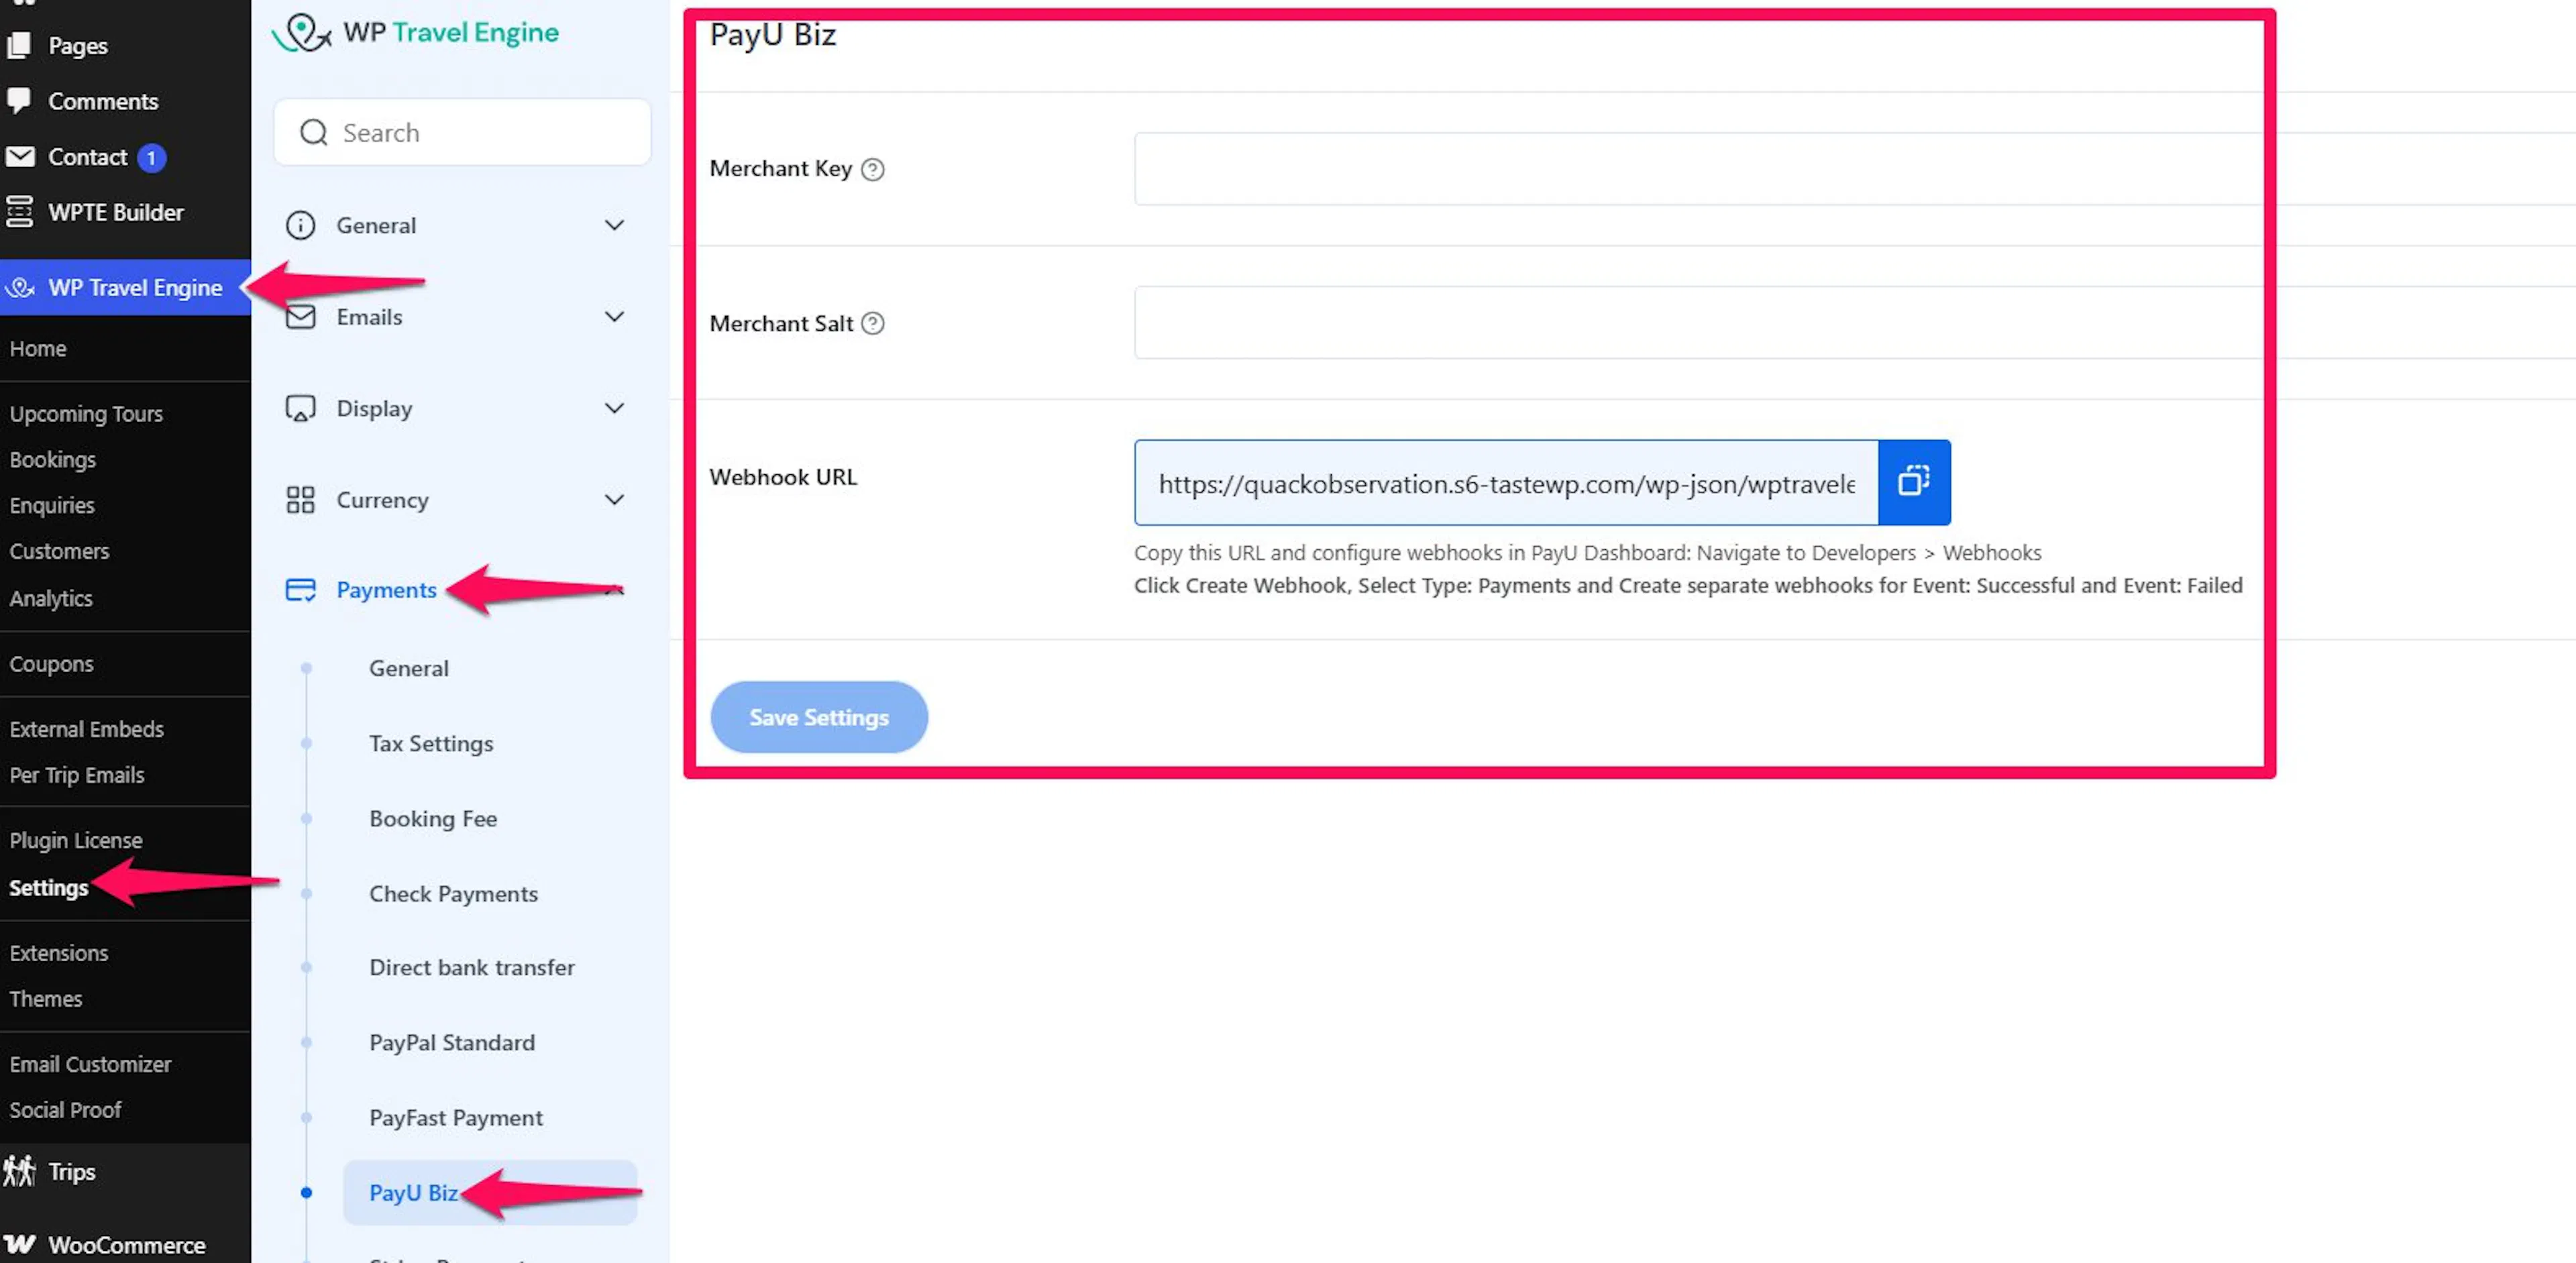
The unique account ID from PayU that connects bookings on your website to your PayU merchant account.
The secret value from PayU that helps verify and protect payment requests sent from your website.
Webhook URL
This allows PayU to send payment status updates to WP Travel Engine.
Copy the Webhook URL below and add it to your PayU Dashboard under Developers > Webhooks. Click Create Webhook, select Payments as the type, and create separate webhooks for the Successful and Failed events.
Once configured, when a traveler books a trip through the PayU Payment Gateway, they're taken to PayU to complete a secure payment. Your website handles the booking, and PayU handles the payment screen.
If you're still stuck or have a question we didn't cover, our support team is happy to help. Reach out at our support page and we'll get you sorted.