

How to Configure the User Dashboard
Set up the User Dashboard so customers can manage bookings, sign in smoothly, and see the right account options on your travel site.
Understand what the User Dashboard does
The User Dashboard is the private account area on your website. Your customers can go there to see their bookings, update their details, and pay any remaining balance for a trip.
If you run tours, this page helps your customers take care of common tasks on their own. For example, someone booked on a 5-day Nepal trek can log in later, check their departure date, confirm what they paid, and pay the rest if there is still a balance due.
You also choose how customer accounts work. You can decide whether accounts are created automatically after booking, whether people must sign in before checkout, and what text appears on the login and password pages.
If you are new to WordPress or plugin settings, that is completely fine. You only need to change a few options here, and we will walk through them one at a time.
Access the User Dashboard settings
Before you start, make sure WP Travel Engine is installed and active on your WordPress site.
Log in to WordPress
This gets you into the main area where you manage your website.
Sign in to your WordPress Admin Dashboard. This is the back end of your site where you change pages, settings, and plugin options.
If you have never used WordPress much before, do not worry. You only need the main dashboard and the menu on the left side for this setup.
Open the User Dashboard settings
This is where you control how customers create accounts and sign in.
In the left sidebar of your WordPress dashboard, go to WP Travel Engine > Settings > Dashboard > User Dashboard. When you see WP Travel Engine > Settings, it means you should look in the menu on the left side of the screen and click through those items in that order.
You are now in the section that controls login, registration, and customer account access.
Review your options
This helps you see what you can turn on, turn off, or rename before you make changes.
Look through the settings on this screen. You will see options for account creation, booking requirements, registration, and the labels customers see on login and password pages.
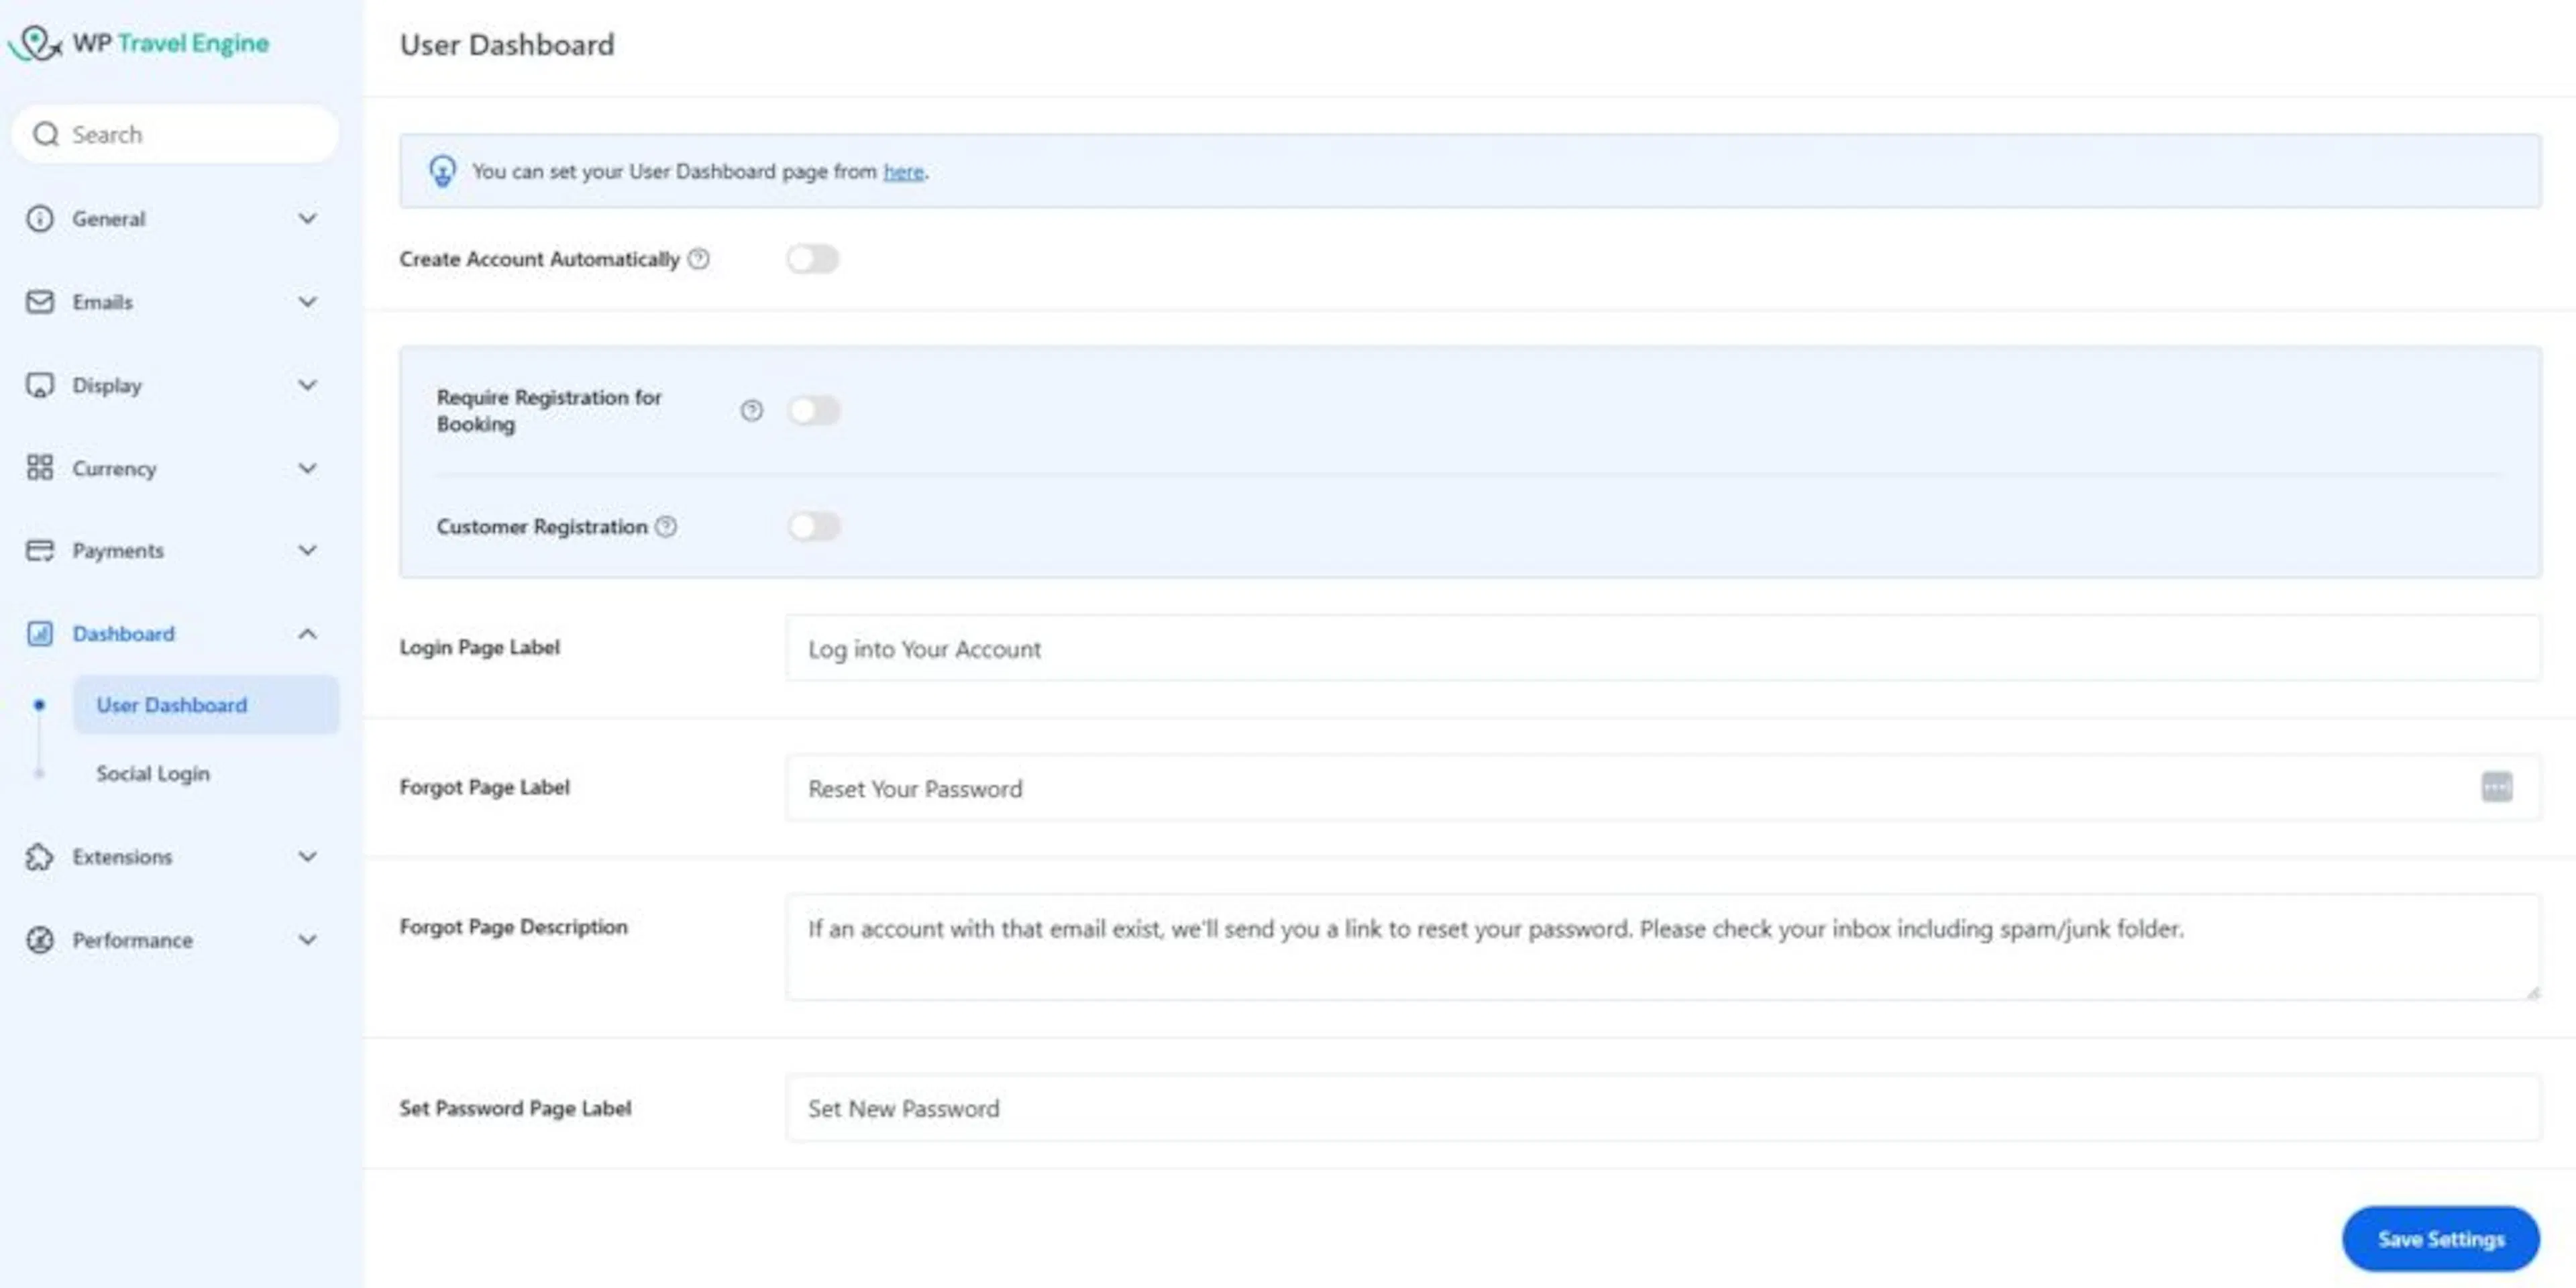
Once this screen looks familiar, you are ready to decide how you want the customer experience to work.
Configure User Dashboard settings
These settings shape what happens when someone books a trip and comes back later to manage it. A few small choices here can make booking smoother for both you and your customers.
Create Account Automatically
Use this setting if you want the website to make a customer account as soon as someone books a trip.

When this is turned on, WP Travel Engine creates a username and password after booking and sends those details by email to the customer. This is helpful if you want every traveler to have an account without asking them to sign up first.
For example, if someone books a 7-day Bhutan package and pays a deposit, they can receive their login details right away and return later to pay the balance.
If you turn this off, the website will not create an account at the time of booking. That works better if you want customers to register on their own later.
Require Registration for Booking
Use this setting if you want to decide whether customers must sign in before they can book.
When this is turned on, people must log in or create an account before they can reach checkout. This gives you a more account-based booking process from the start.
When this is turned off, people can book first and create an account later, or not create one at all if that fits your setup.
For example, say you run a 3-day trek and want to let people book quickly during peak season without forcing them to create an account first. In that case, keep Require Registration for Booking turned off.
Customer Registration
Use this setting if you want customers to be able to create their own account from the My Account page.
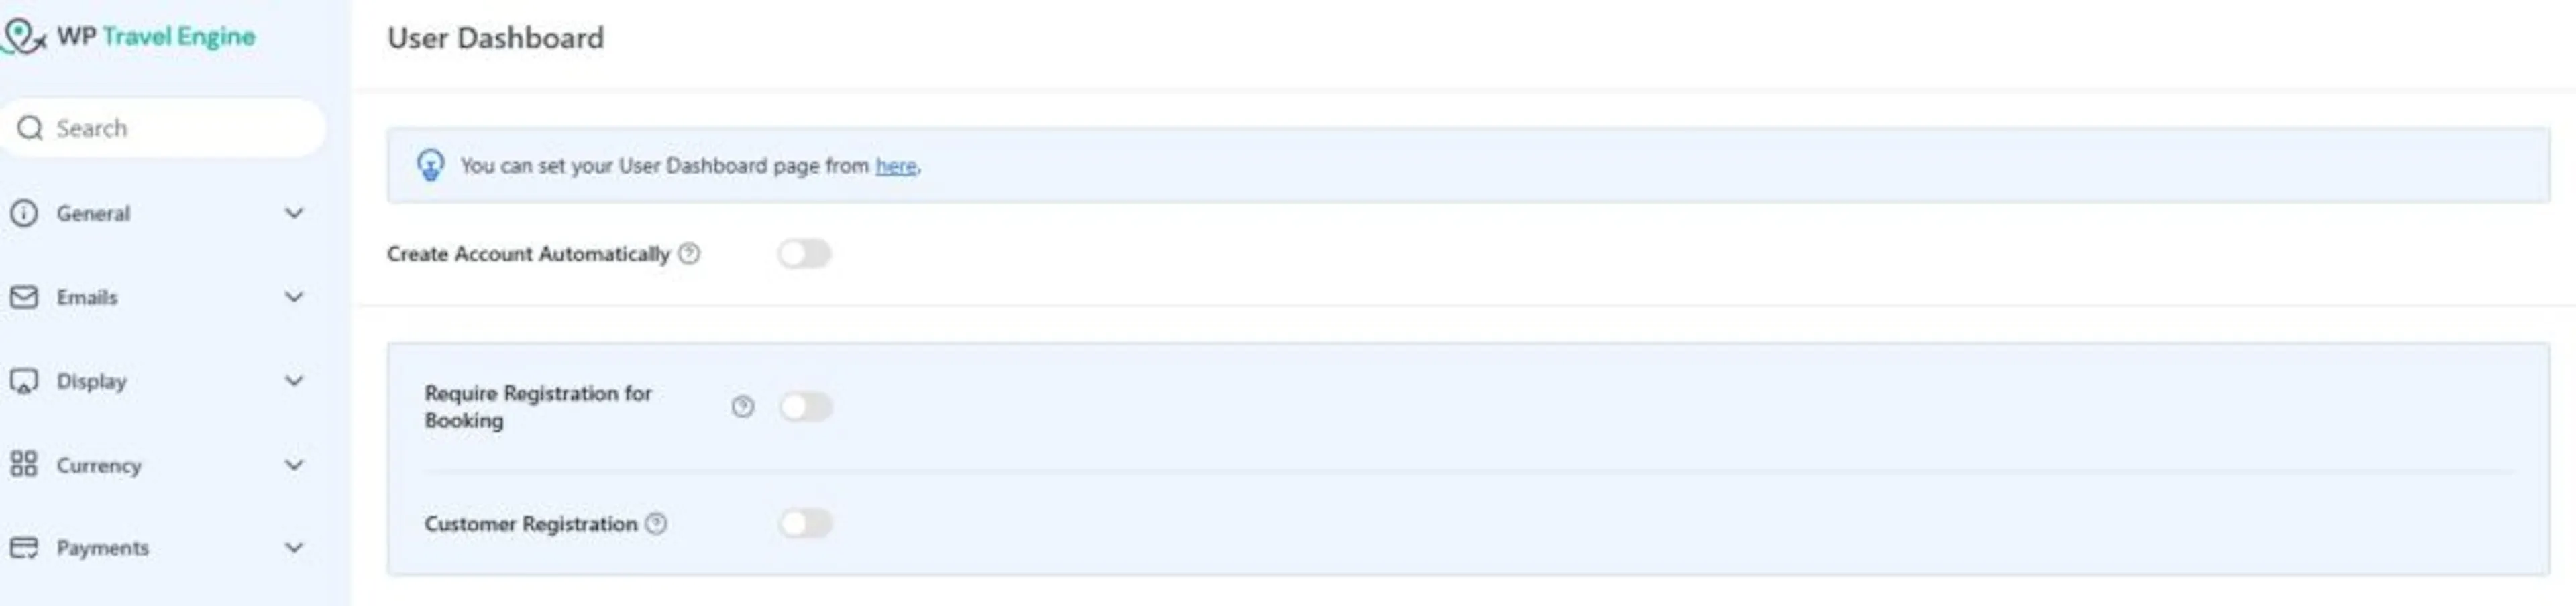
When it is turned on, visitors will see the option to register for an account. When it is turned off, new customers cannot sign up there.
This can be useful if you want to give returning travelers a way to manage future trips on their own. For example, a guest who joined one of your day tours last month could create an account before booking a multi-day package this season.
Login Page Label
Use this setting to change the heading text at the top of the login page.
This is helpful if you want the page to match your tone or brand. For example, you might use wording like "Sign in to manage your trip" instead of a more general login title.
Forgot Page Label
Use this setting to change the heading on the forgot password page.
Customers see this page when they cannot remember their password. A clear label helps them know they are in the right place.
Forgot Page Description
Use this setting to add a short message on the forgot password page.
This is a good place to reassure customers and tell them what to do next. For example, you could write, "Enter the email you used for your Annapurna Base Camp booking and we will send a password reset link."
Set Password Page Label
Use this setting to change the heading customers see when they are setting a new password.
This can make the password reset process feel clearer and more professional. It is a small change, but it helps customers feel more confident while signing back in.
If you'd rather have customers sign up for themselves, keep Create Account Automatically turned off. That way, account creation stays manual and easier to control.
Once these settings match how you want bookings to work, the customer side of the dashboard will make a lot more sense. The next section shows what your travelers will actually see.
What customers see in the User Dashboard
After setup, your customers get their own account page on your website. They can go there to check bookings, update personal details, and pay for trips that still have a balance due.
This helps cut down on back-and-forth messages. A traveler can look up their own booking details instead of contacting you for every small update.
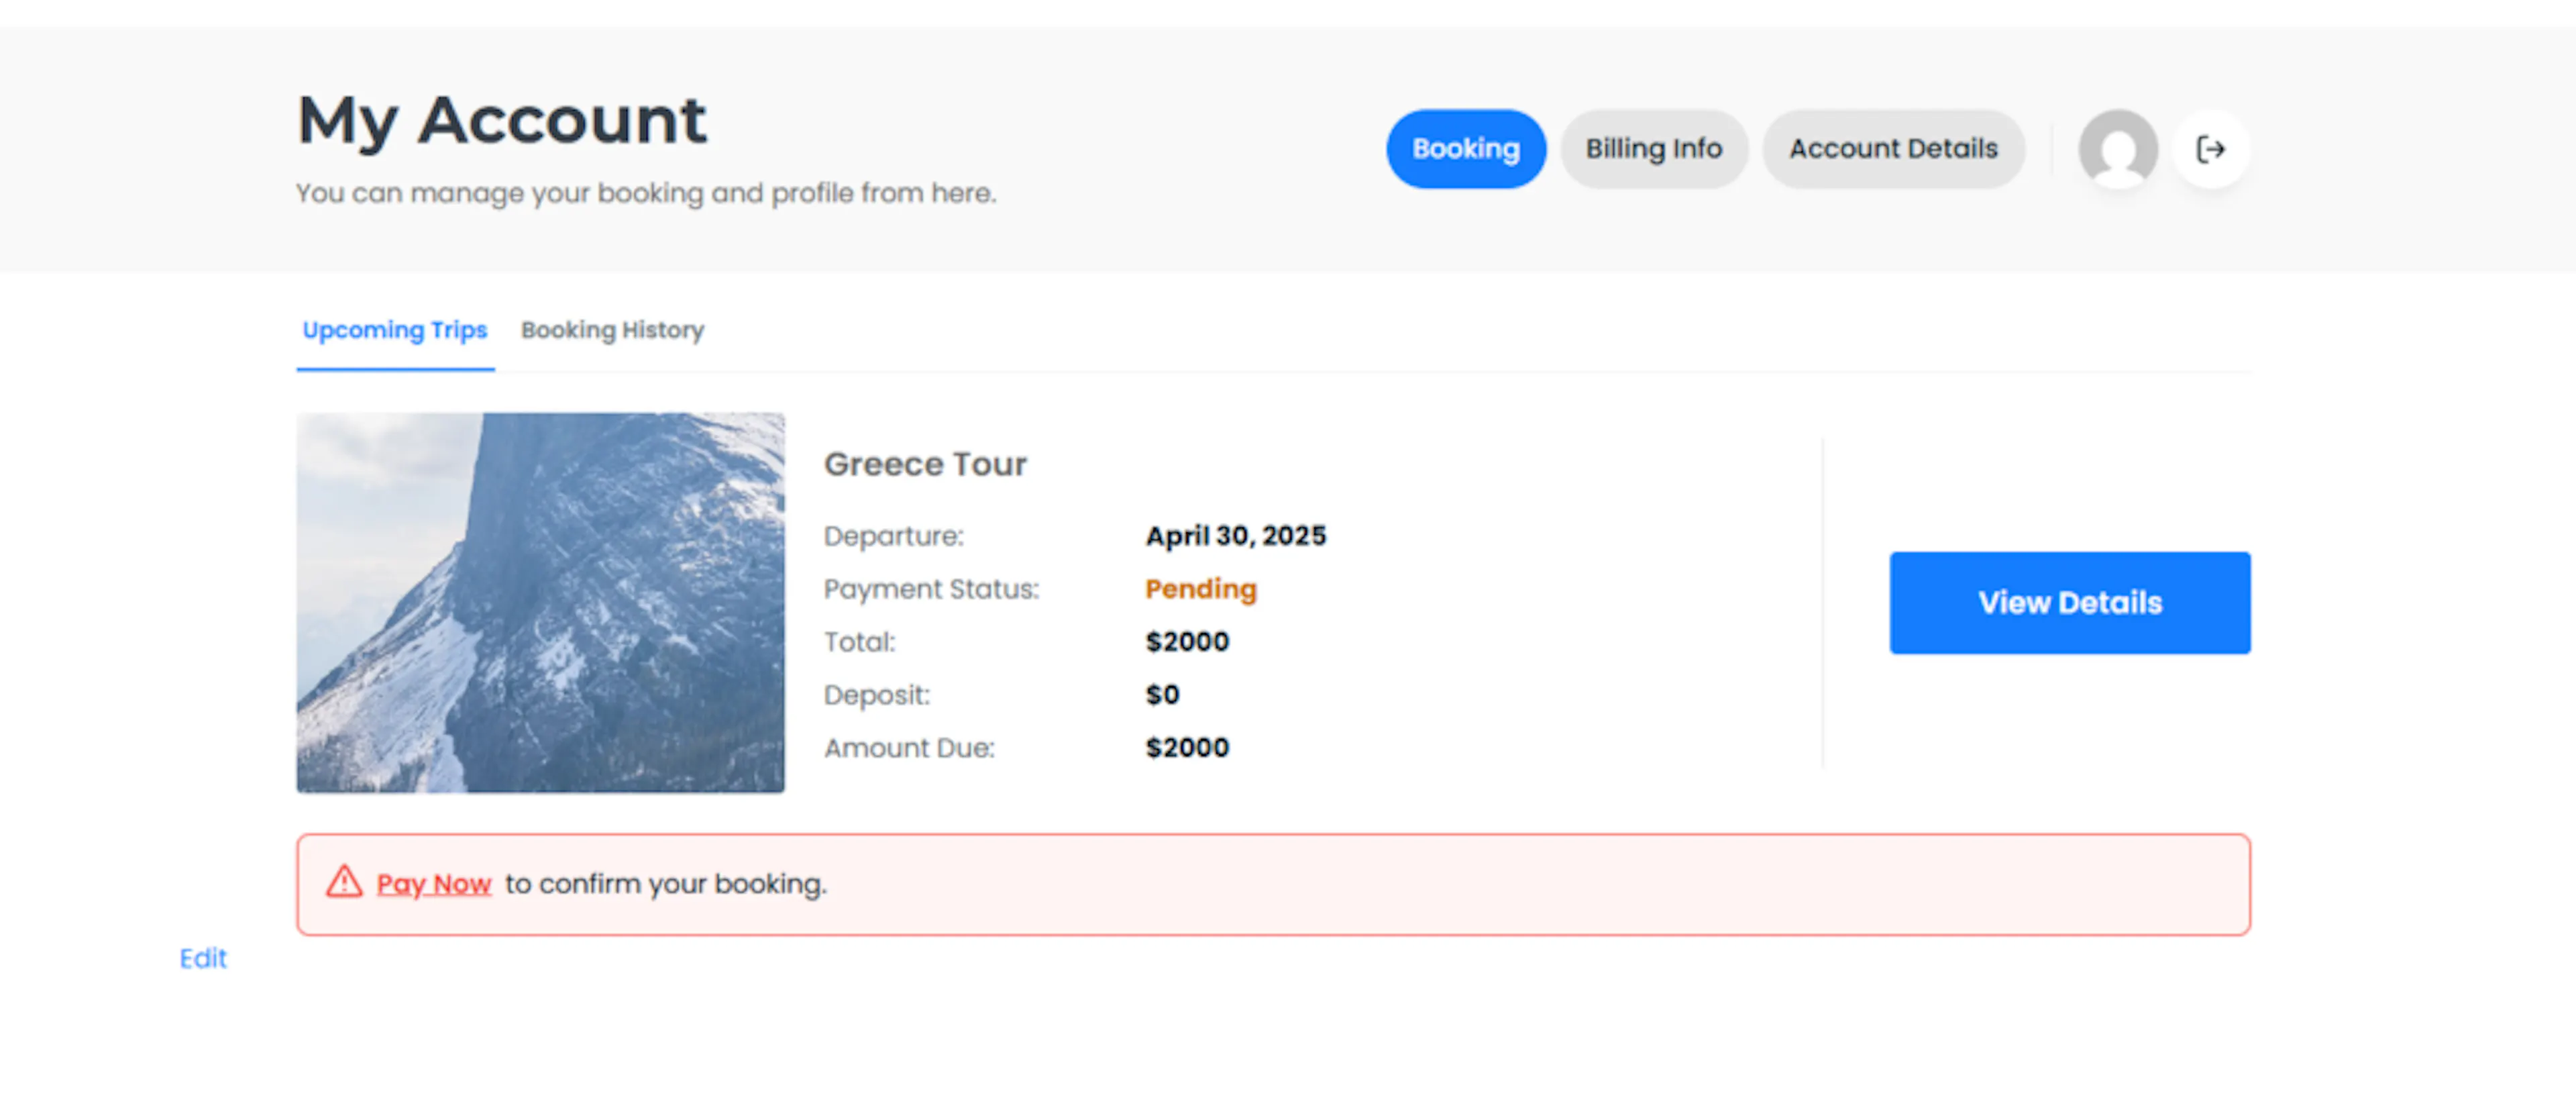
Here's what it looks like:
Navigation tabs
At the top of the dashboard, customers will see tabs that help them move around their account.
- Booking - This is where they can see their current and past bookings. For example, a guest who booked a canyon day tour and a 4-day safari can keep both bookings in one place.
- Billing Info - This is where they can check or update billing details.
- Account Details - This is where they can change personal details such as their name, email address, or other profile information.
These tabs help customers find what they need without having to contact you first.
Upcoming trips
This section shows active or future trips that the customer has booked.
Each trip card gives them the key details at a glance:
- Trip Name - the name of the tour, such as Greece Tour or Everest View Trek.
- Departure Date - the date the trip starts.
- Payment Status - whether the trip is fully paid or still pending.
- Total Cost - the full booking amount.
- Deposit - the amount already paid.
- Amount Due - the remaining balance, if there is one.
For example, if a family books a private cultural tour with gear rental add-ons, they can log in and quickly see what they already paid and what is still due.
Trip management
Each trip also includes actions the customer can use to manage that booking.
- View Details - Opens the full booking information and trip details.
- Edit - Lets the customer change booking details, if editing is available on your site.
- Pay Now - Appears when there is still money left to pay.
That Pay Now option is especially useful for deposit-based bookings. For example, if someone paid part of the cost for a multi-day package, they can come back later and finish the payment from their dashboard.
Booking history
This tab shows older or completed bookings.
It gives customers a record of their past trips with you. That can be helpful for repeat travelers who book seasonal tours each year and want to look back at earlier bookings before making a new one.
Once you know what your customers will see, it is easier to choose the settings that fit your business.
If you're still stuck or have a question we didn't cover, our support team is happy to help. Reach out at our support page and we'll get you sorted.