

Configure Widgets
Add and arrange widgets in Travel Monster's Sidebar and Footer widget areas using either the Customizer or the WordPress dashboard.
Where widgets can go
A widget is a small block of content you can place in specific spots on your site. If you run a 3-day trekking company, you might want travelers to search for trips from any page on your site. A Search widget in the sidebar lets them do that.
The Travel Monster theme gives you two areas where widgets can appear:
- Sidebar - the narrow column that runs alongside your main page content
- Footer - the section at the bottom of every page on your site
You have two ways to add widgets to these areas:
- Through the Customizer, which shows a live preview as you make changes
- Through the Widgets screen in your WordPress dashboard
Both methods get you to the same result. Pick whichever feels more comfortable.
You'll need the Travel Monster theme installed and active on your WordPress site.
Using the Customizer
The Customizer is a live preview tool in WordPress. It lets you see your changes happen in real time before you save them. If you like to know exactly what something will look like before committing, start here.
Open the Widgets panel
You'll start from the main admin area of your WordPress site.
Go to Appearance > Customize > Core > Widgets. You'll see the widget areas your theme provides.
Choose a widget area
Pick the spot where you want your widget to show up.
Select the location where you want to add a widget - your sidebar or one of the footer columns.
Add a widget
Now you'll pick the actual content block you want to place there.
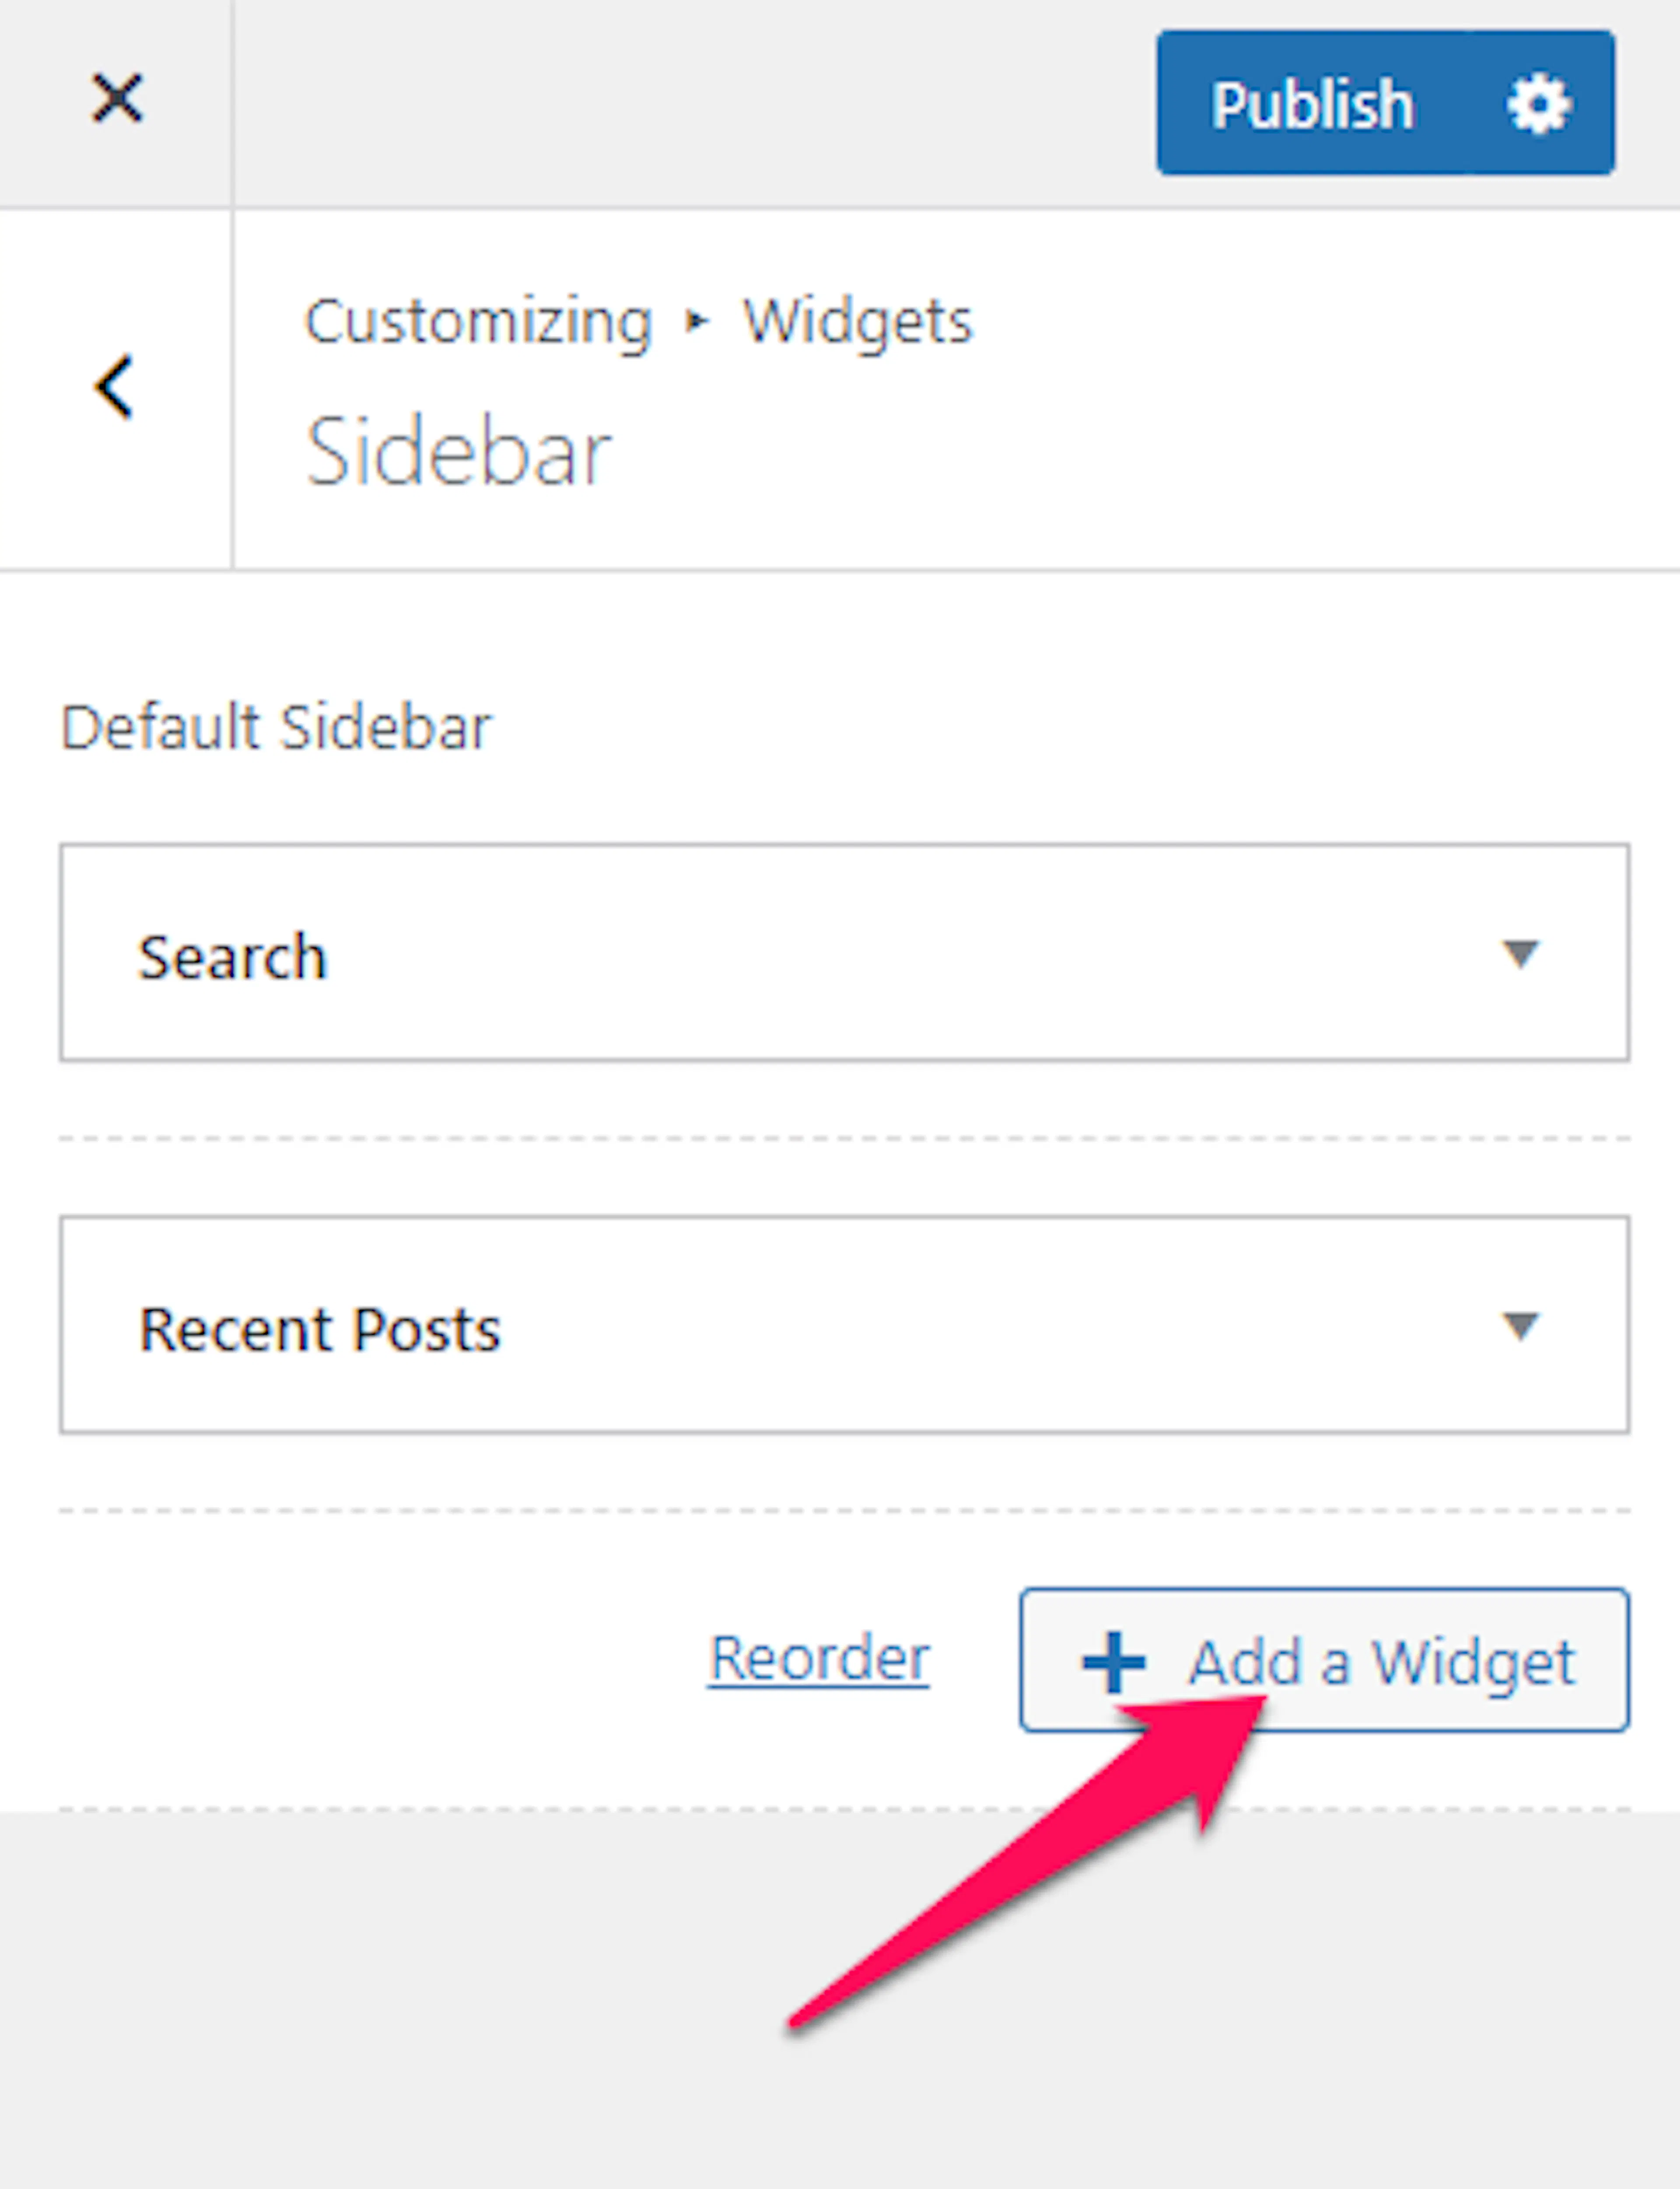
Click Add a Widget and select the widget you want to use. A list will pop up with all the available widgets.
Arrange and publish
You can change the order of your widgets anytime by dragging them around.
Drag and drop the added widgets to set their order, then click Publish to make your changes live.
If you run a multi-day trekking company, you might put a Search widget at the top of your sidebar so travelers can quickly find tours. Add a Recent Posts widget below it to show off your latest travel blog updates.
Don't worry if the first arrangement isn't perfect. You can always come back and adjust things later.
Using the Widgets screen
If you prefer working from a full screen instead of a preview panel, the Widgets screen gives you more room to see everything at once.
Open the Widgets screen
You'll head to a dedicated page in your dashboard for managing widgets.
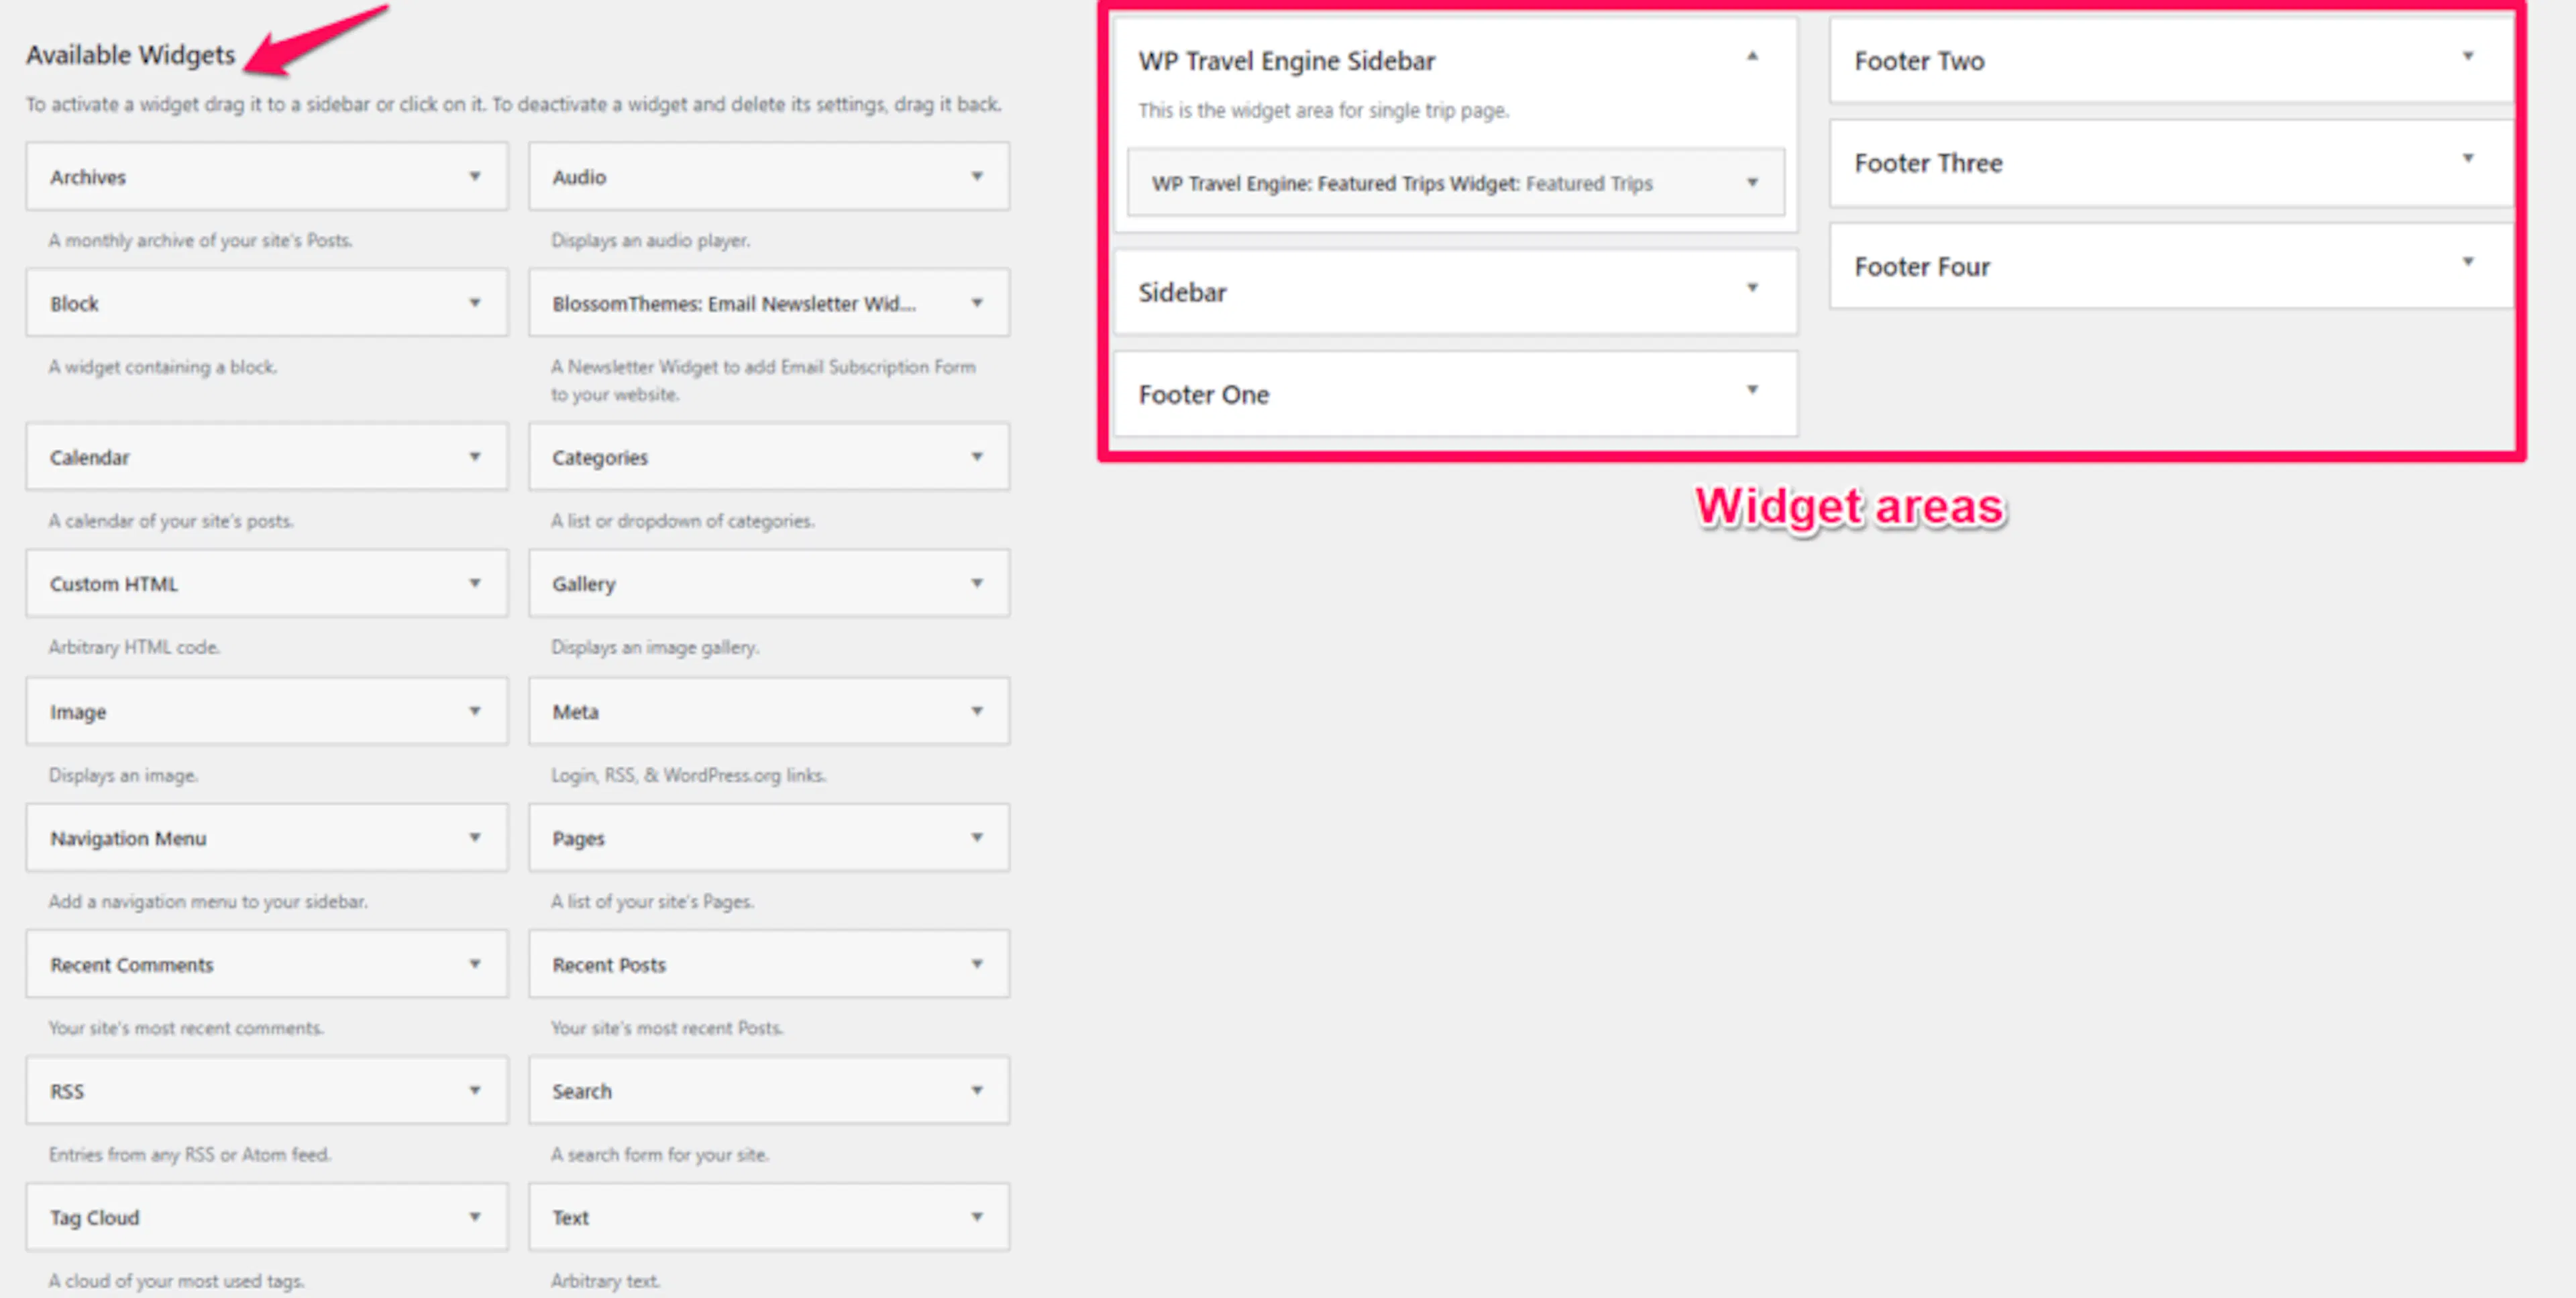
Go to Appearance > Widgets in your dashboard. Available widgets are listed on the left, and the widget areas provided by the theme are listed on the right.
Add a widget to an area
This is where you place a widget into the spot where you want it to appear.
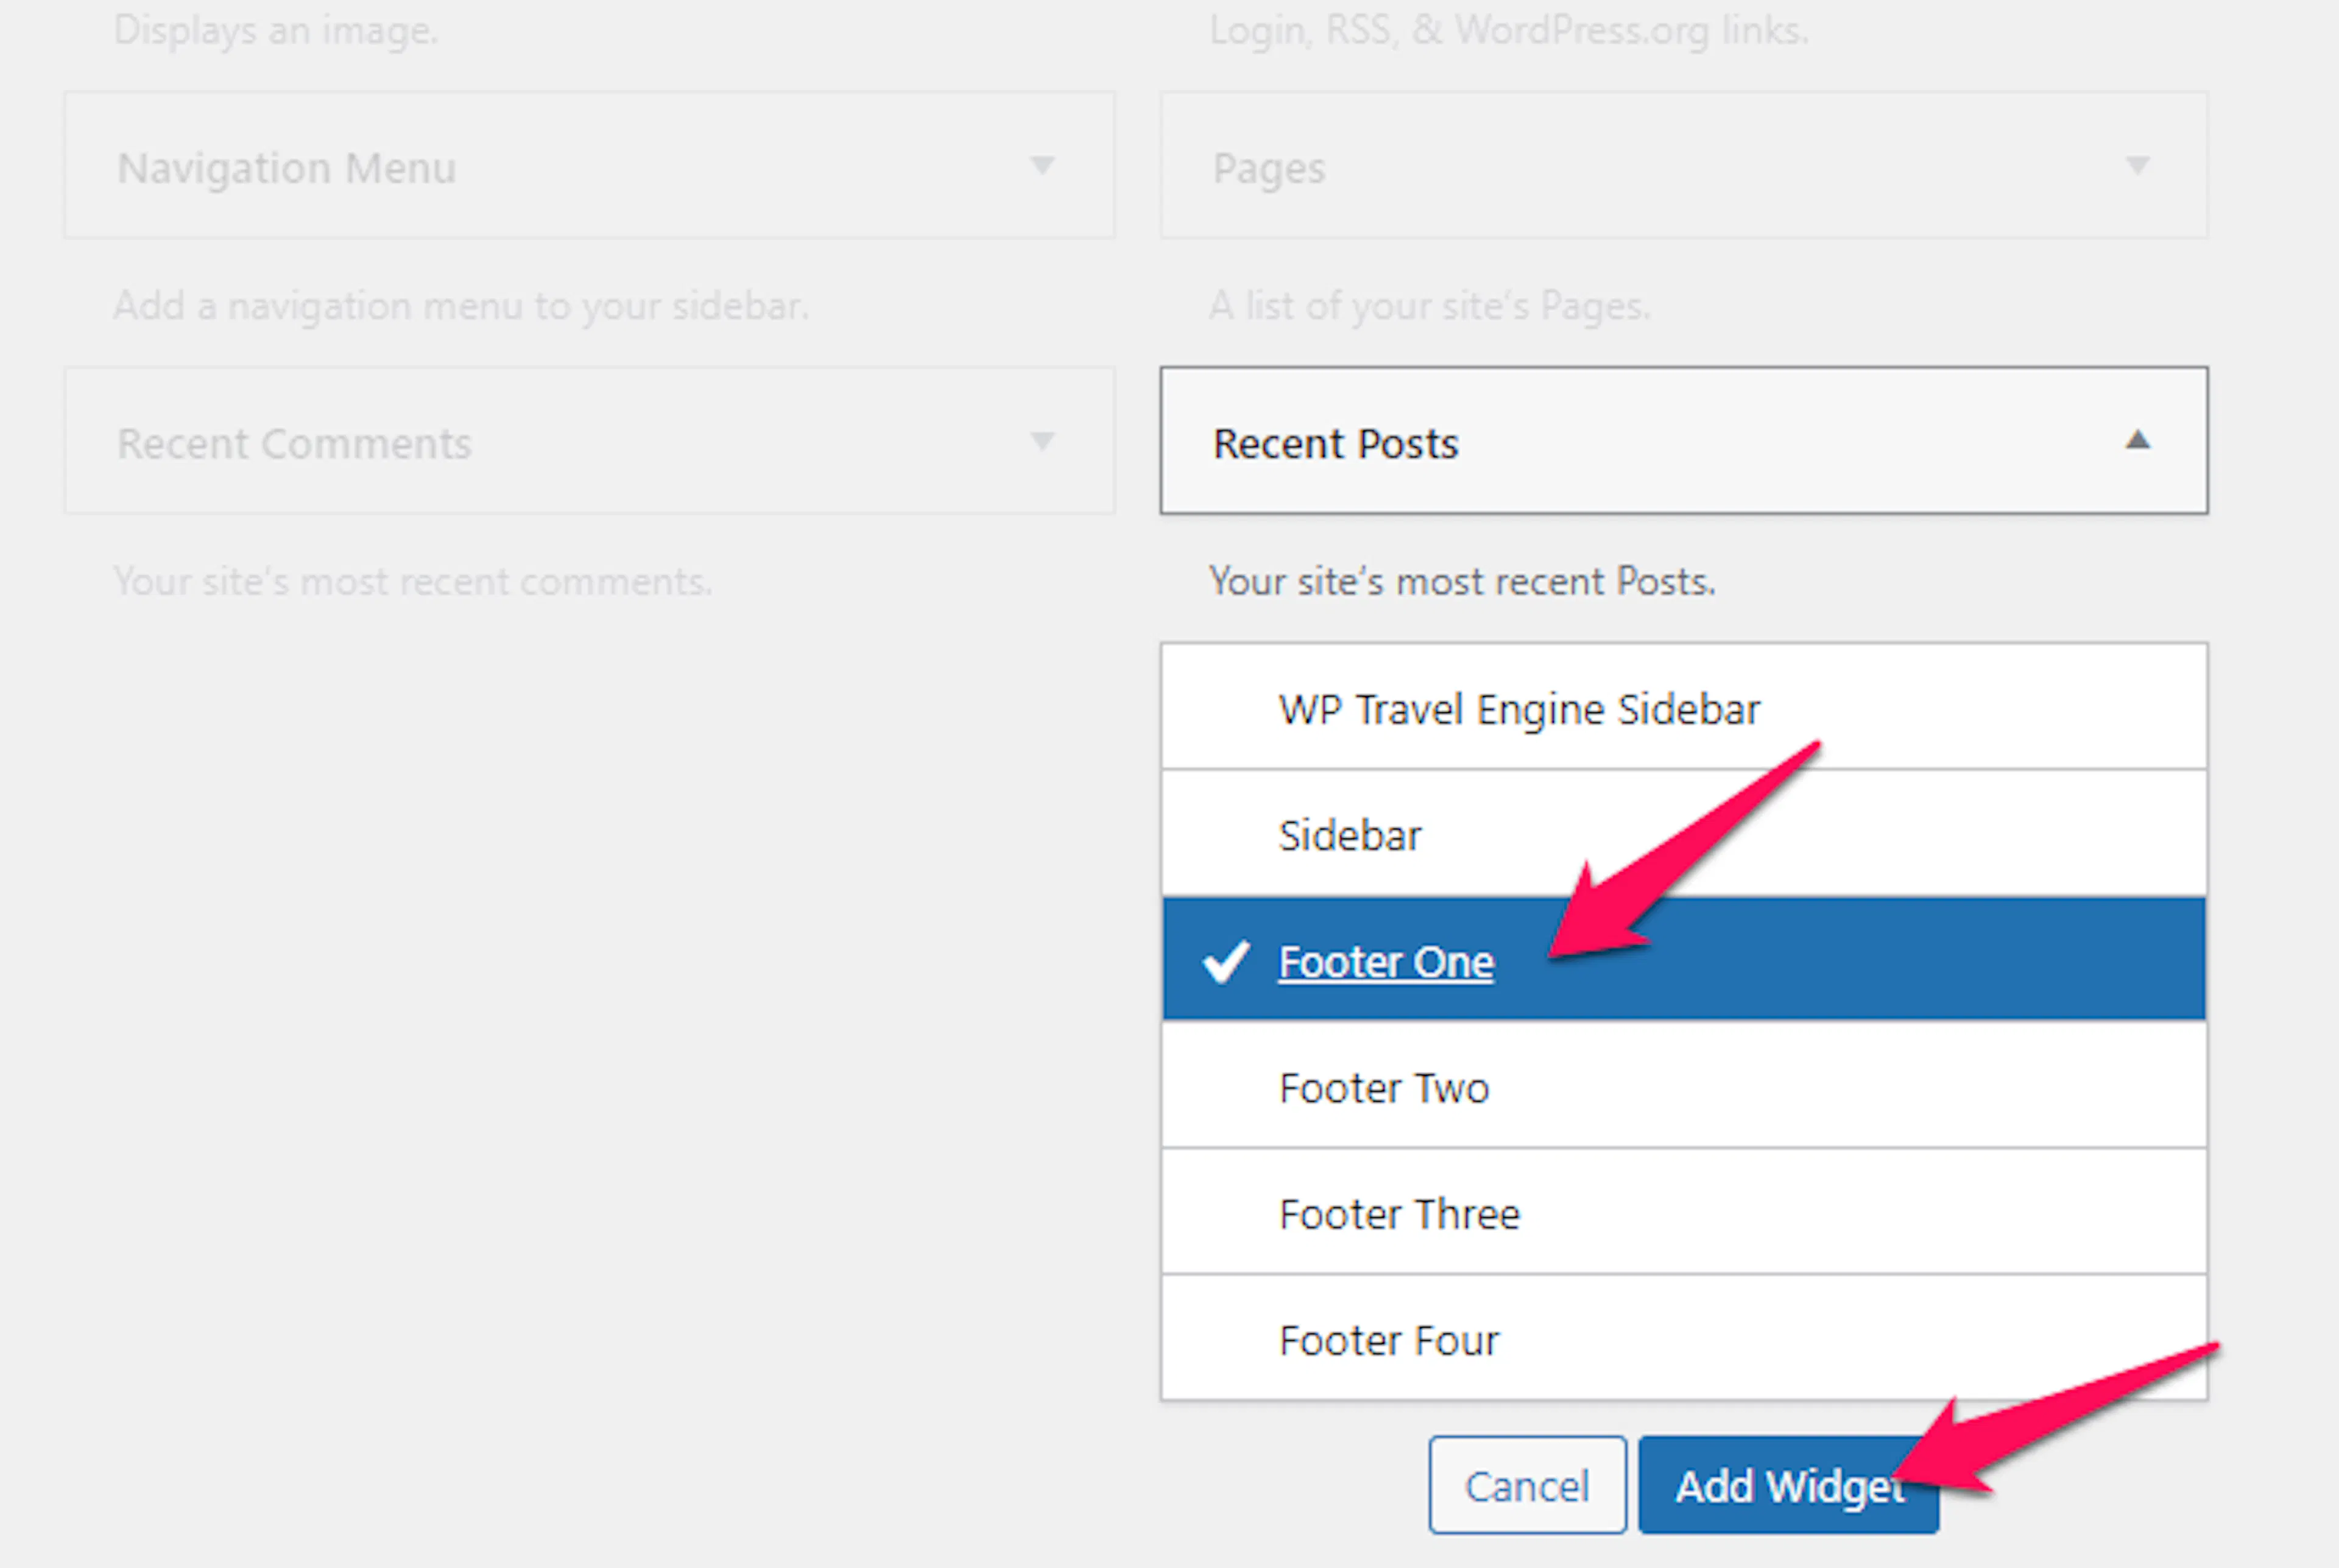
Drag and drop a widget into the widget area you want, or click a widget and select the location to add it to.
Save the widget
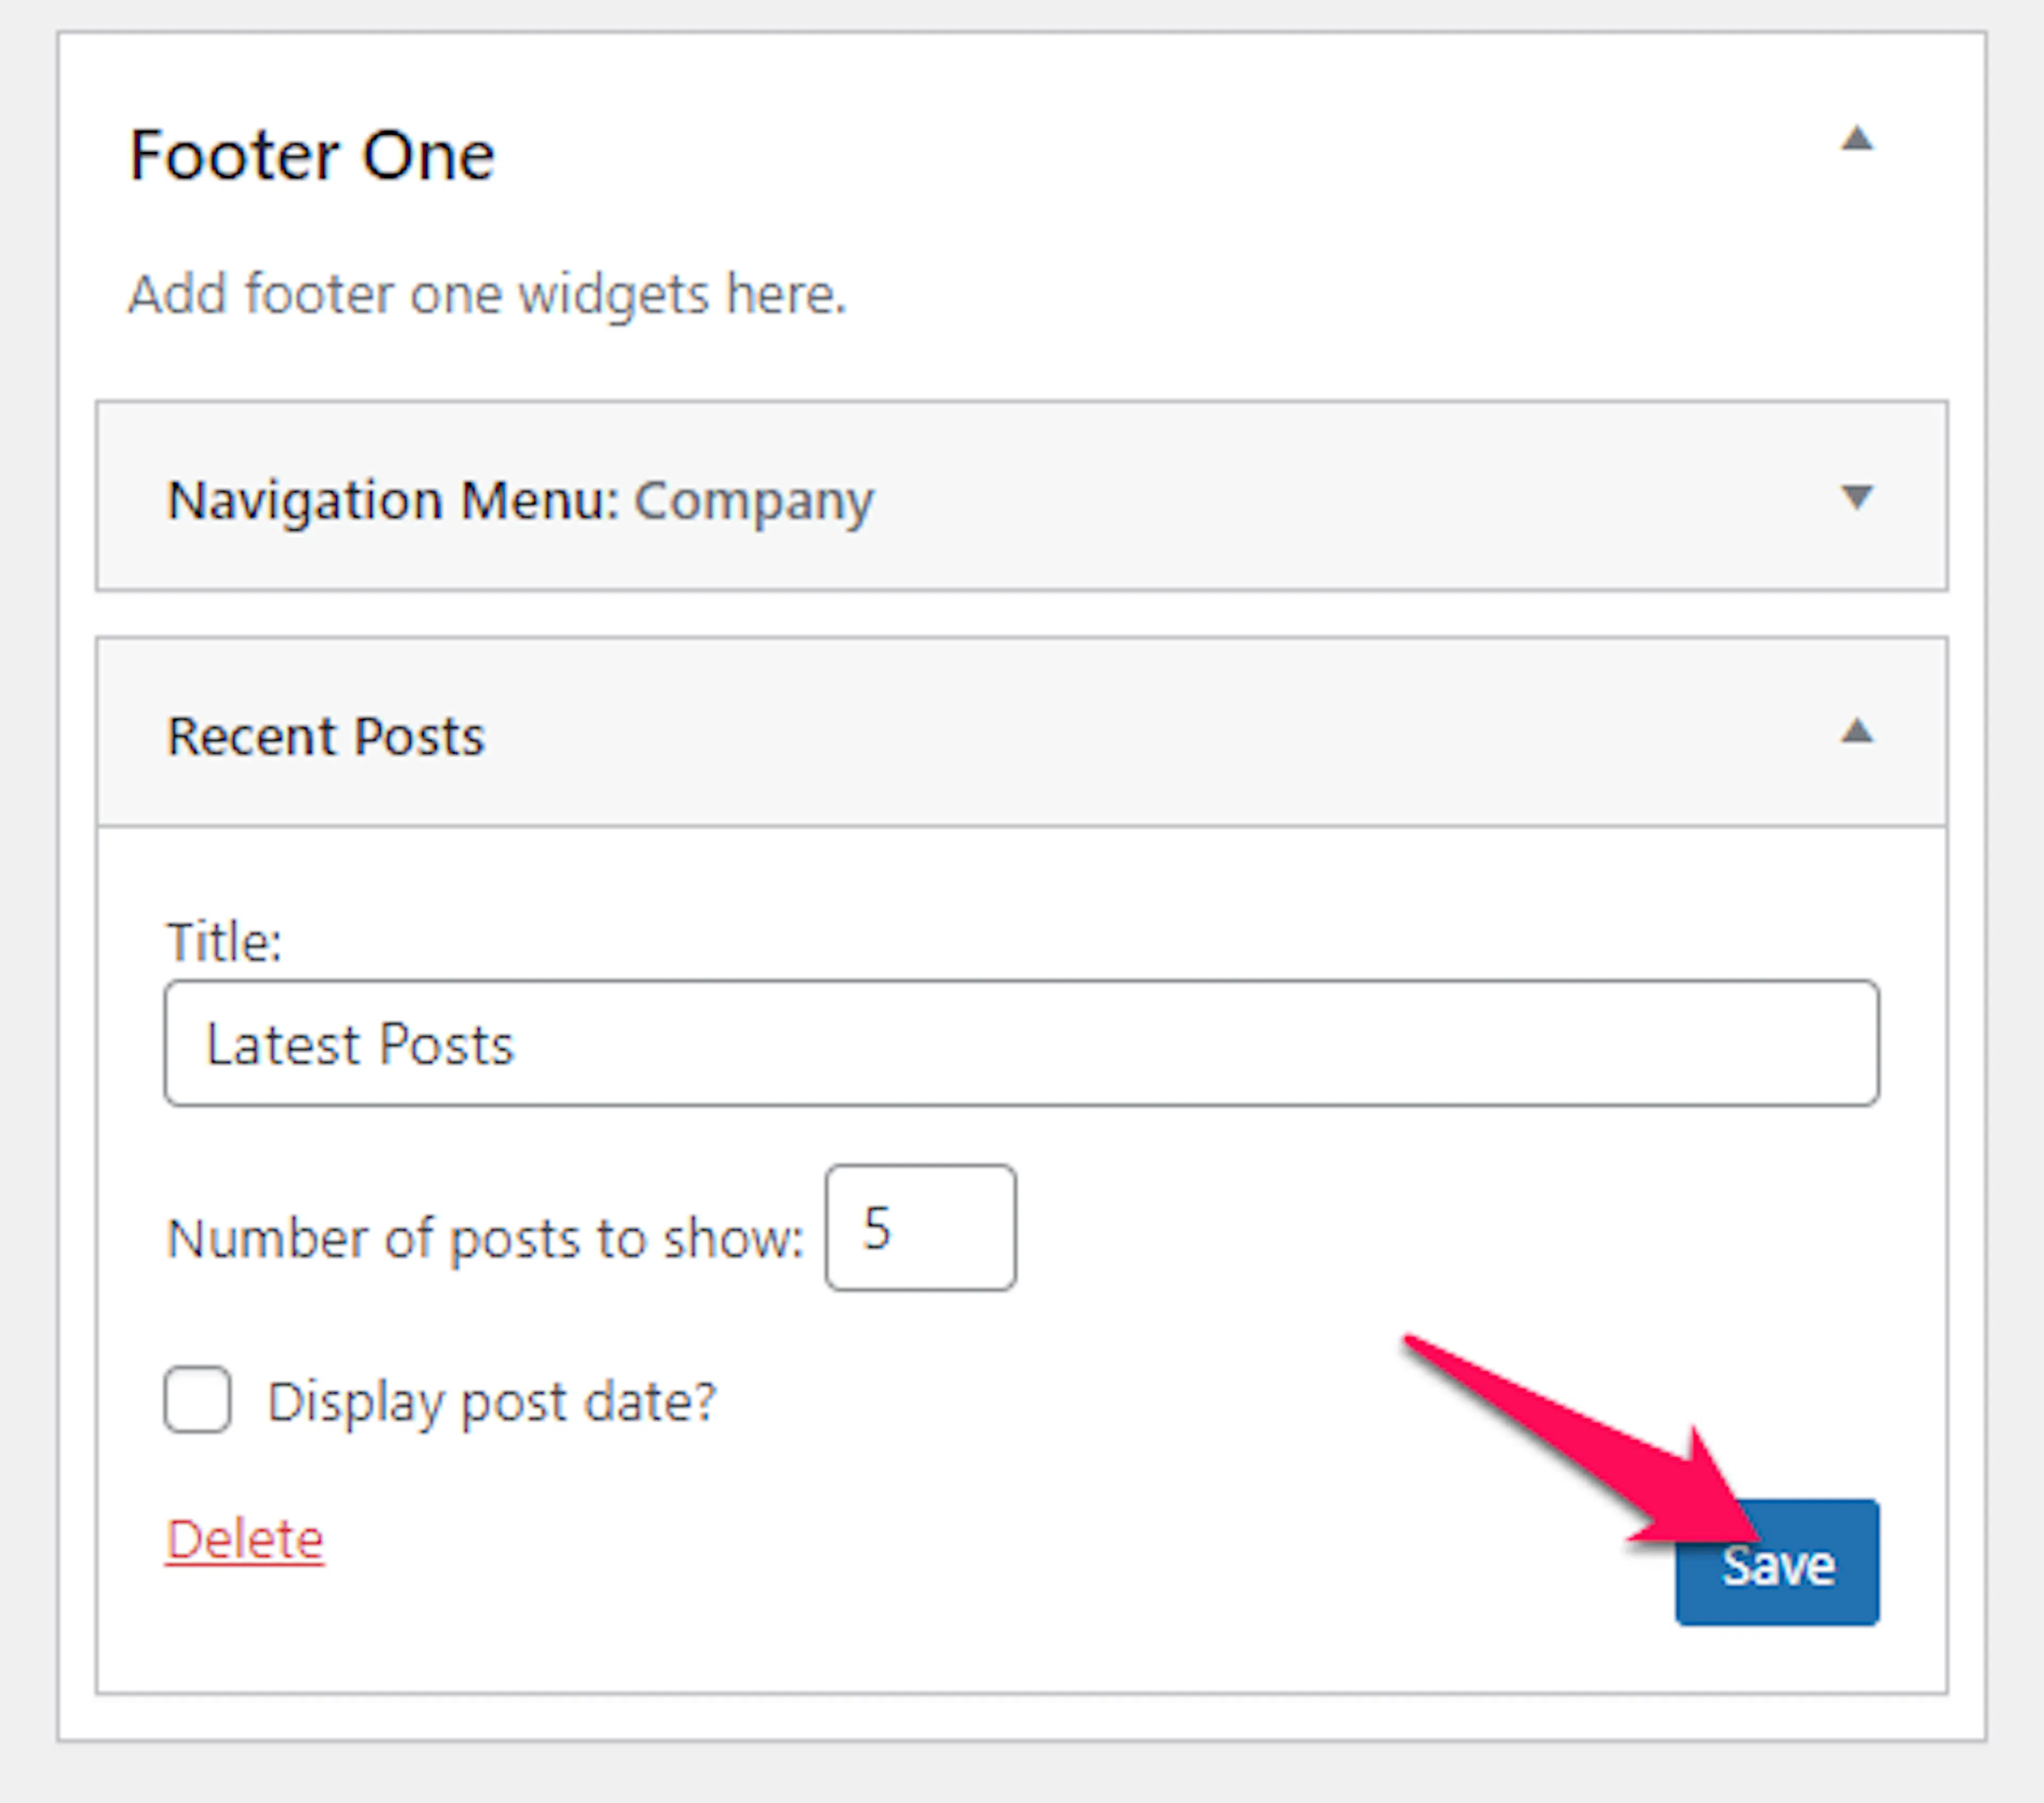
Each widget has its own settings, like a title or number of items to show. Fill those in before saving.
Configure the widget's settings, then click Save.
That's your widgets set up. You can always come back and rearrange things whenever you need to.
If you're still stuck or have a question we didn't cover, our support team is happy to help. Reach out at our support page and we'll get you sorted.
Next step
Setup Static Homepage
Set a custom page as your site's homepage instead of the default blog feed.