

PayHere Payment Gateway
Set up PayHere in WP Travel Engine so travelers can book on your site and pay securely in Sri Lankan or other supported currencies.
Overview
PayHere Payment Gateway is a popular merchant service in Sri Lanka for accepting trip and tour payments.
When you connect it to WP Travel Engine, travelers can choose PayHere during checkout. They then complete the payment on PayHere's secure payment page.
This works well if you sell tours to local travelers. It also works well if you welcome international guests who want to pay in a supported currency.
For example, you might sell a 5-day Sri Lanka cultural tour on your website. A traveler can book the tour on your site and then pay through PayHere in LKR or USD. That keeps the booking process clear for you and secure for your customer.
PayHere Payment Gateway requires WP Travel Engine v3.0.5 or later.
If your site is already running that version, you are ready to set things up. The next section shows what to have with you before you begin.
What you'll need before you start
A few details need to be ready before you switch PayHere on. If you gather them first, the setup goes much more smoothly.
- An active merchant account with PayHere.
- Your Merchant ID from PayHere.
- Your Merchant Secret from PayHere.
- A WordPress site with WP Travel Engine installed and active. A plugin is a small add-on that gives your WordPress site extra features.
Payments can come from any country. Your site currency only needs to match one of PayHere's supported currencies.
- LKR - Sri Lanka Rupee
- USD - United States Dollar
- EUR - Euro
- GBP - Pound Sterling
- AUD - Australian Dollar
For example, you might accept bookings for the same private safari from a family in Colombo and a couple in Melbourne. PayHere can handle both cases as long as your site uses one of the supported currencies.
Once you have these details in front of you, you are ready to install the addon.
Install the PayHere addon
What you'll need before this step - access to your WordPress dashboard and the PayHere addon file from your account.
Your WordPress dashboard is the main control area for your website. After this part, the PayHere addon will be active on your site and ready to connect.
Download the extension
This gives you the addon file you need for your website.
Download the extension from your dashboard.
Upload the plugin folder
This puts the addon in the place where WordPress stores plugins.
Upload the folder to your /wp-content/plugins/ directory. This folder is where WordPress keeps its plugins.
Activate the plugin
This tells WordPress to start using the addon.
In your WordPress dashboard, look at the left sidebar and click Plugins.
Find WP Travel Engine – PayHere Payment Gateway and activate it.
Once the addon is active, the hard part is done. Next, you will connect it to your PayHere account.
Configure the gateway
What you'll need before this step - your PayHere Merchant ID and Merchant Secret.
This part connects your website to your PayHere account. Once you save these settings, PayHere can appear as a payment option when someone books a trip.
Open Payment settings
This is where WP Travel Engine keeps your payment methods.
Log in to your WordPress dashboard.
On the left sidebar, click WP Travel Engine. Then click Settings. Then open Payments.
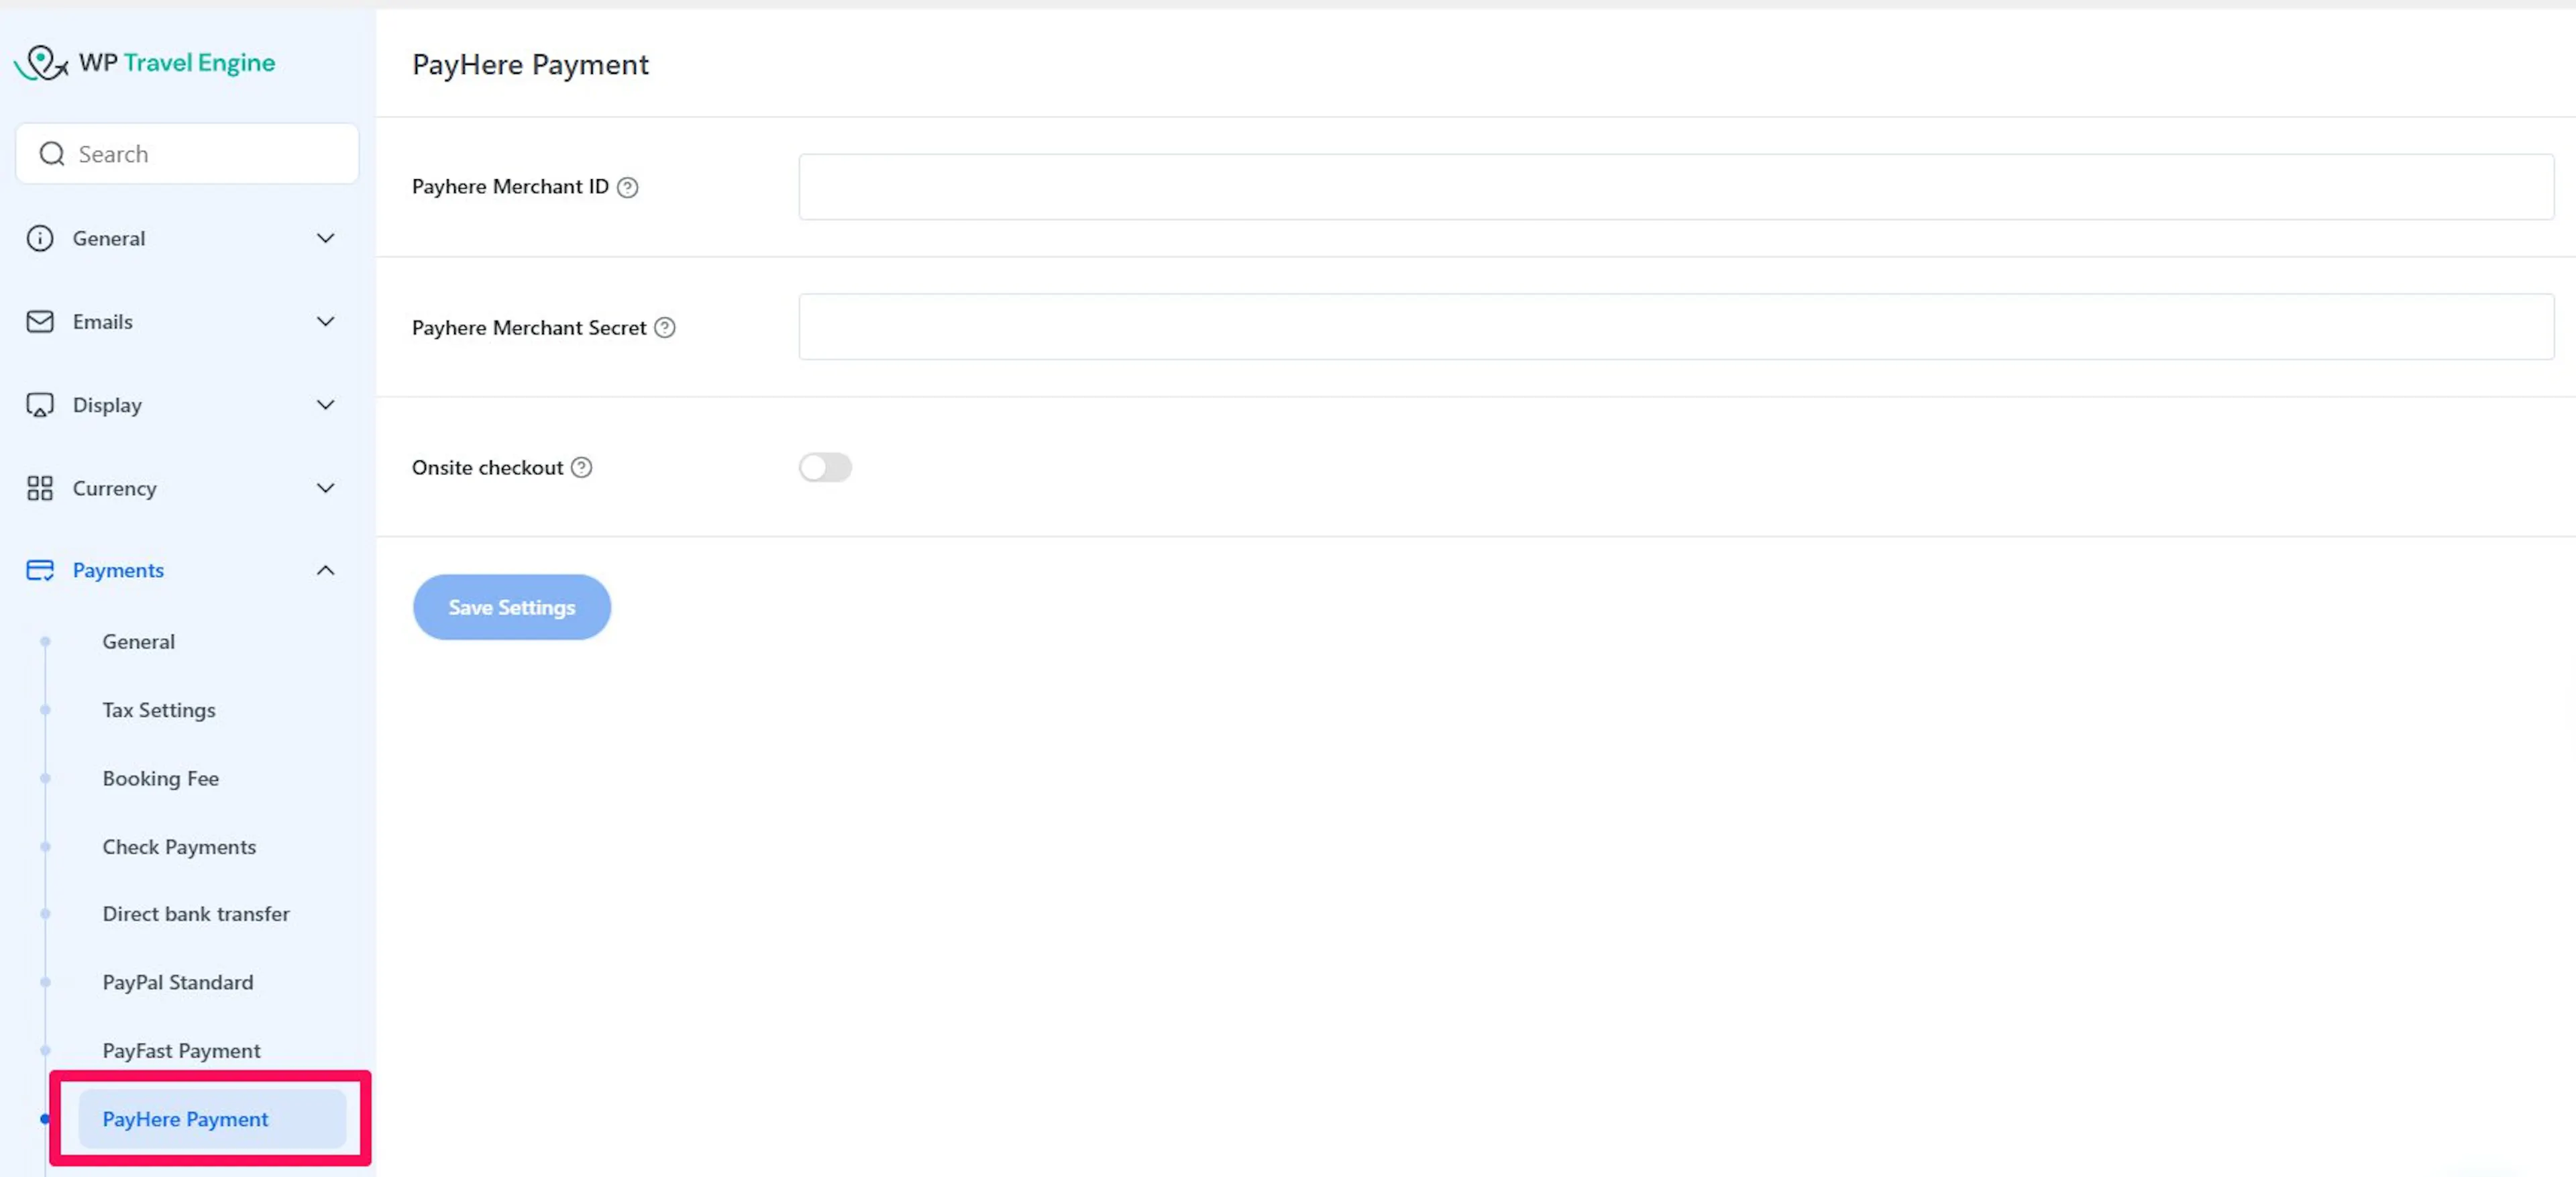
Select PayHere
This opens the settings for this payment method.
Look for PayHere in the payment options.
Click PayHere to open its settings.
Enter your merchant credentials
This tells PayHere that the payments coming from your site belong to your business.
Add your Merchant ID and Merchant Secret.
Set a supported currency
This makes sure travelers pay in a currency that PayHere accepts.
Go to WP Travel Engine > Settings > Currency > General > Payment Currency and set the Payment Currency to LKR, USD, EUR, GBP, or AUD.
If you sell a weekend trekking package to overseas travelers, you might choose USD. If you mostly take bookings from local travelers, you might choose LKR.
If you sell tours to travelers in different countries, PayHere can still work for you. For example, you might price a private day tour in USD for overseas travelers or in LKR for local bookings. The important part is that the currency on your site matches one of PayHere's supported currencies.
If your currency is set correctly and your merchant details are saved, your payment setup is ready. The next section shows the two account details you will use.
PayHere account details
These are the two details you need from your PayHere account. Keep them handy while you go through the setup.
Your PayHere Merchant ID.
Your PayHere Merchant Secret code.
Once you enter these details, your website can send payment requests to PayHere. After that, your travelers are ready to use it at checkout.
What happens at checkout
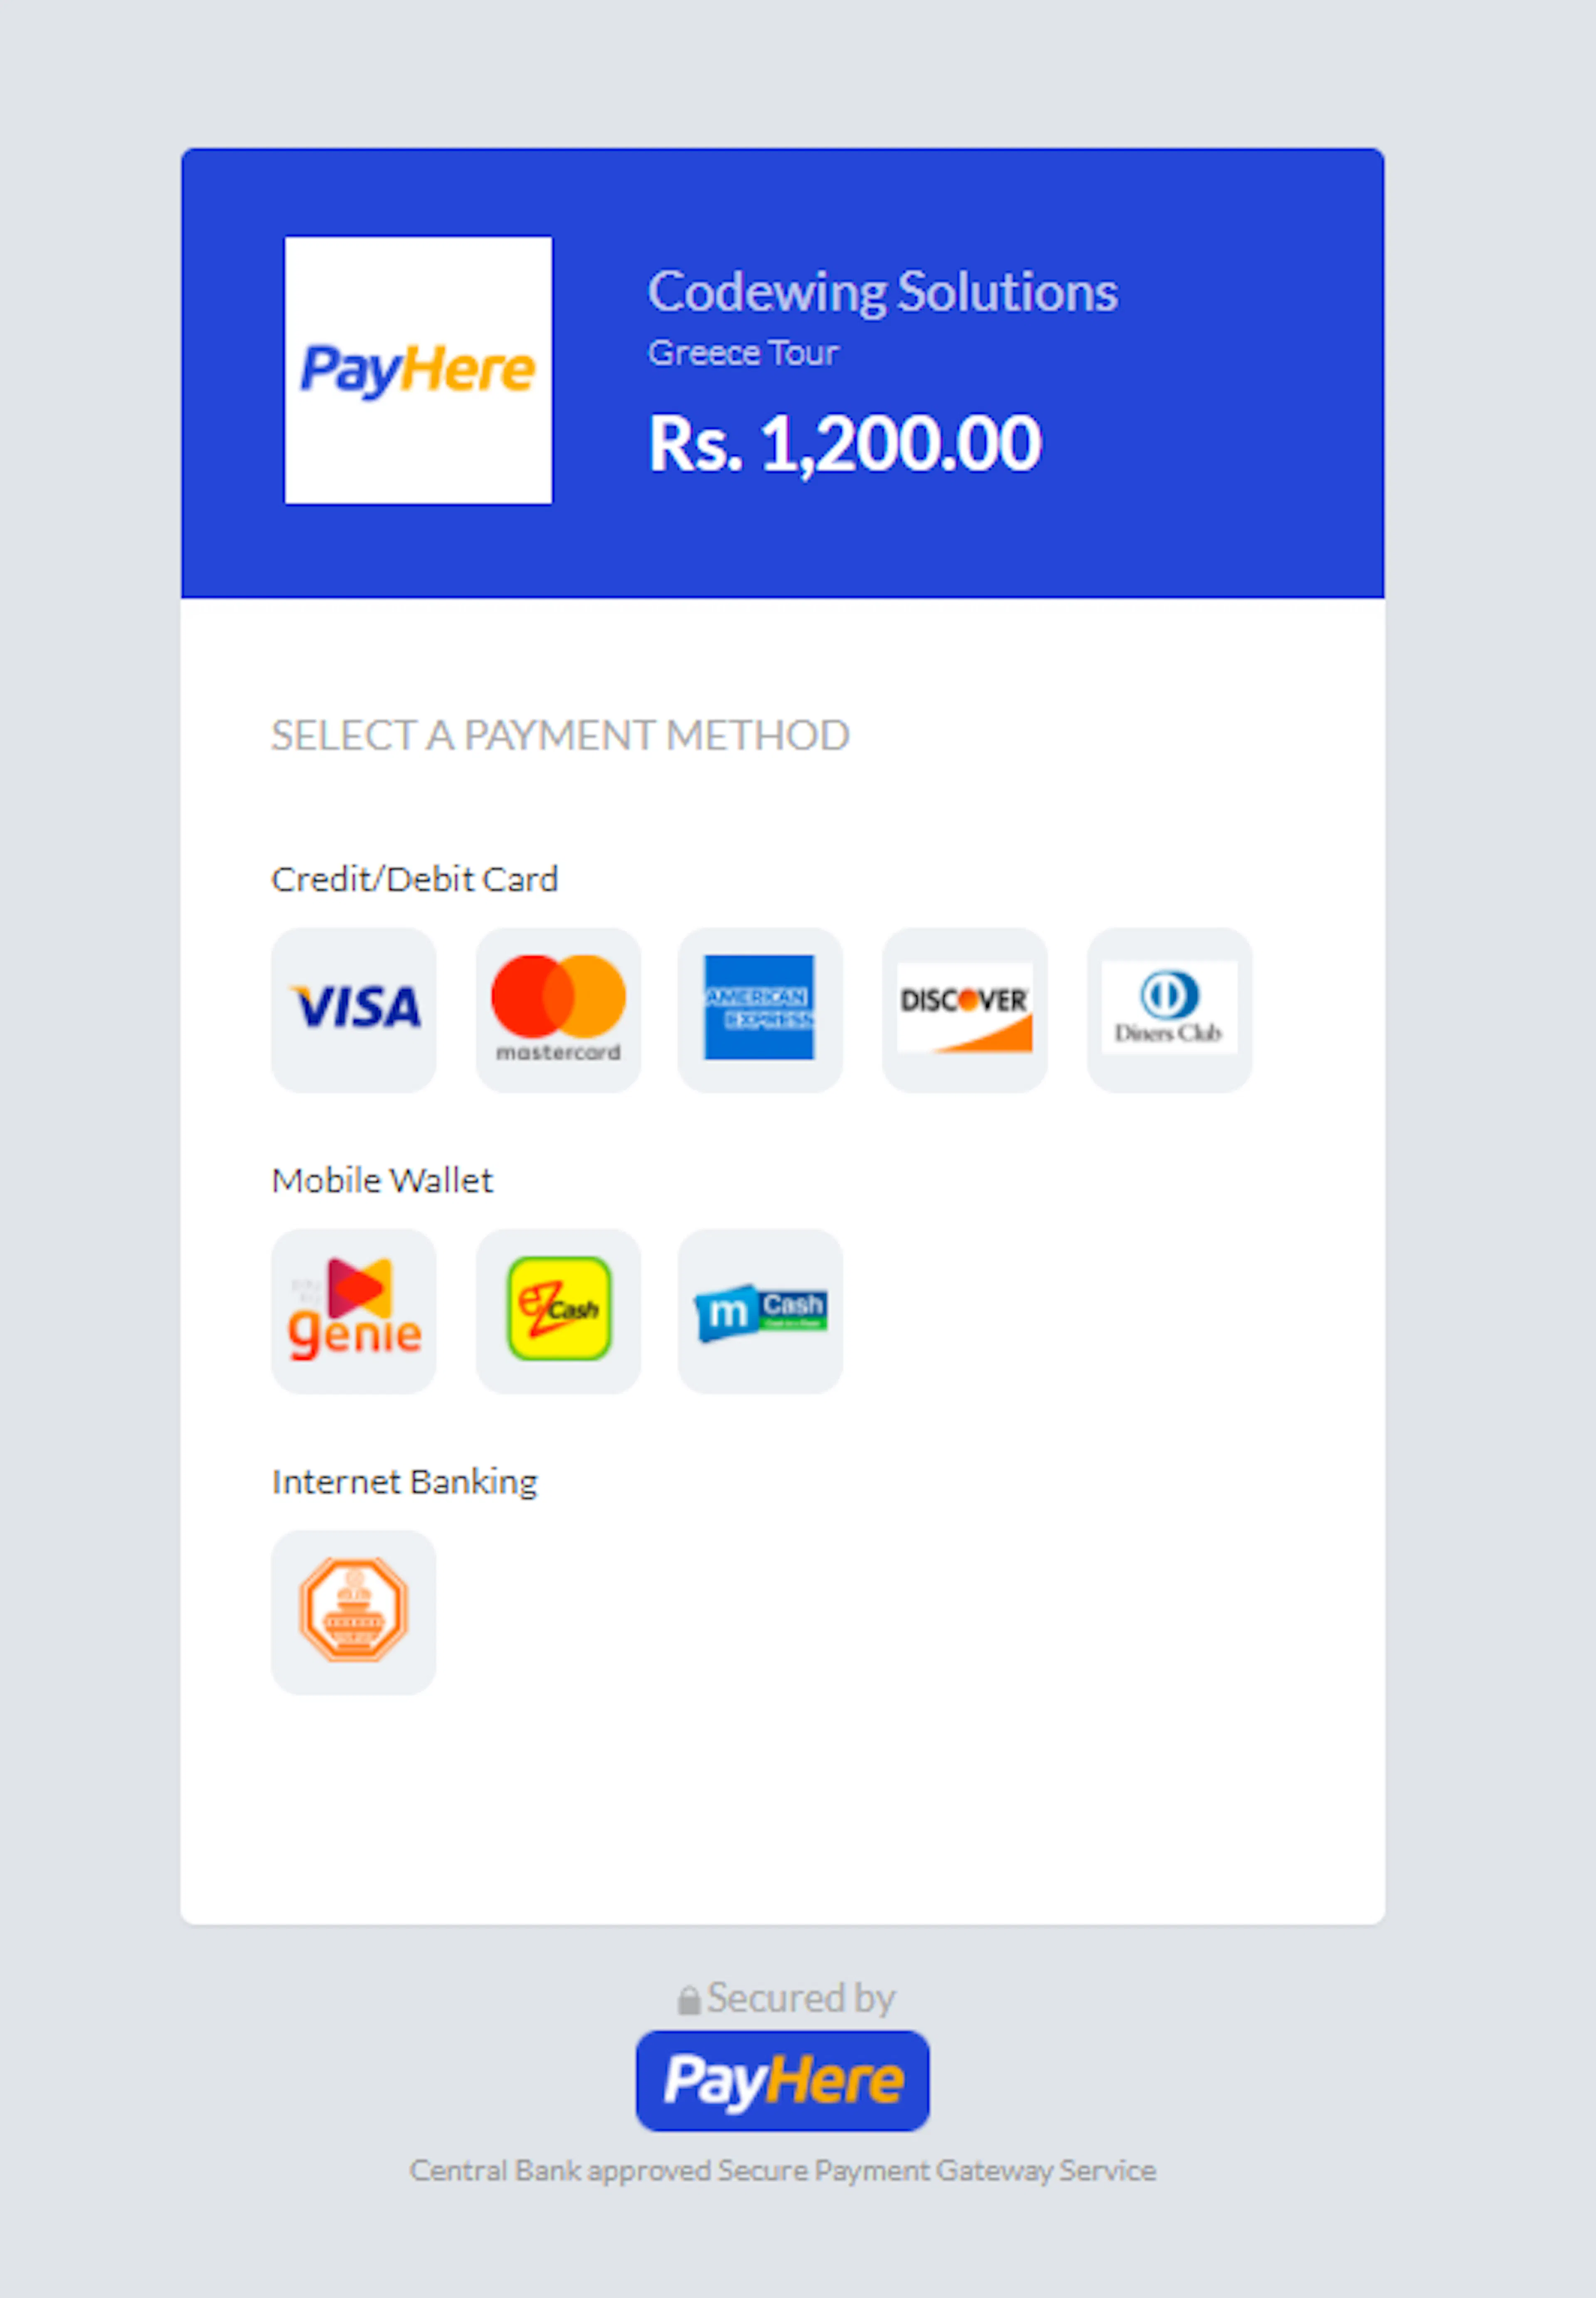
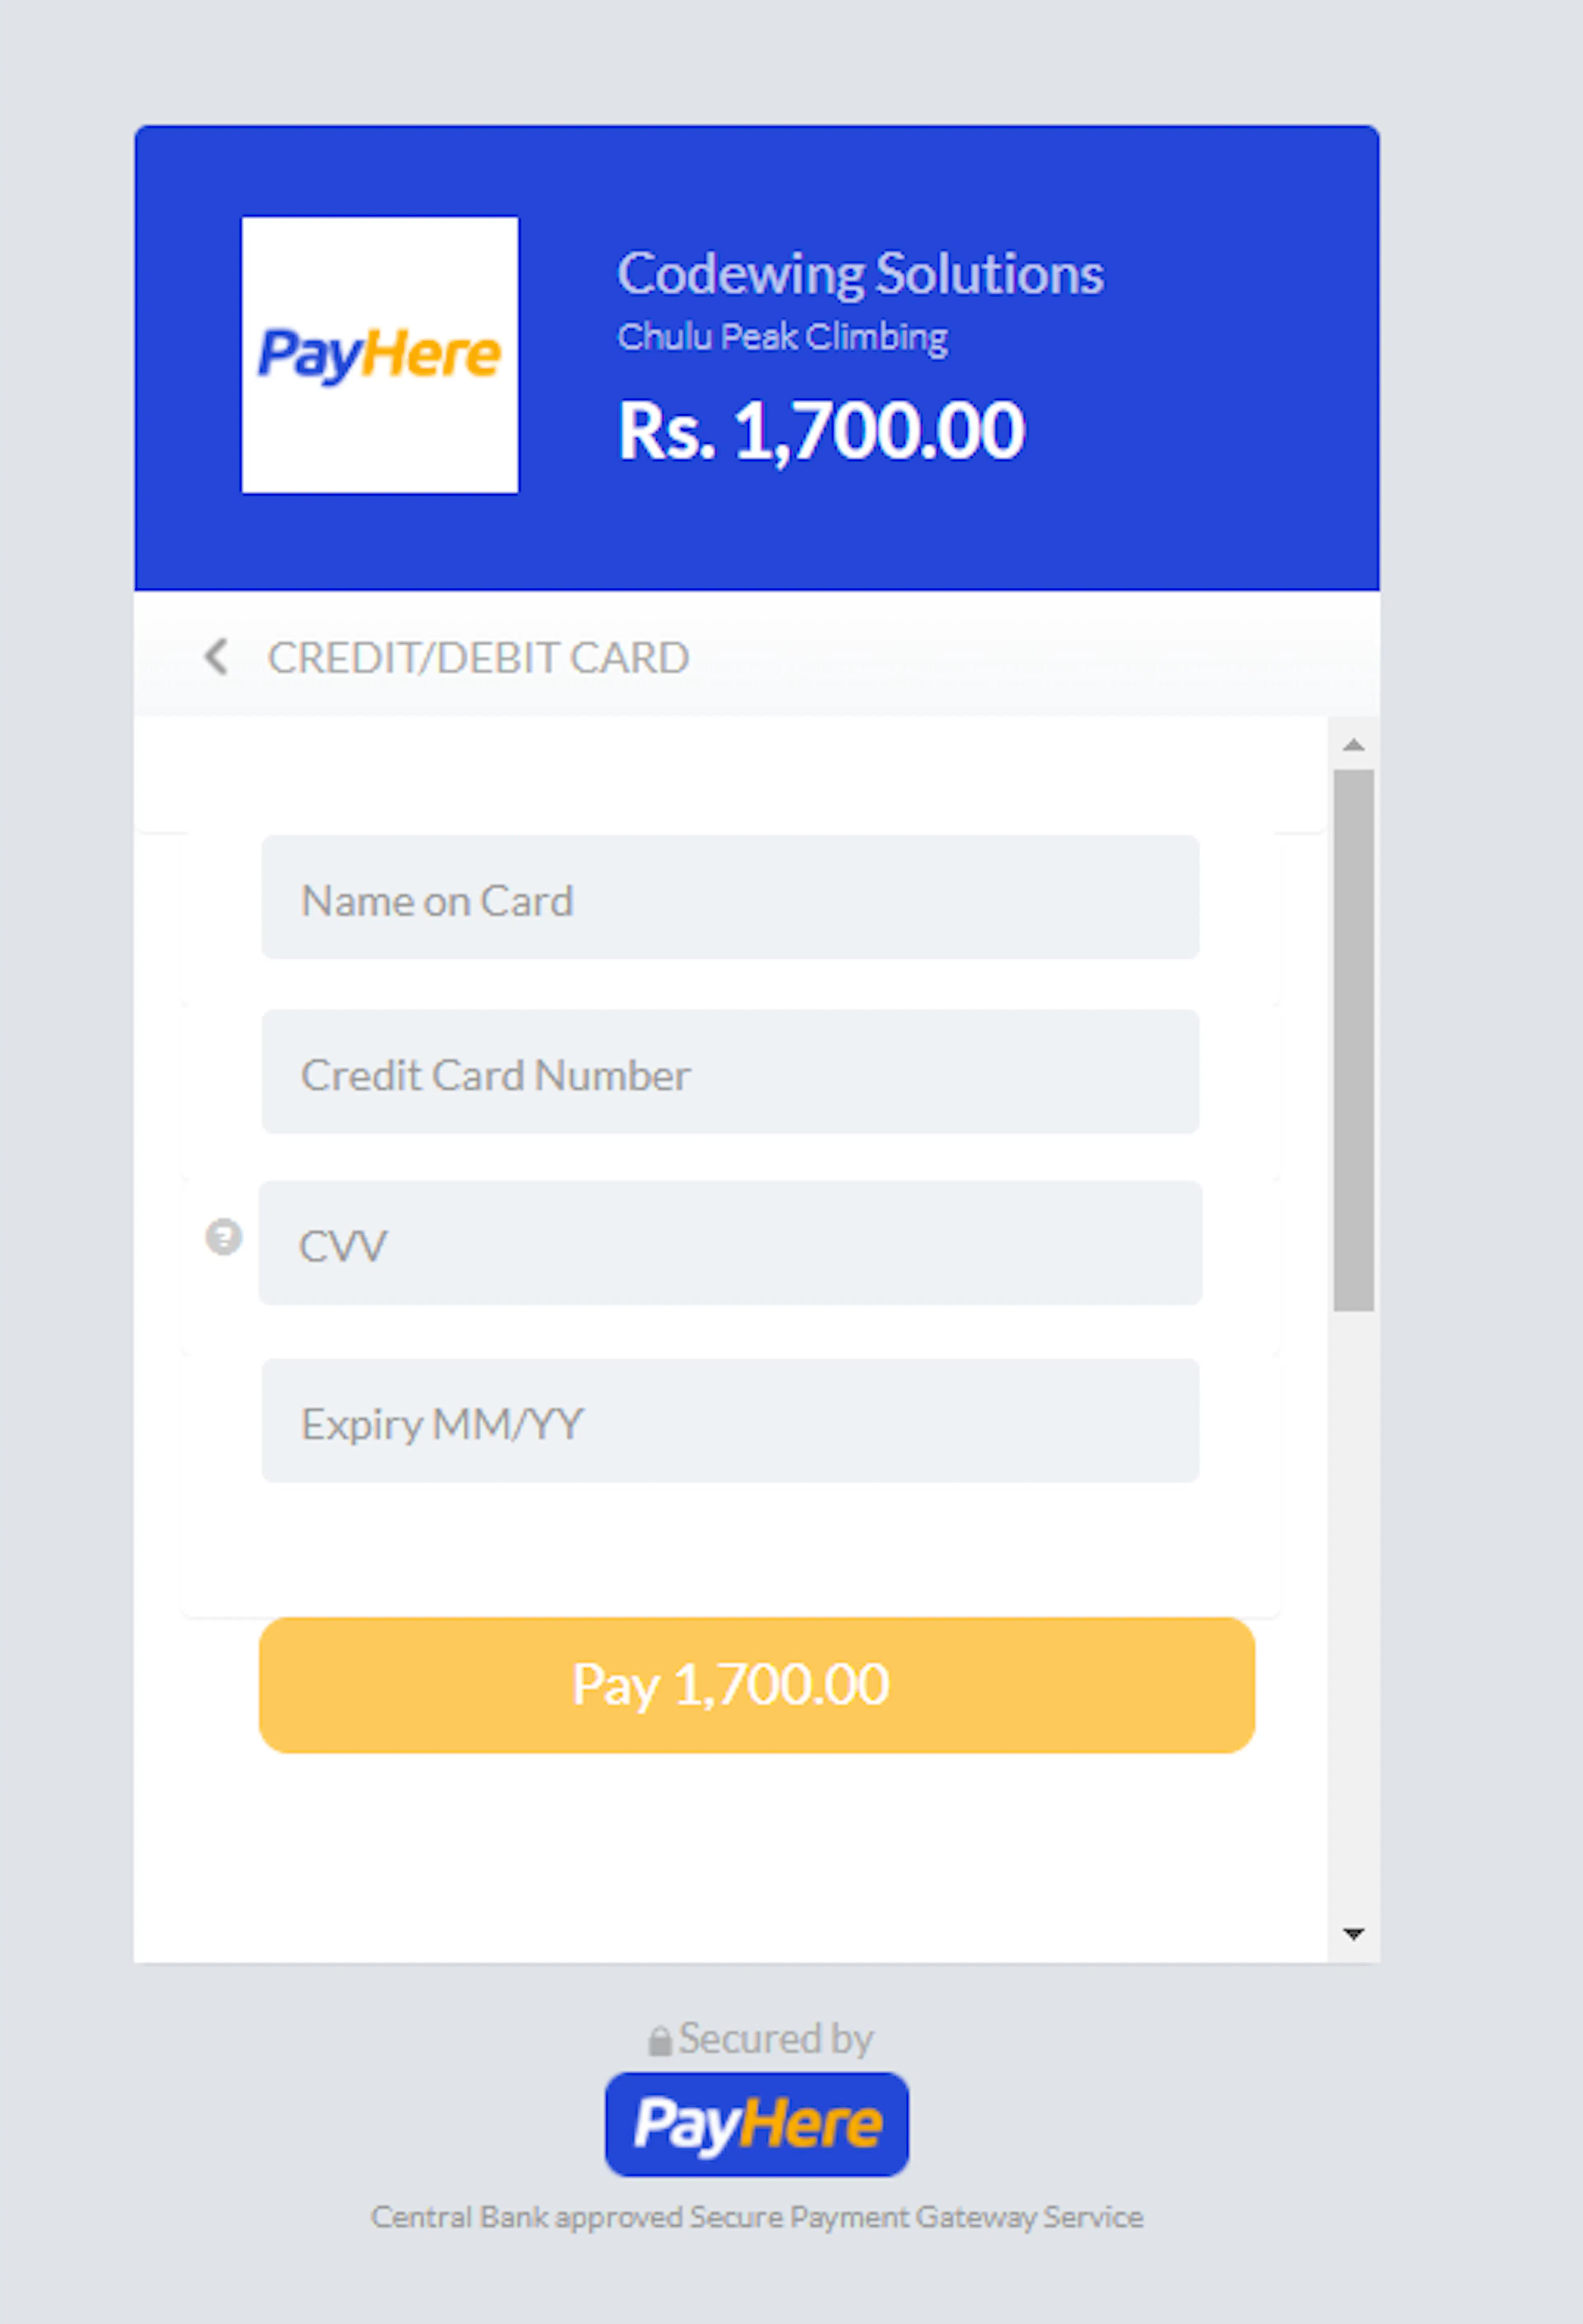
Your traveler stays on your website while making the booking. When it is time to pay, they move to PayHere's secure payment page to complete the payment. The booking details stay on your site the whole time.
For example, a guest might book a weekend wildlife tour on your site and then finish the payment on PayHere's page. This gives you a clear handoff between booking and payment.
If you're still stuck or have a question we didn't cover, our support team is happy to help. Reach out at our support page and we'll get you sorted.