

How to add General Info?
Add the key trip details your customers need, including duration, age limits, and booking rules, so each trip is set up clearly.
General trip information
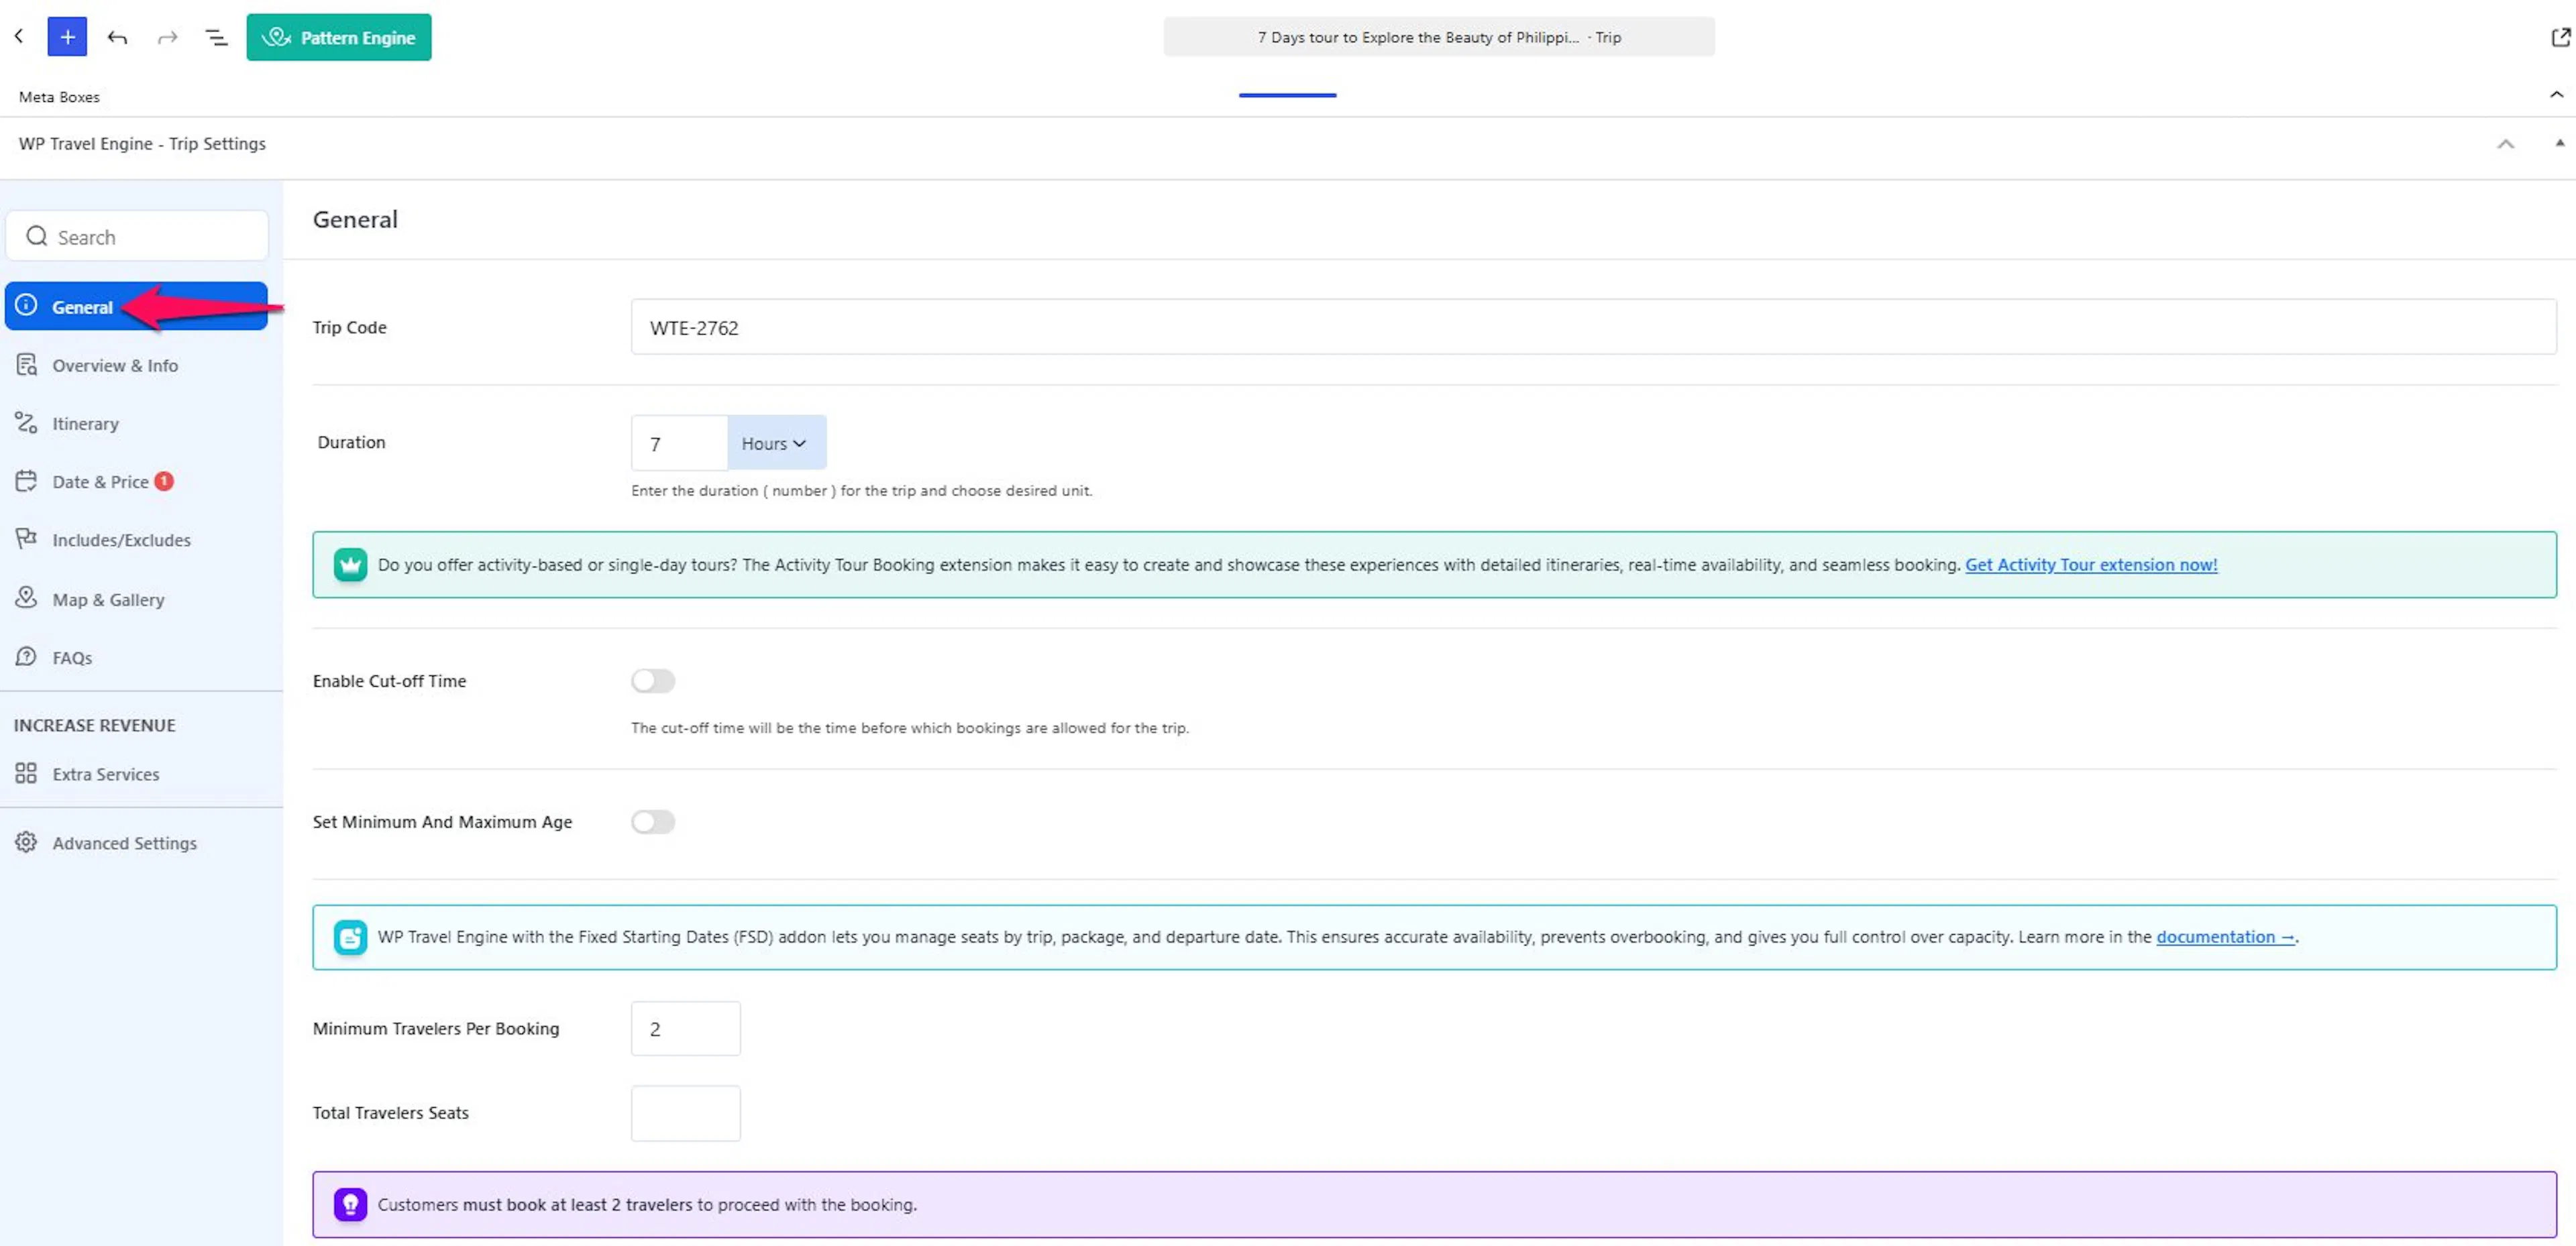
The General tab is where you set the main details for a trip. This is where you add things like duration, age limits, and participant limits. These settings help you tailor each trip and manage bookings properly.
What you enter here affects how your trip appears and how people can book it. Once these basics are in place, the rest of your trip setup feels much easier.
If you also need to control how many seats are available for a trip, take a look at the Seat Allocation guide. It walks you through booking capacity in more detail.
Fill in the General tab fields
What you'll need before you start: open the trip you want to edit and go to the General tab.
Add the Trip Code
This code helps you identify the trip and reuse it in other parts of your site.
Trip Code is the unique identifier for the trip. You can use this code to display the trip card on other pages or posts. For example, you could add the code to a blog post about your best treks and show the booking card for that trip right inside the post.
Once the code is in place, you have a quick way to feature that trip elsewhere on your site.
Set the trip duration
This tells customers how long the trip runs at a glance.
Use Duration to set the trip length in days and nights. For example, if you are offering a short mountain trek, you might enter 3 days and 2 nights.
That gives people a clear picture of the trip before they book.
Turn on Cut-off Time if you need booking notice
This setting helps you avoid last-minute bookings when you need time to prepare.
Use Enable Cut-off Time to stop accepting bookings a certain number of days before the trip starts. For example, if you need 2 days to arrange transport and prepare gear, set the cut-off to 2 days so nobody can book too close to departure.
If you run trips that need planning ahead, this setting gives you more control.
Set the minimum and maximum age
This helps you make sure the trip is a good fit for the people booking it.
Use Set Minimum and Maximum Age to choose the age range allowed to join the trip. For example, if your trek has a moderate difficulty level, you might set the minimum age to 12.
This makes expectations clear for customers and helps prevent unsuitable bookings.
Choose the minimum travellers per booking
This setting is useful when a trip only works with a certain group size.
Use Set Minimum Travellers Per Booking to define how many people must be included in one booking. For example, if you only run a group trek when at least 2 people book together, set the minimum to 2.
With that done, your booking rules better match how you actually run the trip.
Total Travelers Seats
This setting is useful when a trip has a fixed number of available seats.
Use Total Travelers Seats to define the maximum number of travelers who can book the trip. For example, if a trip can accommodate up to 10 travelers, set the total seats to 10.
This helps you manage the trip’s capacity and prevents bookings from exceeding the available seats.
If you're still stuck or have a question we didn't cover, our support team is happy to help. Reach out at our support page and we'll get you sorted.