

Configure Menus
Set up clear navigation for your tour website by creating menus for the header and footer with the WordPress Customizer or dashboard.
Menu locations
Set up menus so visitors can find your tours, travel information, and contact details from every page. A menu is a list of links that appears in your website's header or footer.
Travel Monster supports three menu locations:
- Primary: The main menu in the header. Add links such as Home, Tours, About Us, and Contact.
- Secondary: A second header menu for helpful links such as Travel Tips, FAQs, or Booking Information.
- Footer: A menu at the bottom of your website. Add links such as Privacy Policy, Terms, or Travel Resources.
You can use the WordPress Customizer to see changes as you make them. You can also use the dashboard's Menus screen for a more direct setup.
Good to know
Both methods create the same menus. Use the Customizer when you want to preview the menu on your site. Use the dashboard when you prefer a simpler list-based screen.
Set up menus from the Customizer
The Customizer shows your menu changes in a live preview. Use it when you want to check how your navigation looks before visitors see it.
What you'll need before you start: the pages, categories, or links you want to add to your menu.
Open the Menus panel
Open the menu settings so you can create navigation for your tour website.
Go to Appearance > Customize > Menus in the WordPress dashboard.
Start a new menu
Create a separate menu for each location you want to use.
Click Create New Menu in the Menus panel.
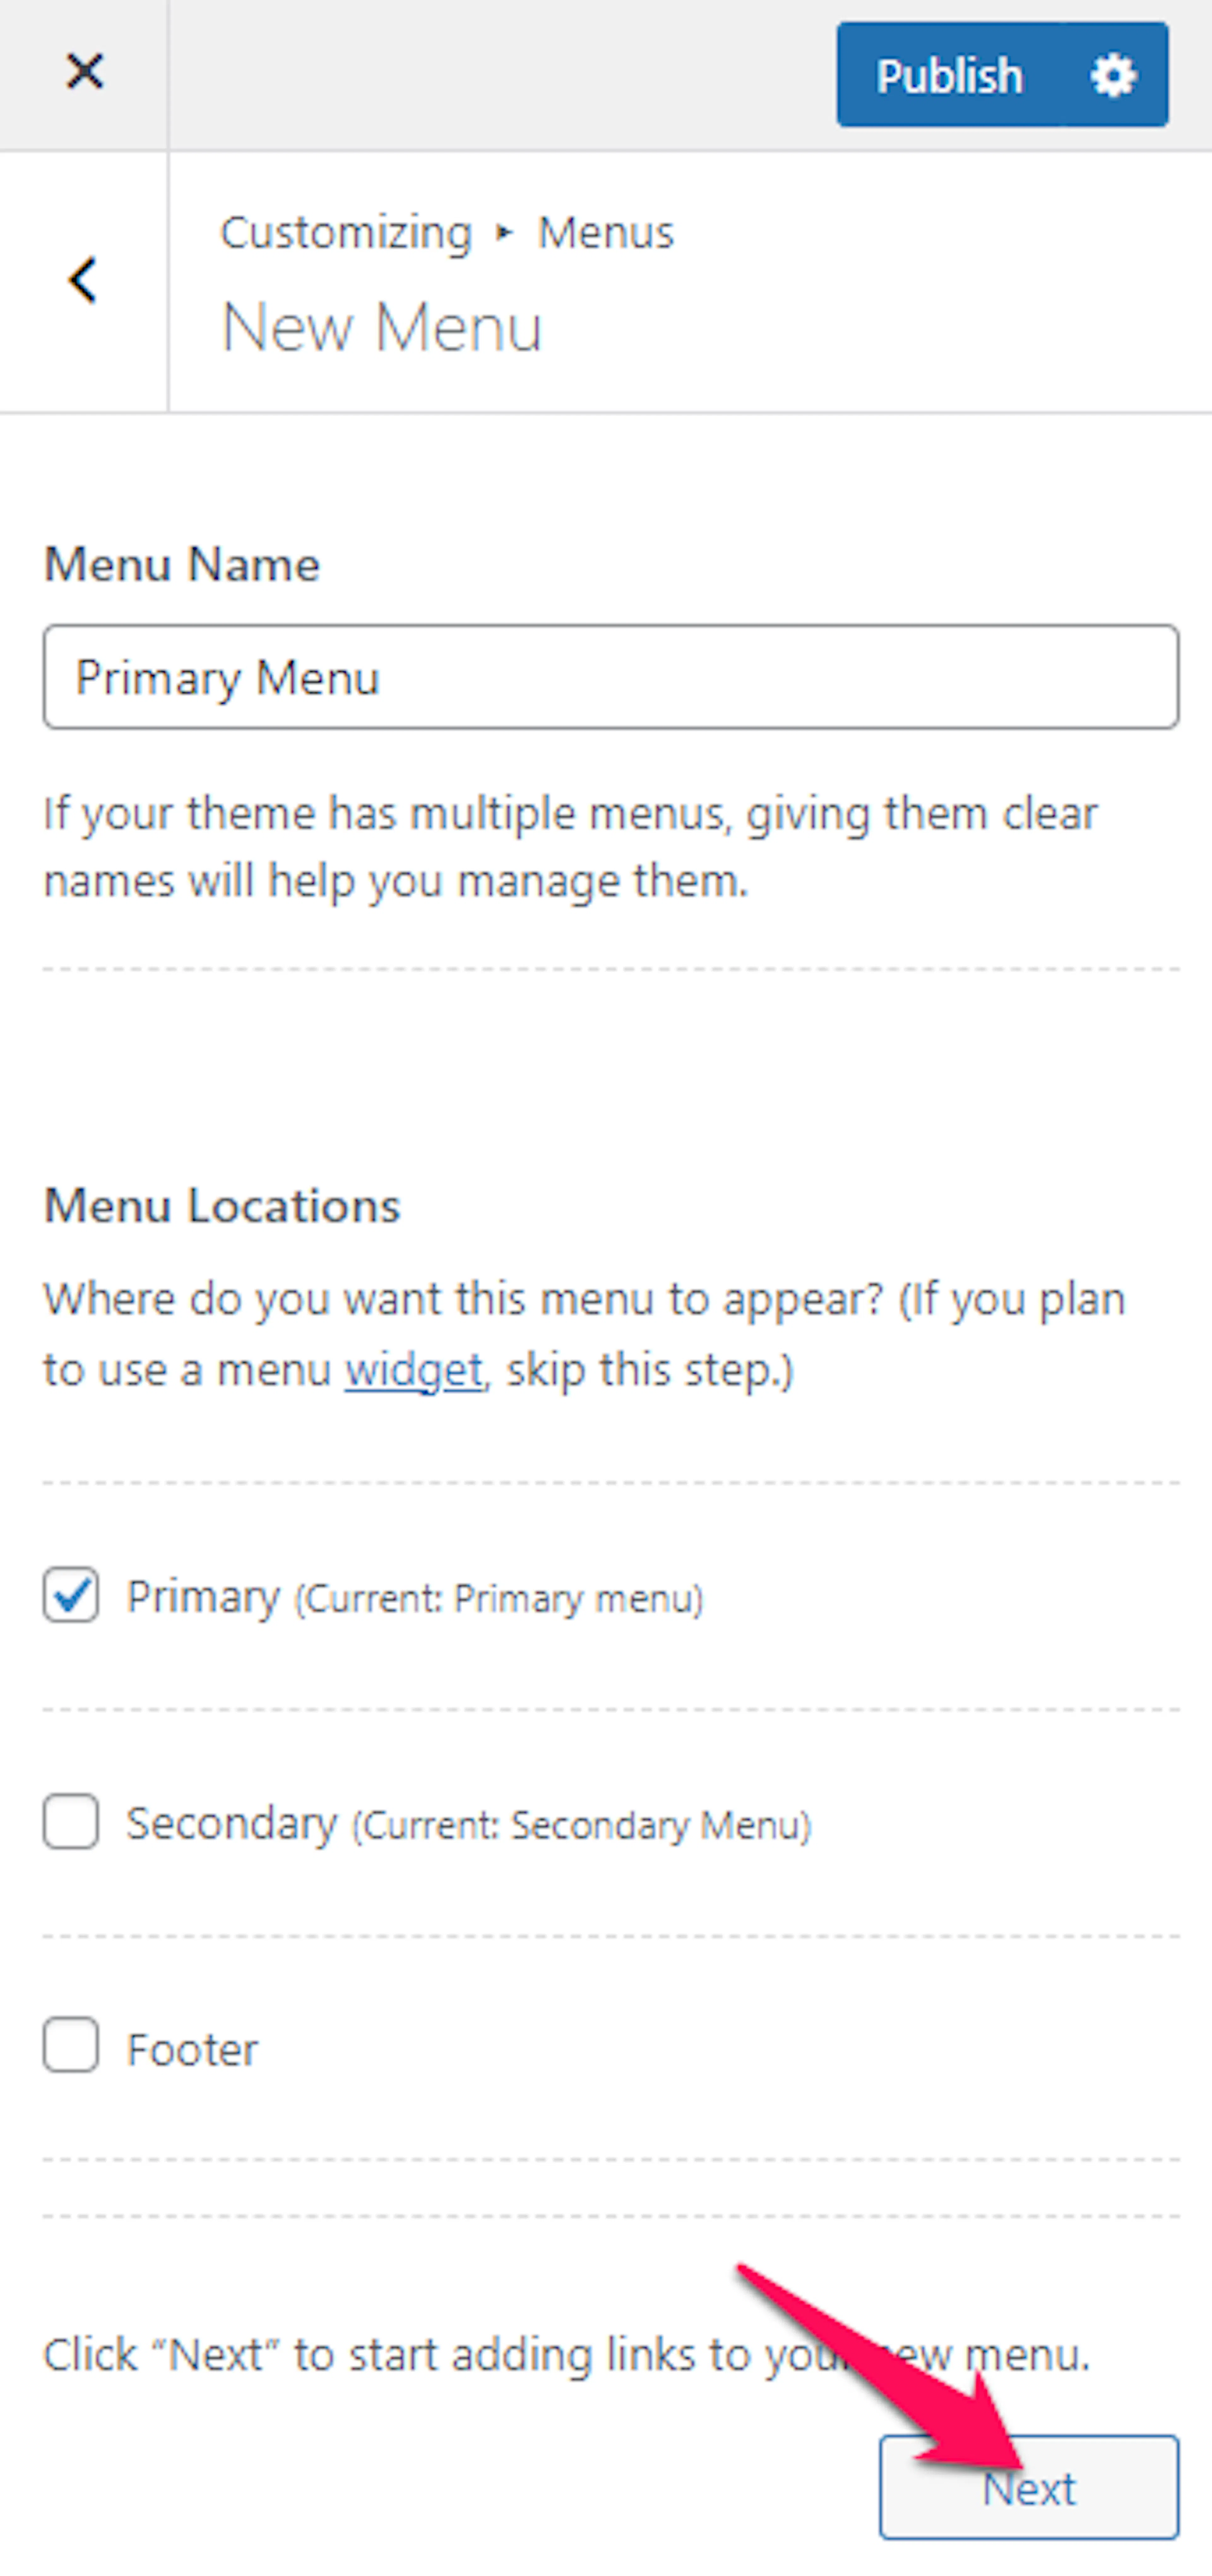
Name the menu and choose its location
A clear name helps you recognize the menu later. For example, name a menu Main Tour Links for your primary header navigation.
Enter a name in the Menu Name field. Select Primary, Secondary, or Footer as the Menu Location. Click Next at the bottom of the panel.
Add items to the menu
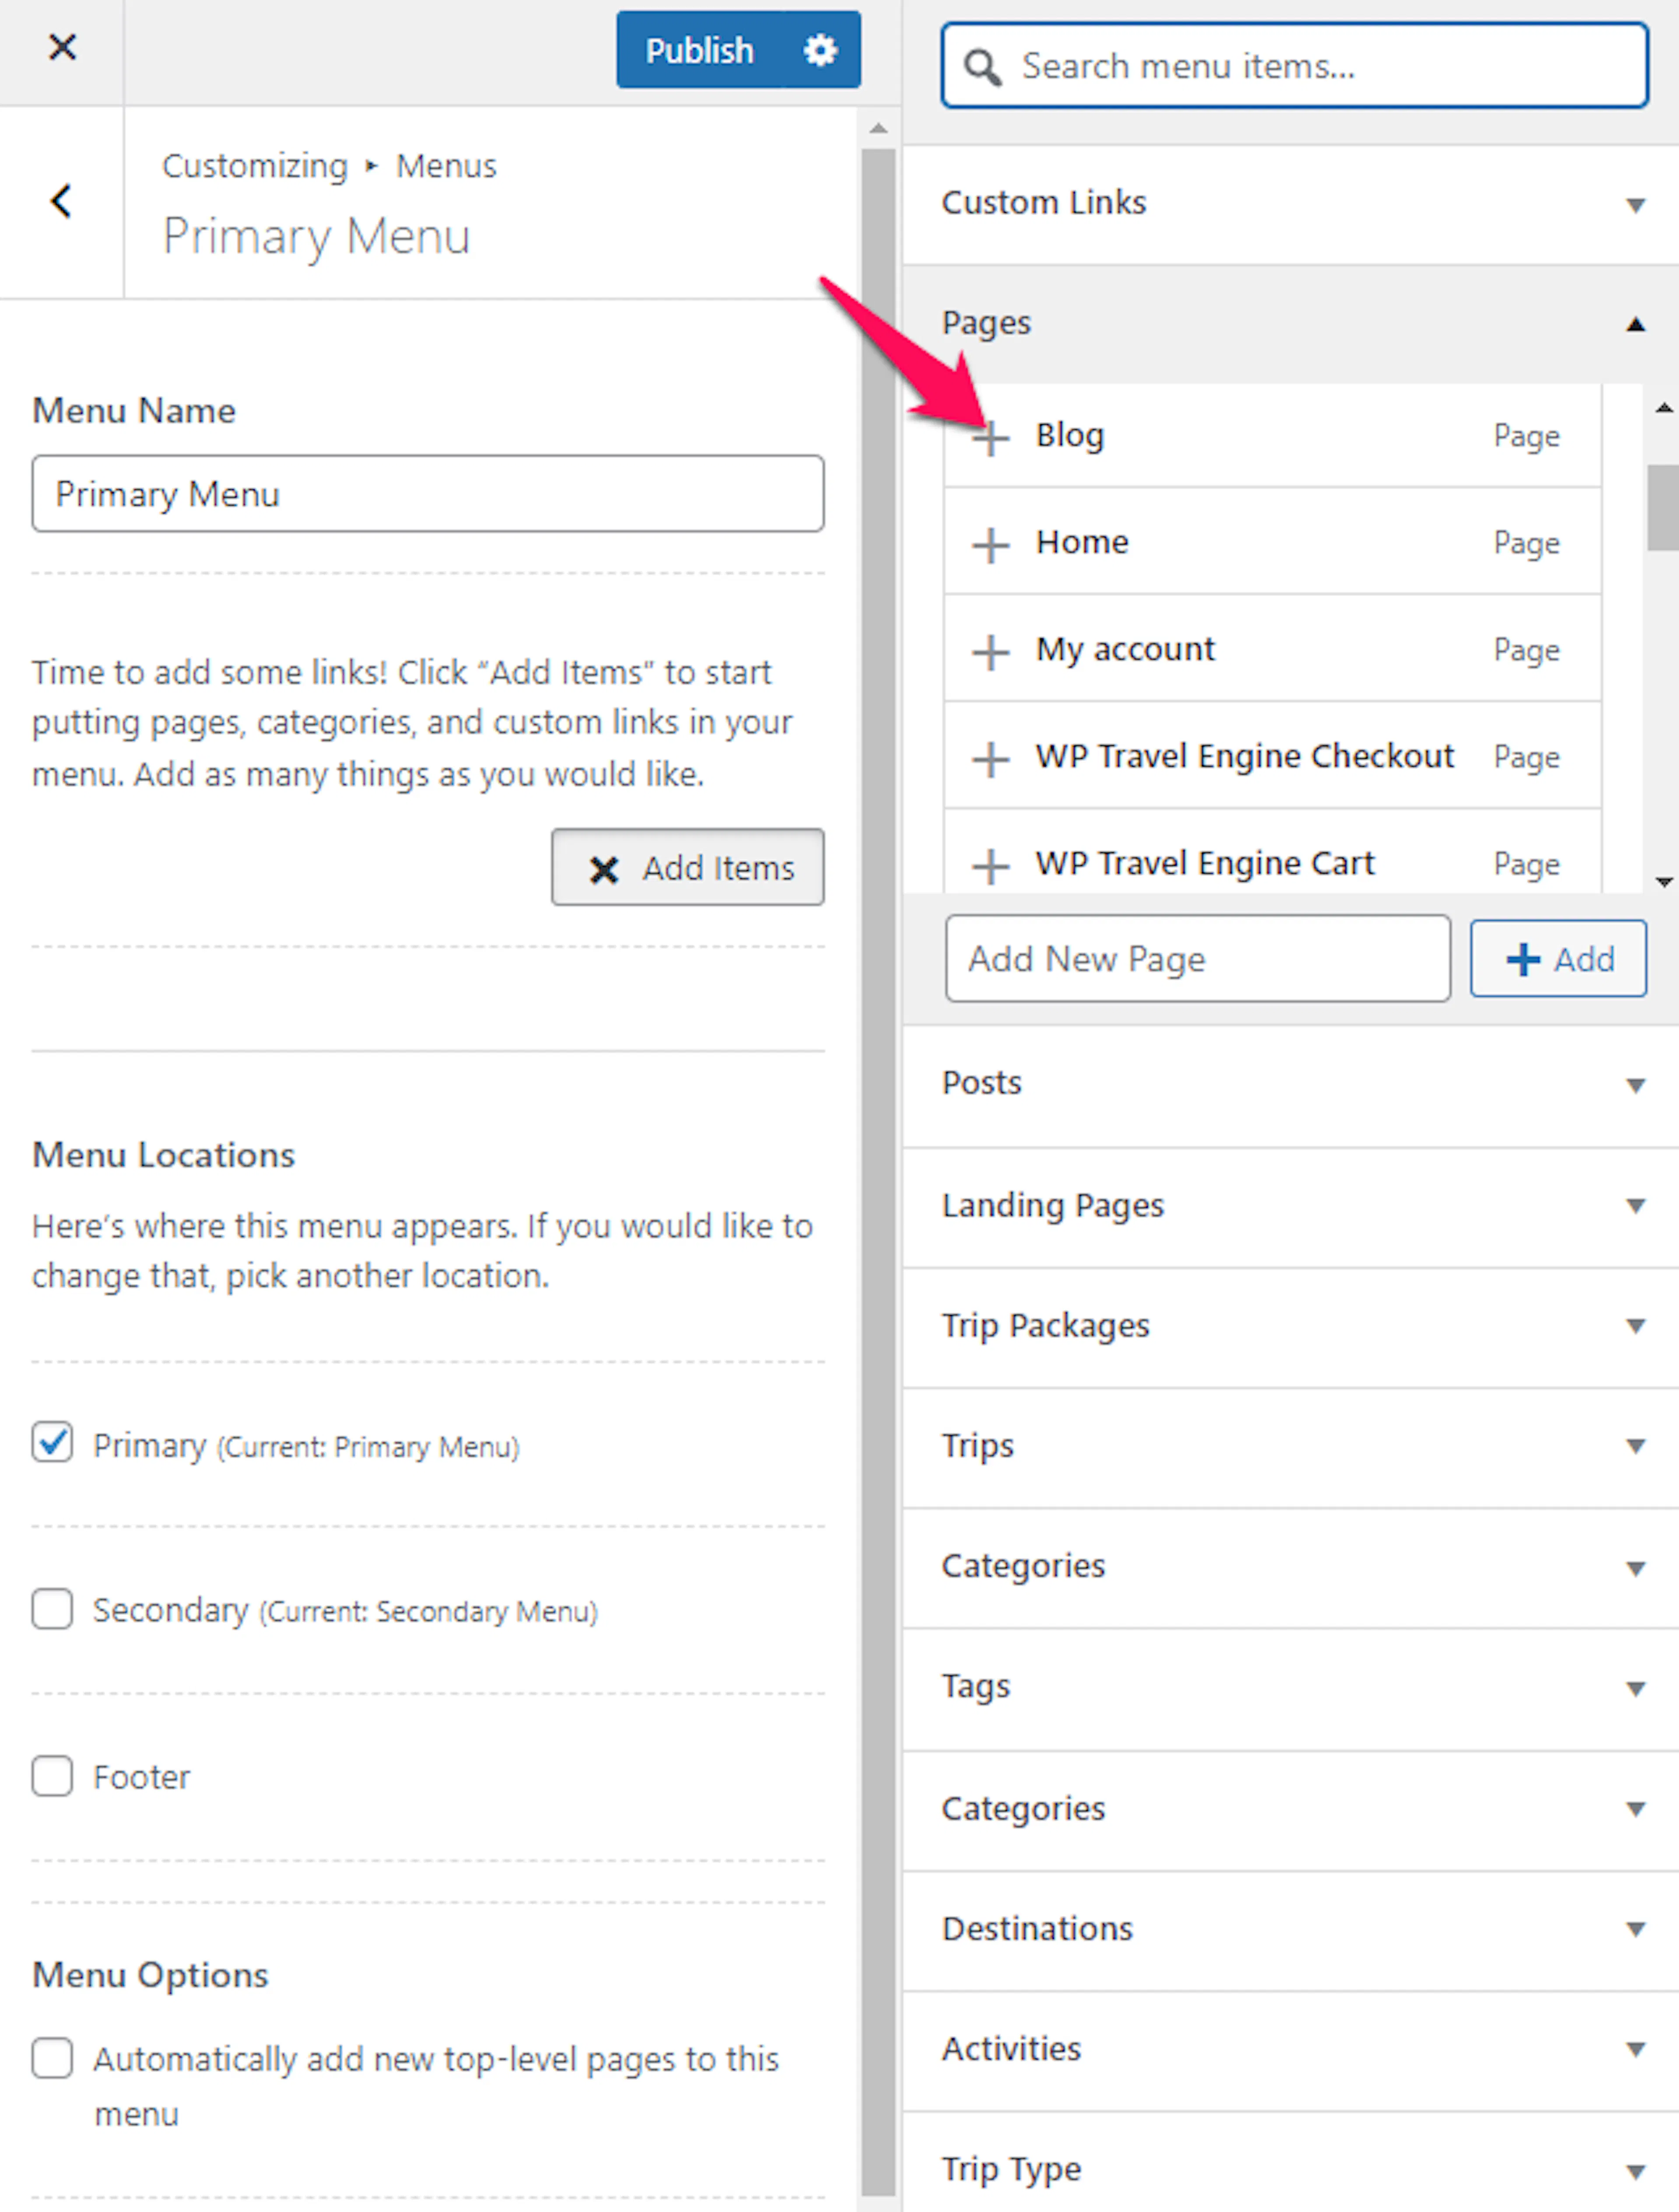
Add the links visitors need to plan and book a trip.
Click Add Items in the menu panel. Browse pages, posts, categories, and custom links. Click the plus sign next to each item you want to add. For example, add your Destinations page, a Mountain Tours category, and a Contact page.
Arrange and publish
Put the most useful links first so visitors can find your tours quickly.
Drag and drop the items into the order you want. Click Publish at the top of the Customizer. Your menu is now visible in the selected location.
Your first menu is ready. Repeat these steps for any other header or footer location you want to use.
Set up menus from the dashboard
The dashboard's Menus screen gives you a direct way to create and assign navigation. Use it when you do not need a live preview while working.
Open the Menus screen
Open the screen where you manage all of your website menus in one place.
Go to Appearance > Menus in the WordPress dashboard.
Create the menu
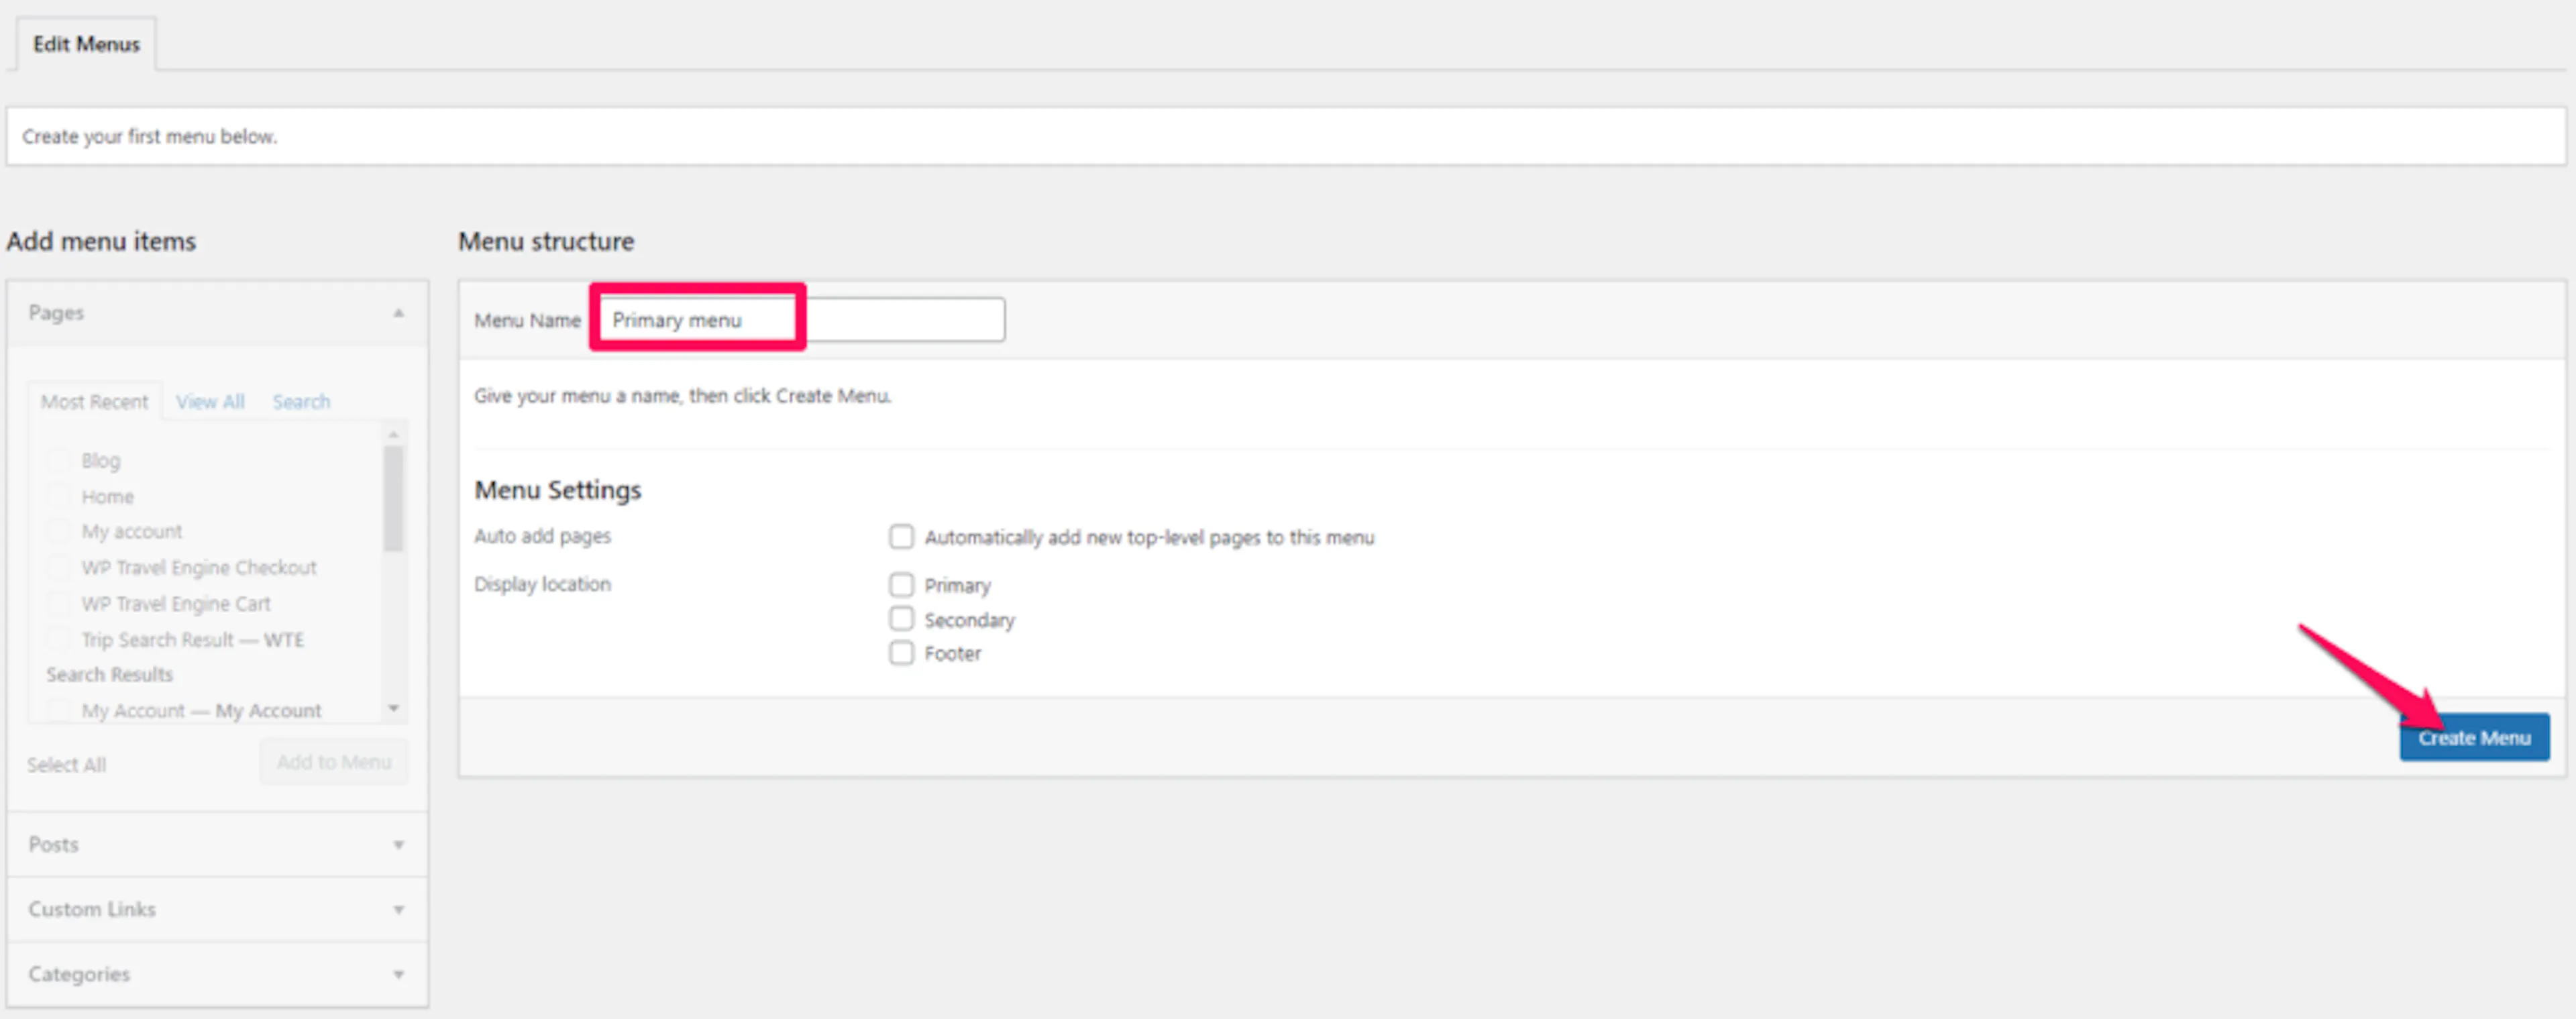
Give the menu a name so you can identify it when you create other menus.
Enter a name in the Menu Name field. For example, use Footer Information for links such as Privacy Policy and Contact Us. Click Create Menu.
Add items to the menu
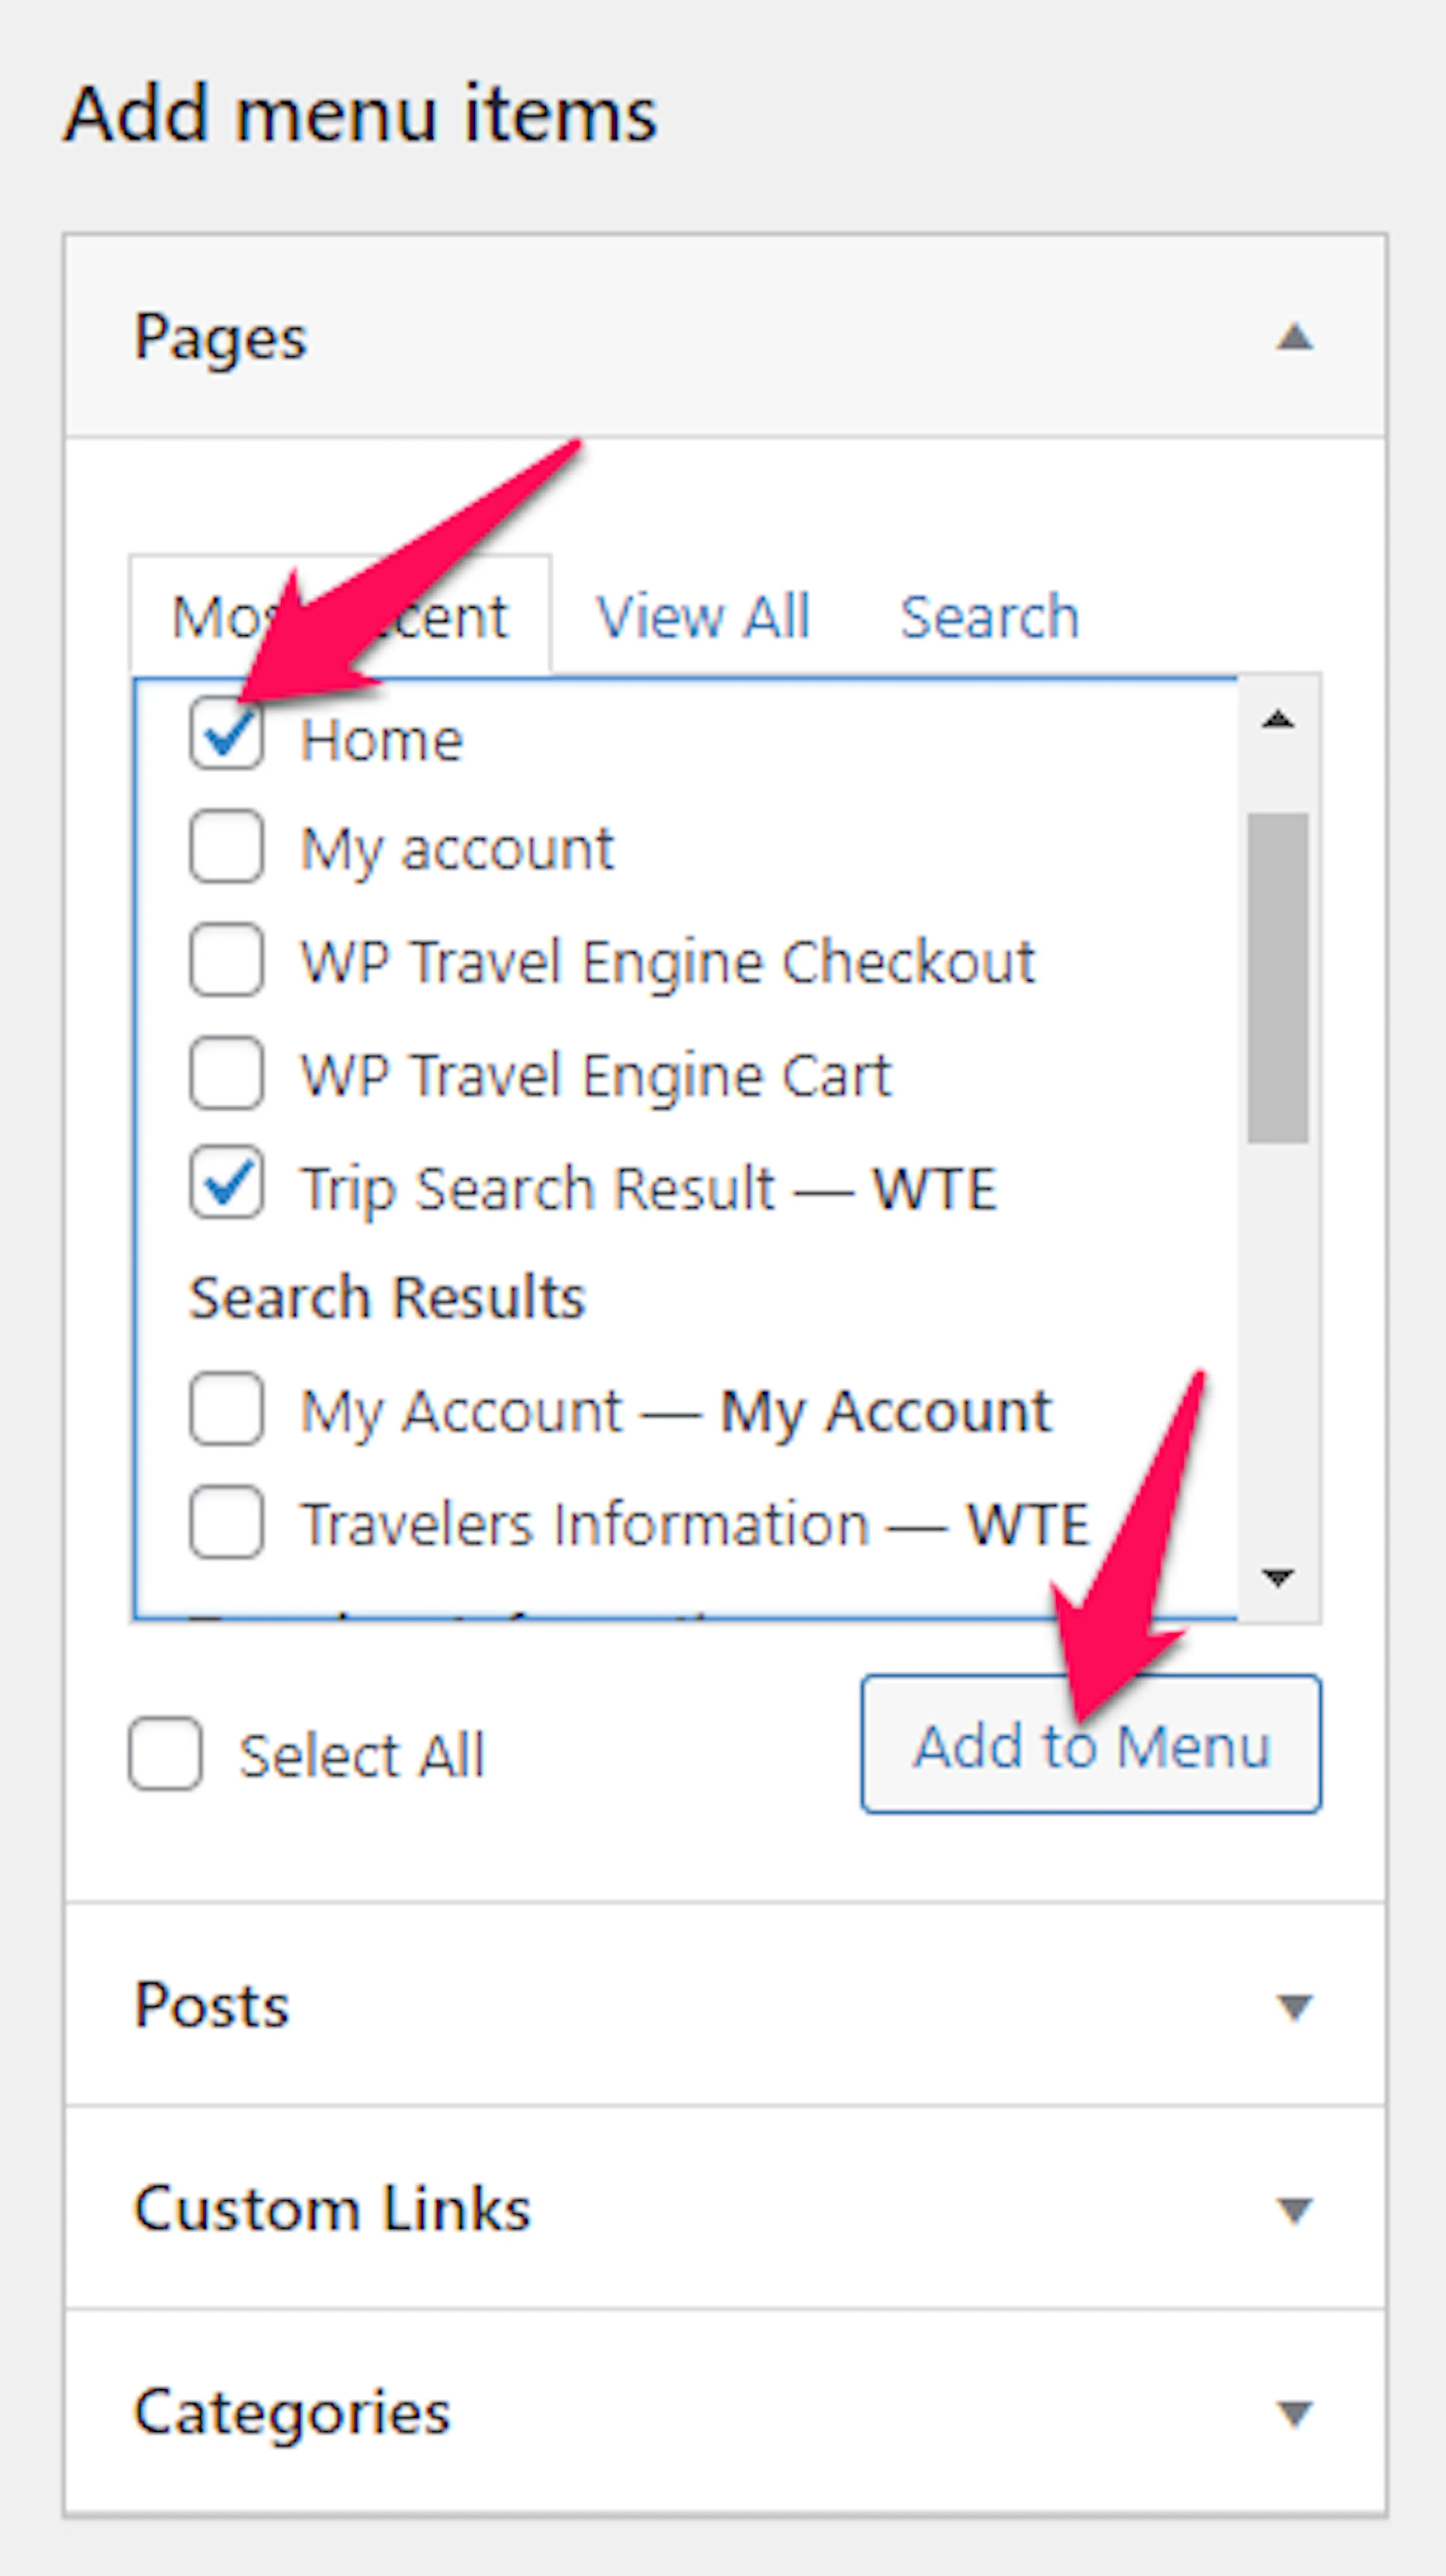
Add the pages and links that visitors need from this part of your site.
Select items from the Pages, Posts, Custom Links, or Categories panels. Click Add to Menu in the panel. A custom link is useful when you want to link to an outside booking service or a specific booking page.
Arrange the items
Place the most important links where visitors will see them first.
Drag and drop the added items into the order you want. Put booking and tour links near the top of a header menu.
Assign a display location
Choose where WordPress should show this menu on your website.
Under Menu Settings, select Primary, Secondary, or Footer. Choose the location that matches the menu's purpose.
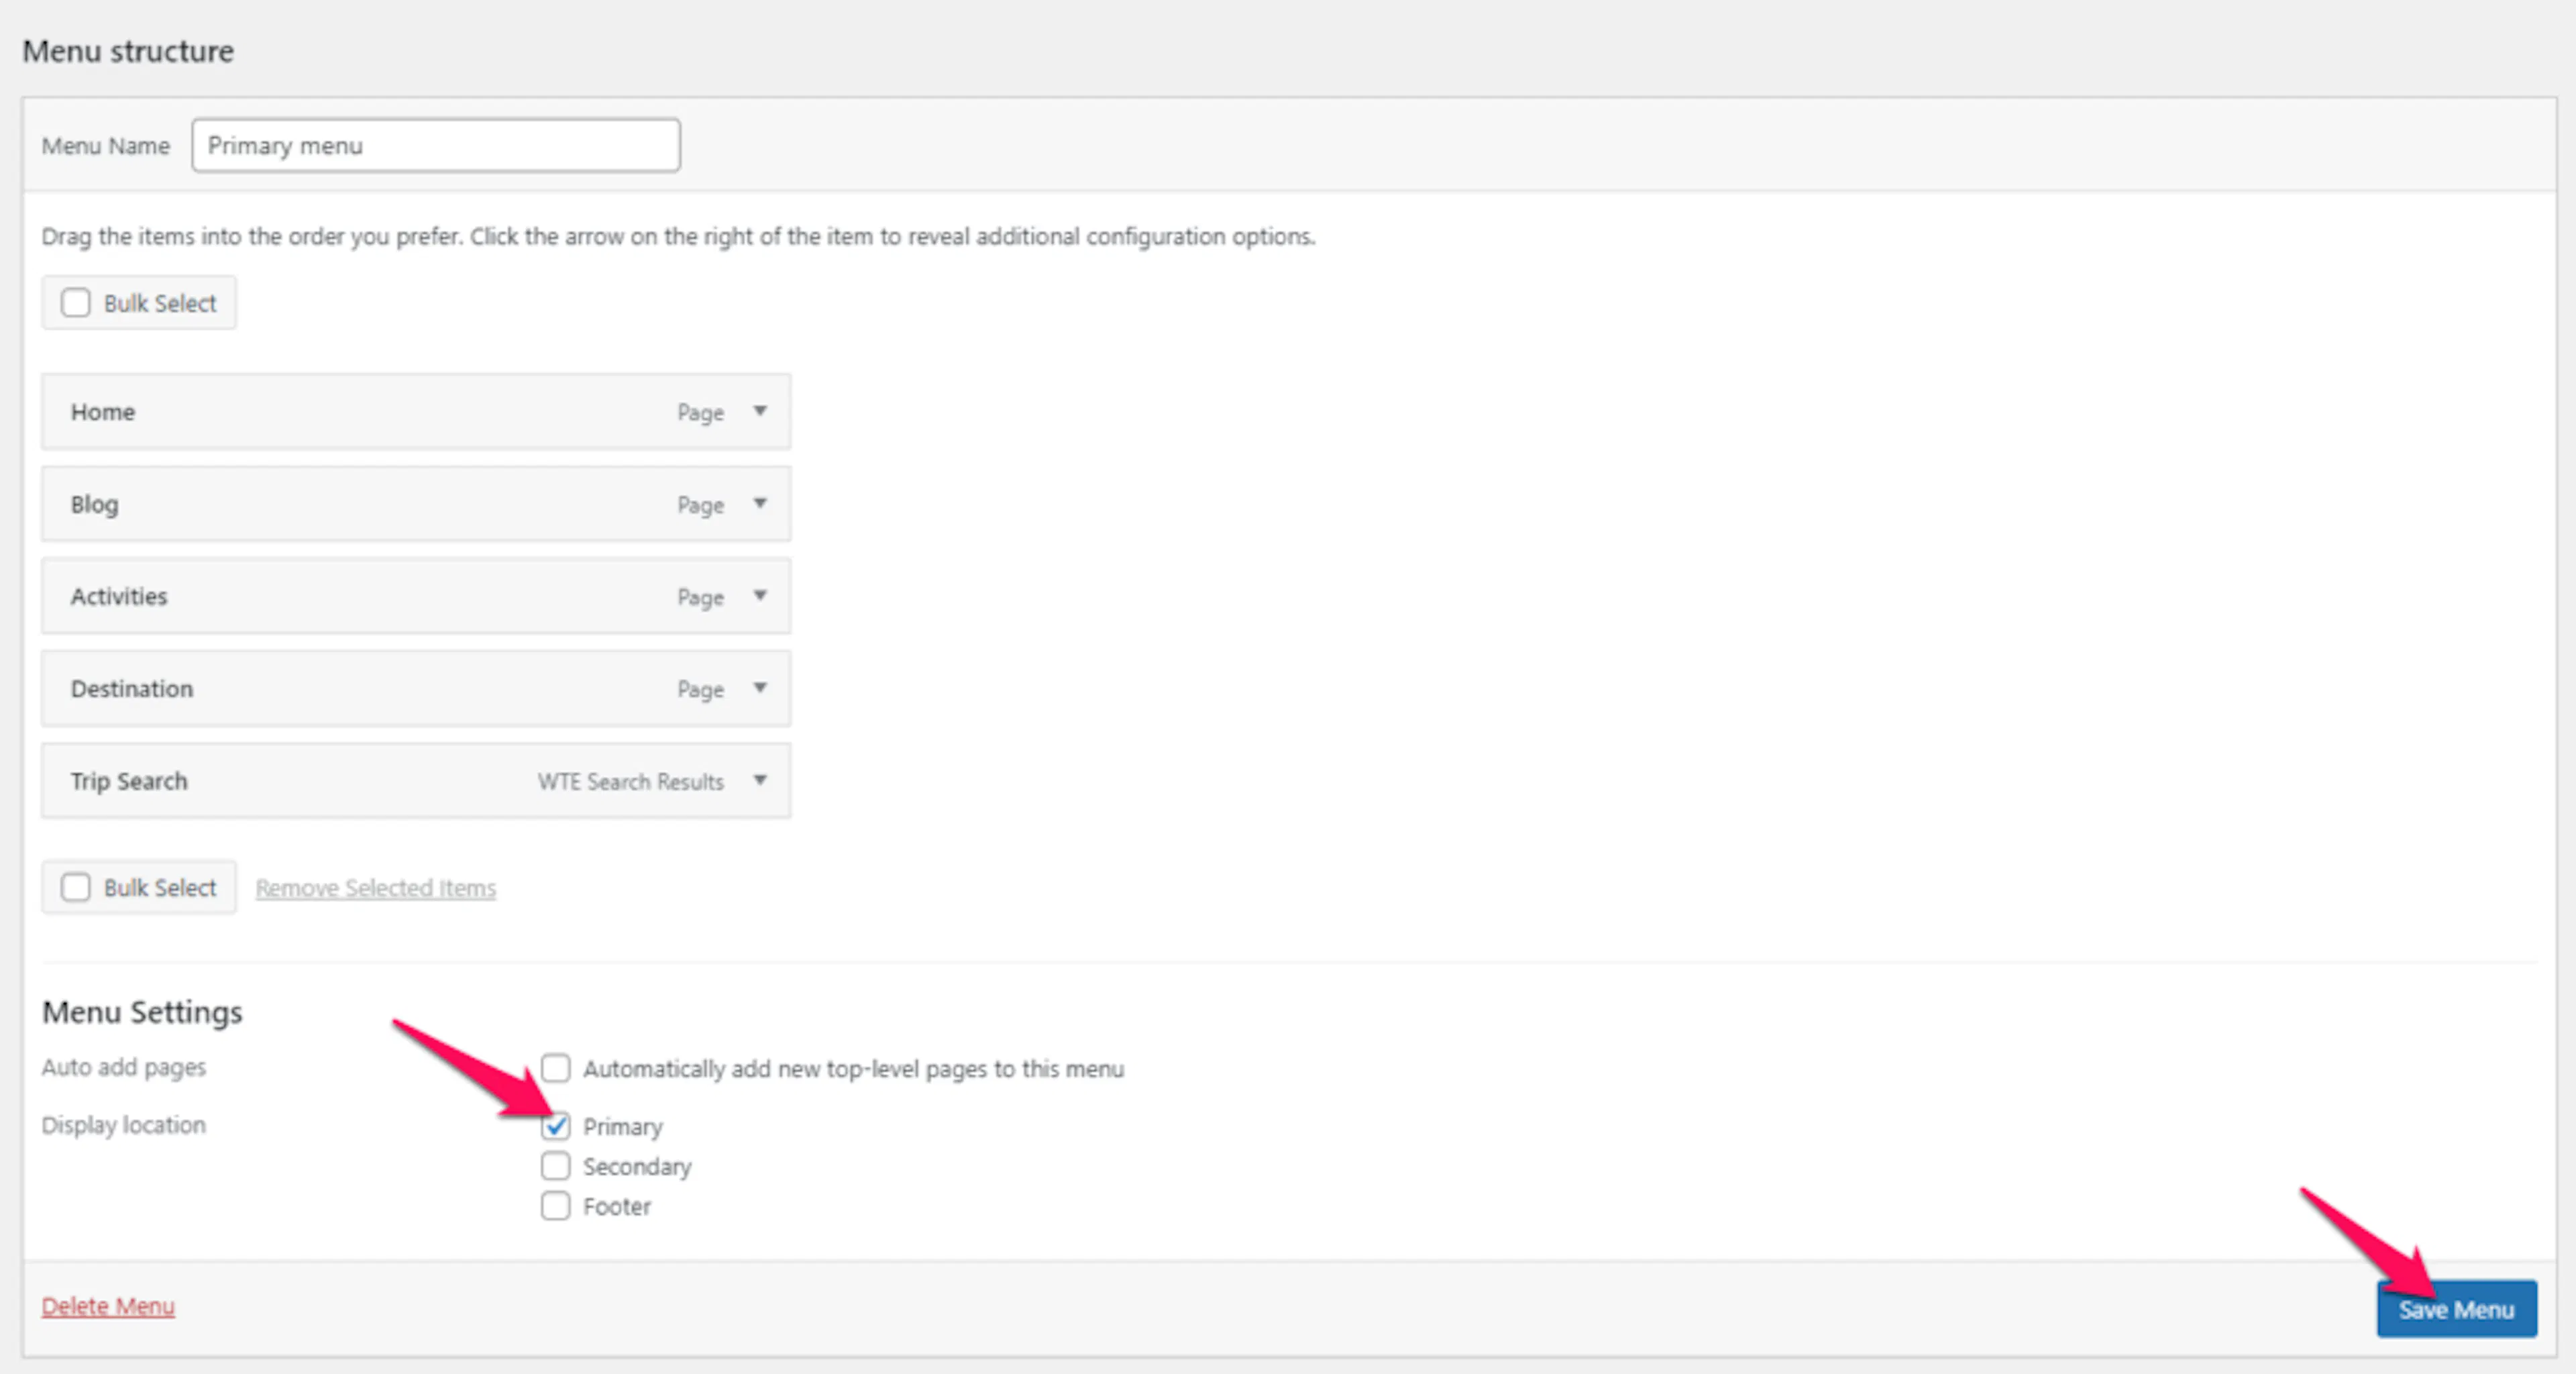
Save the menu
Save your links and location so visitors can use the menu.
Click Save Menu at the bottom of the screen. Open your website in a new browser tab to confirm that the menu appears where you expect.
Your navigation is set up. Next, add widgets to the sidebar and footer areas to give visitors more useful information.
If you're still stuck or have a question we didn't cover, our support team is happy to help. Reach out at our support page and we'll get you sorted.
\
Next step
Configure Widgets
Add and arrange widgets in your site's sidebar and footer widget areas.