

How to Add New Filters and Taxonomies Using Custom Filters
Add your own filter options like Difficulty Level or Travel Style so travelers can narrow down trips and find the right one faster.
Overview
Custom Filters lets you add your own ways to group trips. WP Travel Engine already includes built-in options such as Destination, Activities, and Trip Type. You can create additional options for things like Difficulty Level, Trip Duration, Season, or Travel Style.
A taxonomy is a way of grouping your trips, like sorting them by destination or activity type. Custom filters create new taxonomies that help you organize trips and give travelers more precise search options.
These filters appear on the Trip Archive page. This is the page on your site where all your trips are listed and travelers can search and filter them. The filters appear on the frontend, which is the part of your website that travelers see. Travelers can then narrow down the trip list to find options that match what they want.
You can create the filter first, then add the options that travelers will use. Start by opening the Custom Filters page.
Creating a custom filter
Before you start, make sure WP Travel Engine is installed and active on your WordPress site.
Open your WordPress dashboard
Open your WordPress dashboard. This is the admin area where you manage your website. You can usually find it at yourwebsite.com/wp-admin.
Go to the Custom Filters page
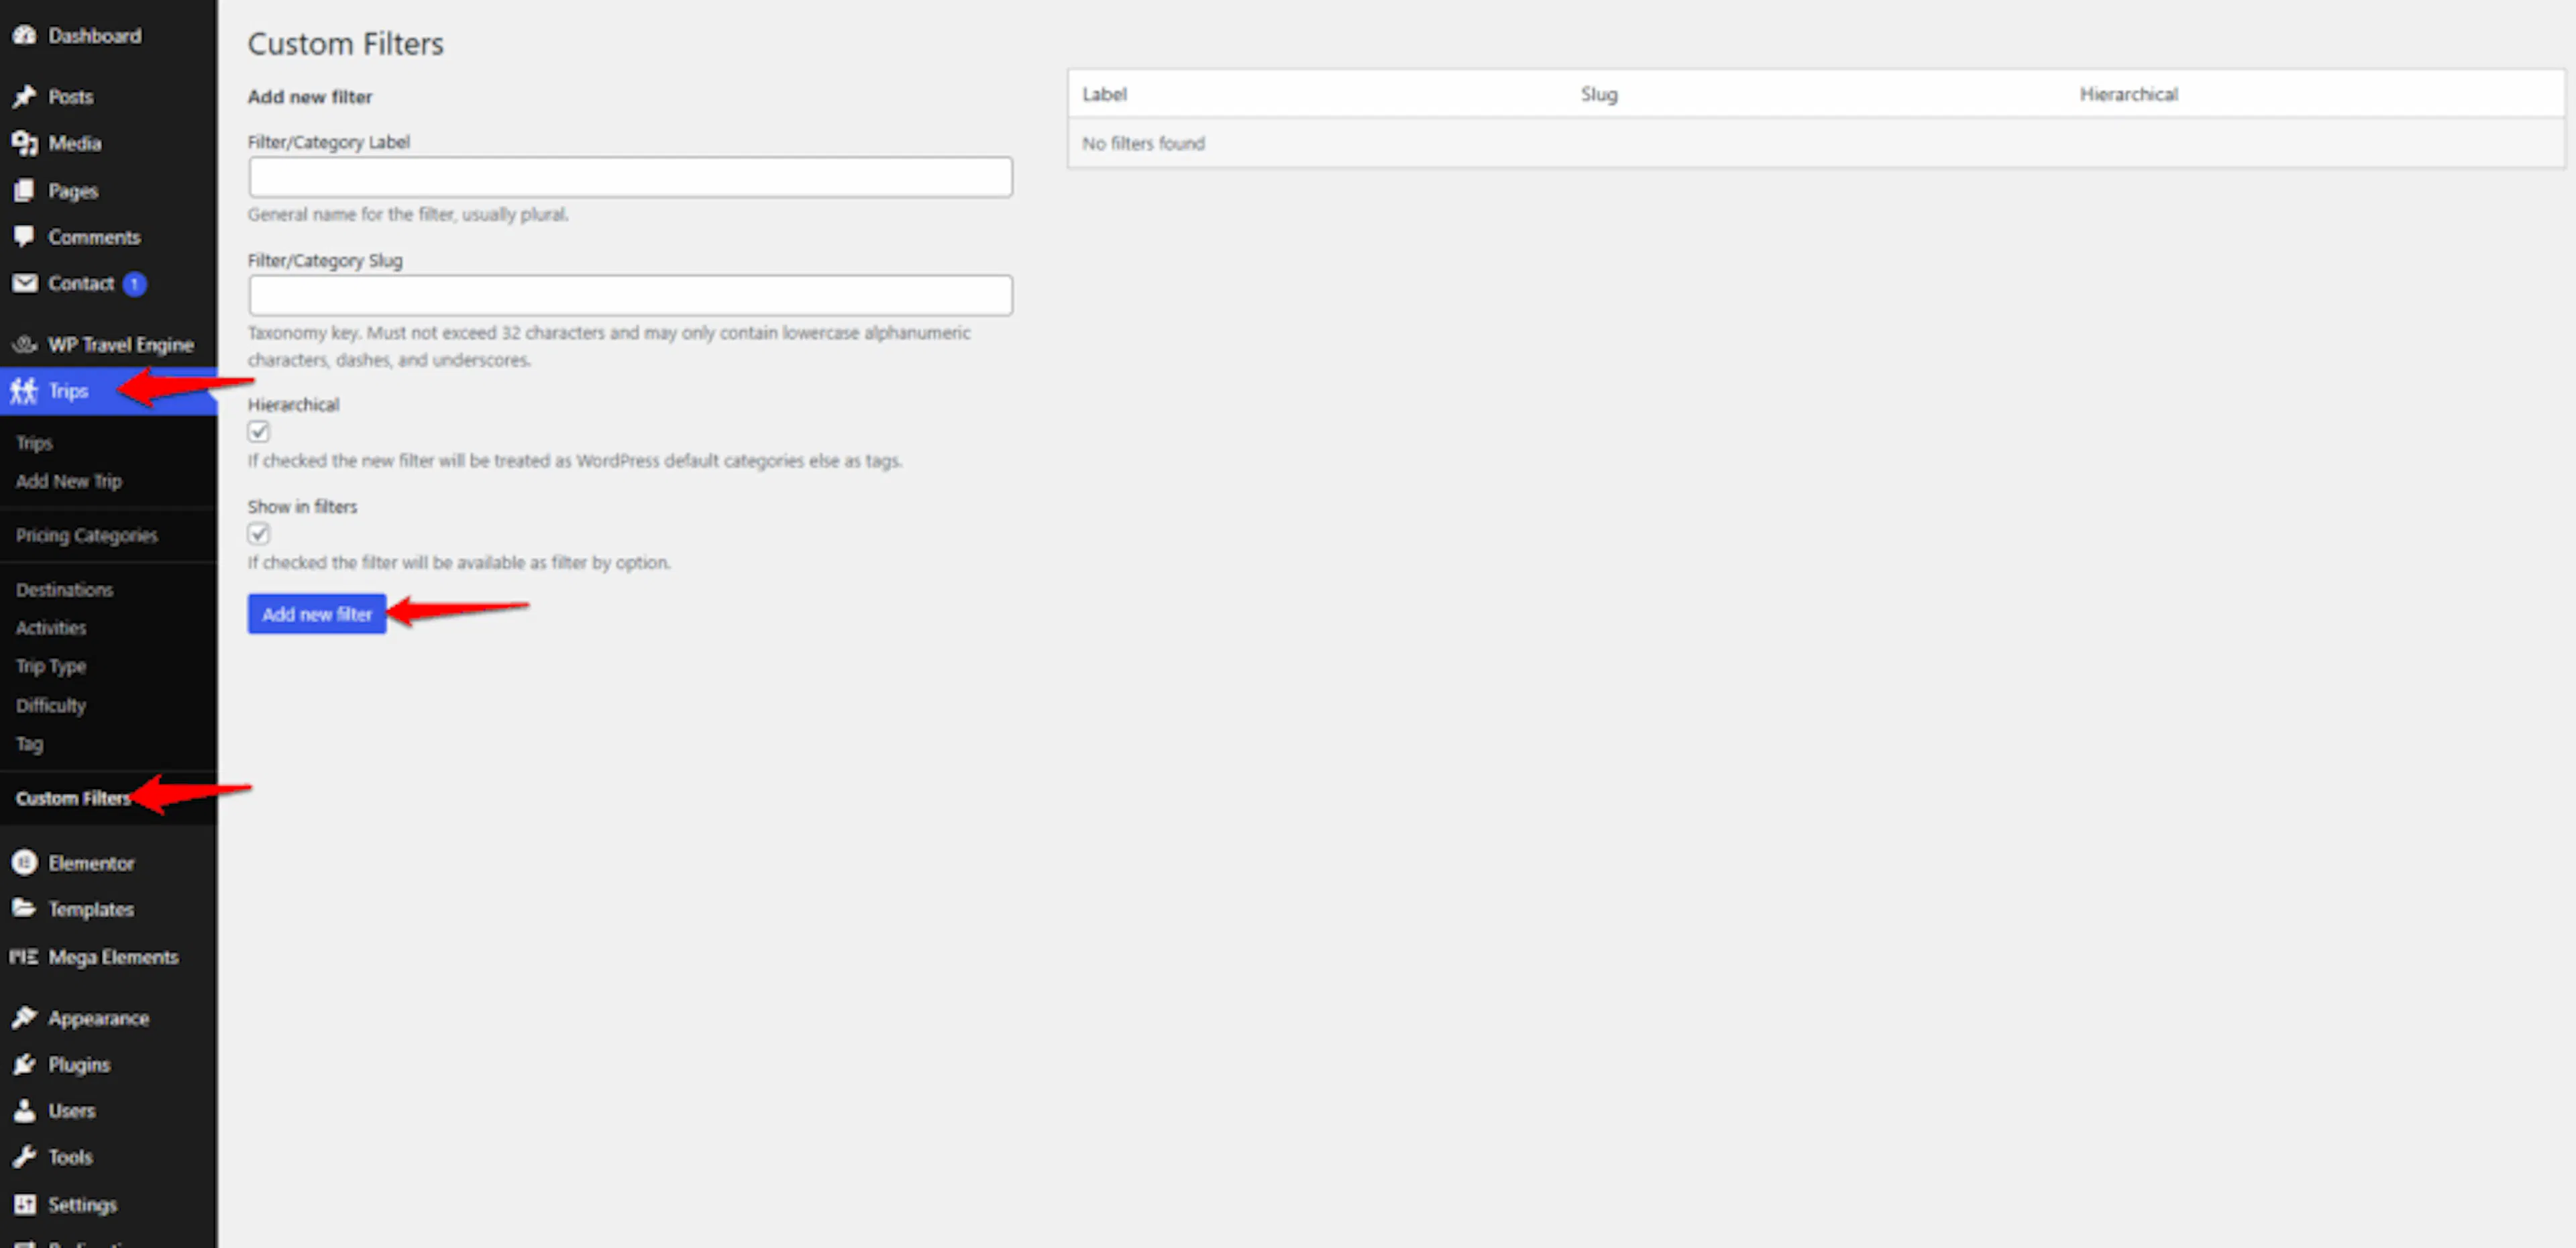
In the left-hand menu, click Trips. Then click Custom Filters.
Add a new filter
On the Custom Filters page, look for the option to add a new custom filter and select it.
The form gives your new filter a name and controls how it works.
Filter/Category Label: Enter the name travelers will see when they browse or filter trips. For example, use Difficulty Level for trek difficulty or Trip Duration for day tours and multi-day packages.
Filter/Category Slug: Enter the URL-friendly version of the filter name. A slug uses lowercase letters, no spaces, and hyphens between words. If your filter is called Difficulty Level, use difficulty-level as the slug.
Hierarchical: Choose whether the filter should have parent and child options. When this setting is checked, the filter acts like categories. For example, a Region filter could use Asia as a parent with Nepal and Bhutan underneath it. When this setting is unchecked, the filter acts like tags. Each option sits on its own with no parent or child relationship.
Show in Filters: Check this setting if you want the filter to appear on the Trip Archive page for travelers to use. Leave it unchecked if you want to use the filter only for organizing trips in the backend. The backend is the admin area of your WordPress site where you manage everything.
Save the filter when you finish. Your new filter is ready for its options.
Adding categories or tags to a custom filter
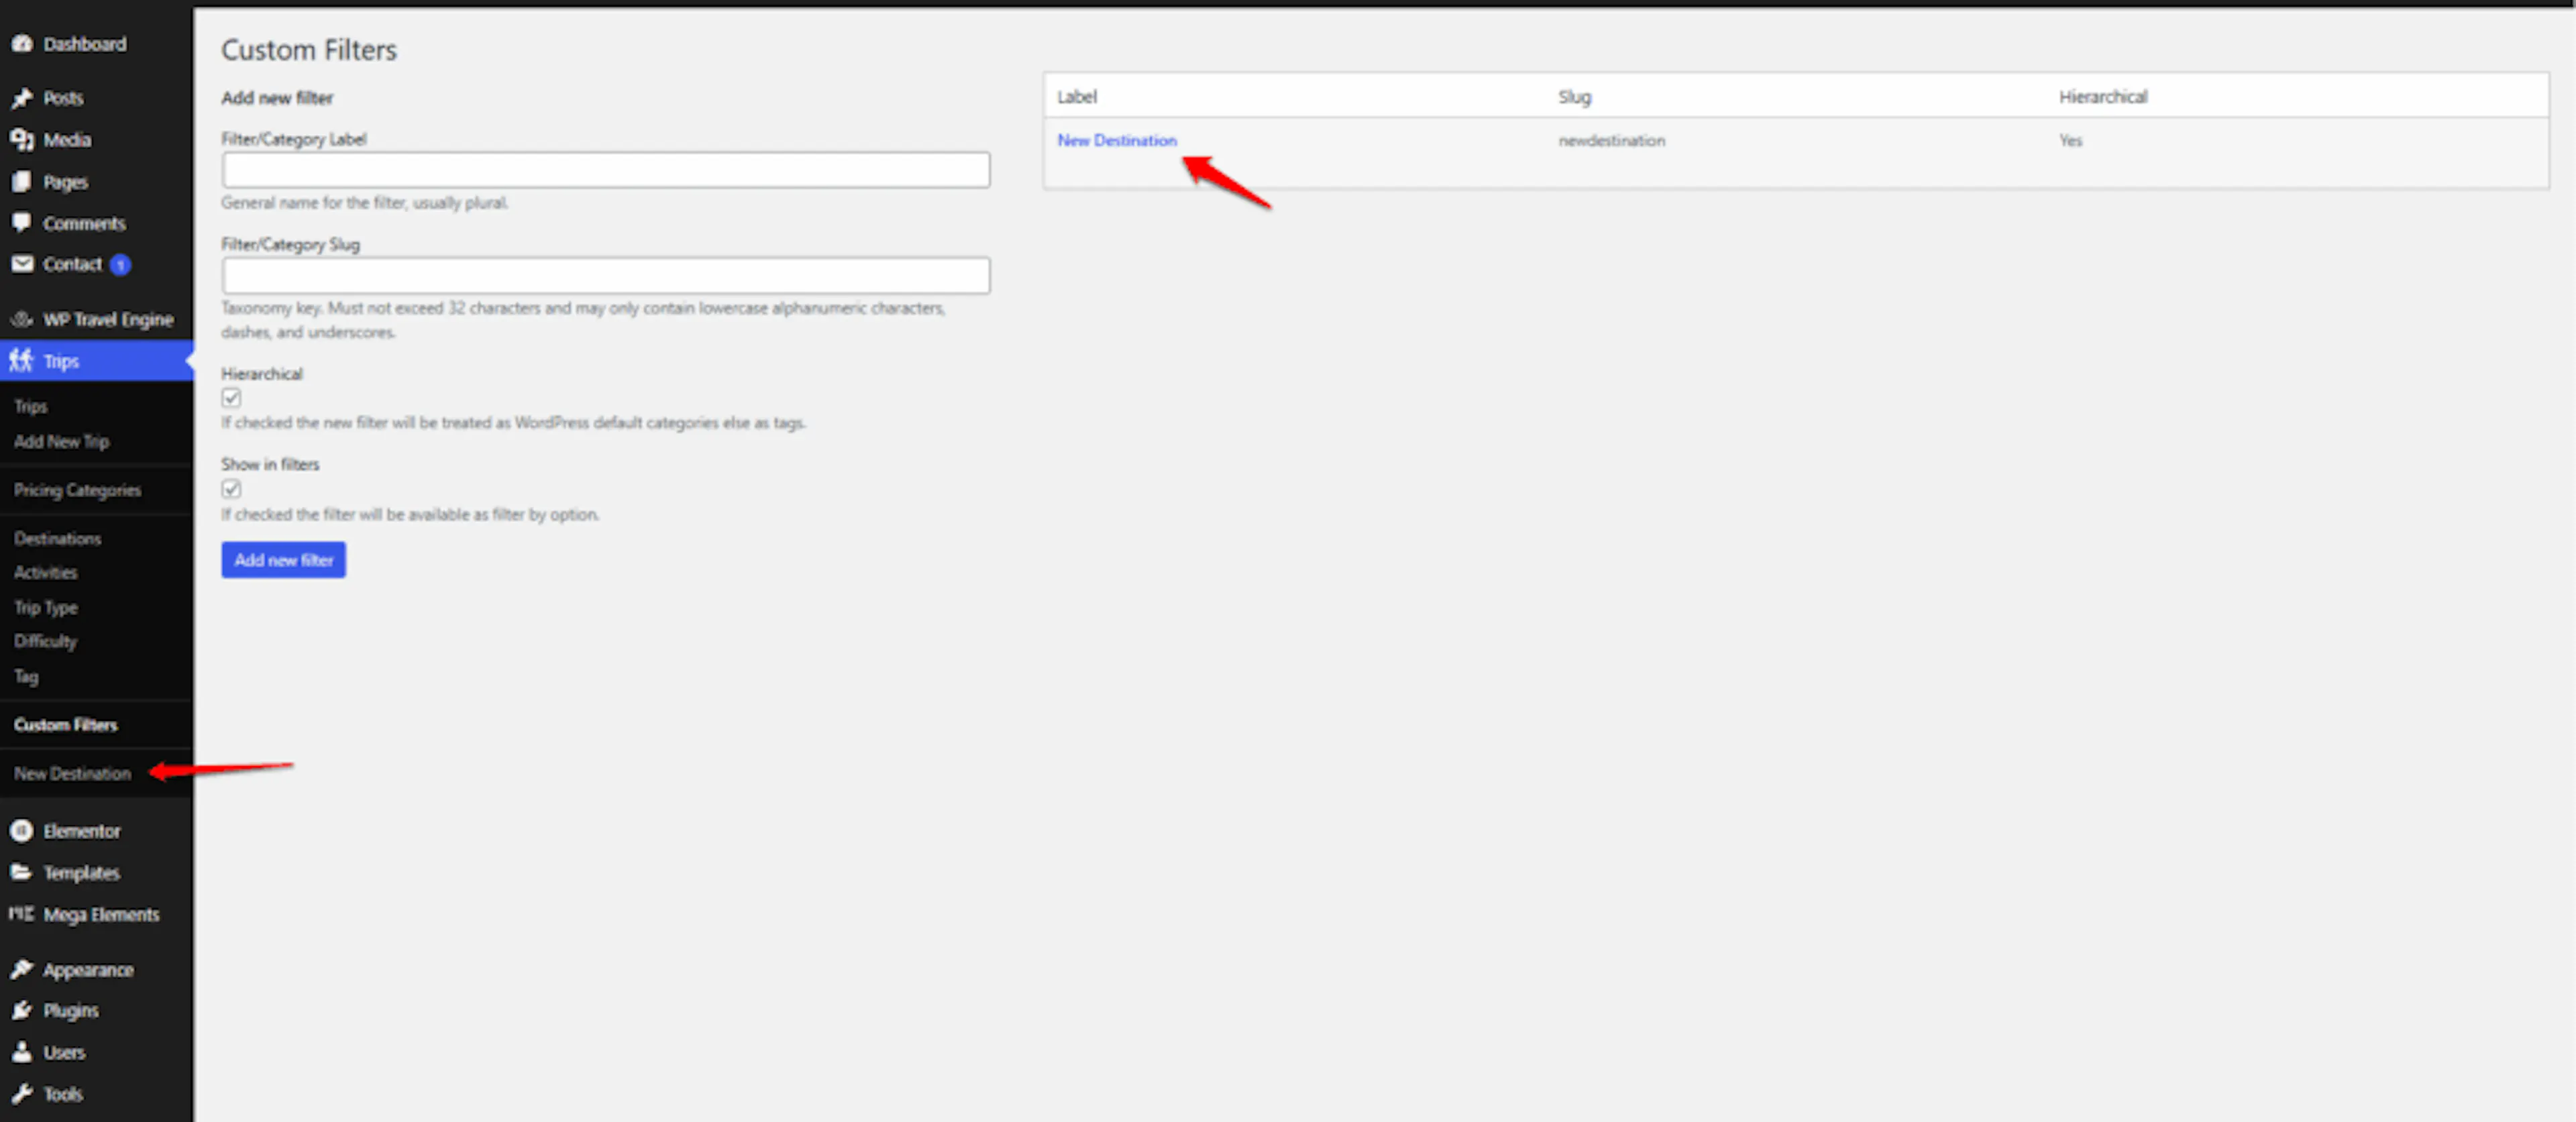
Creating the filter gives you the place to organize trips. You still need to add the options inside it, such as Easy, Moderate, and Hard inside a Difficulty Level filter.
Open the custom filter
Click on the custom filter you created.
Add categories or tags
Type the categories or tags you want to use under this filter. Save your changes when you finish.
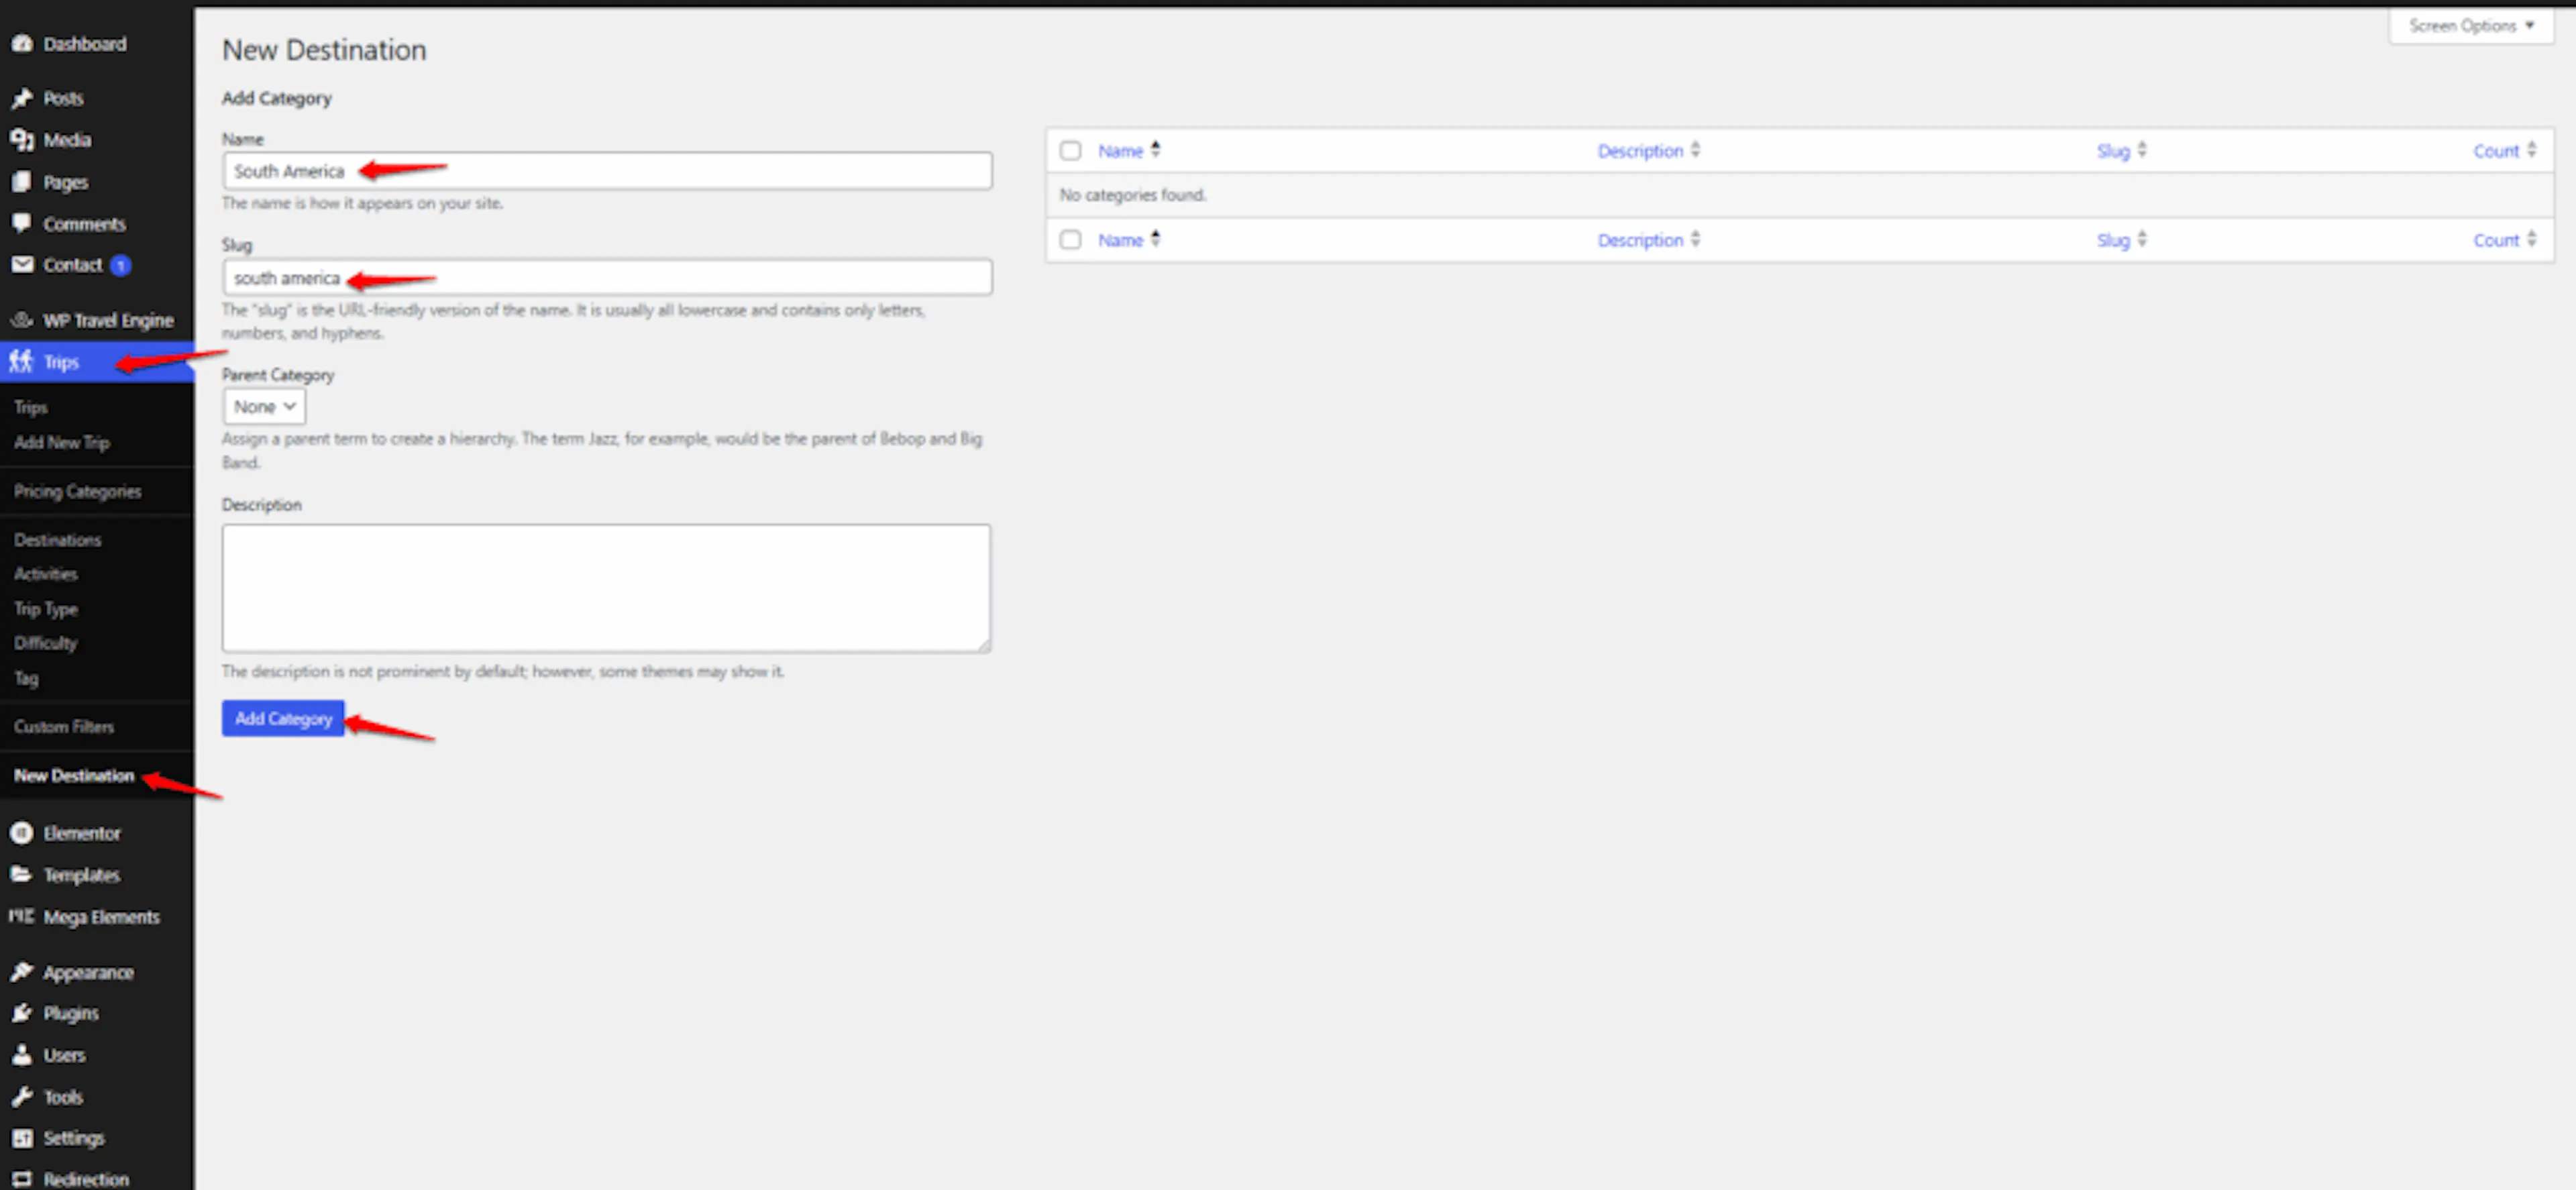
The filter will not show on the Trip Archive page unless at least one trip uses a category or tag from that filter. Assign at least one trip for the filter to appear.
Once your options are ready, assign them to the trips that belong in each group.
Assigning custom filters to trips
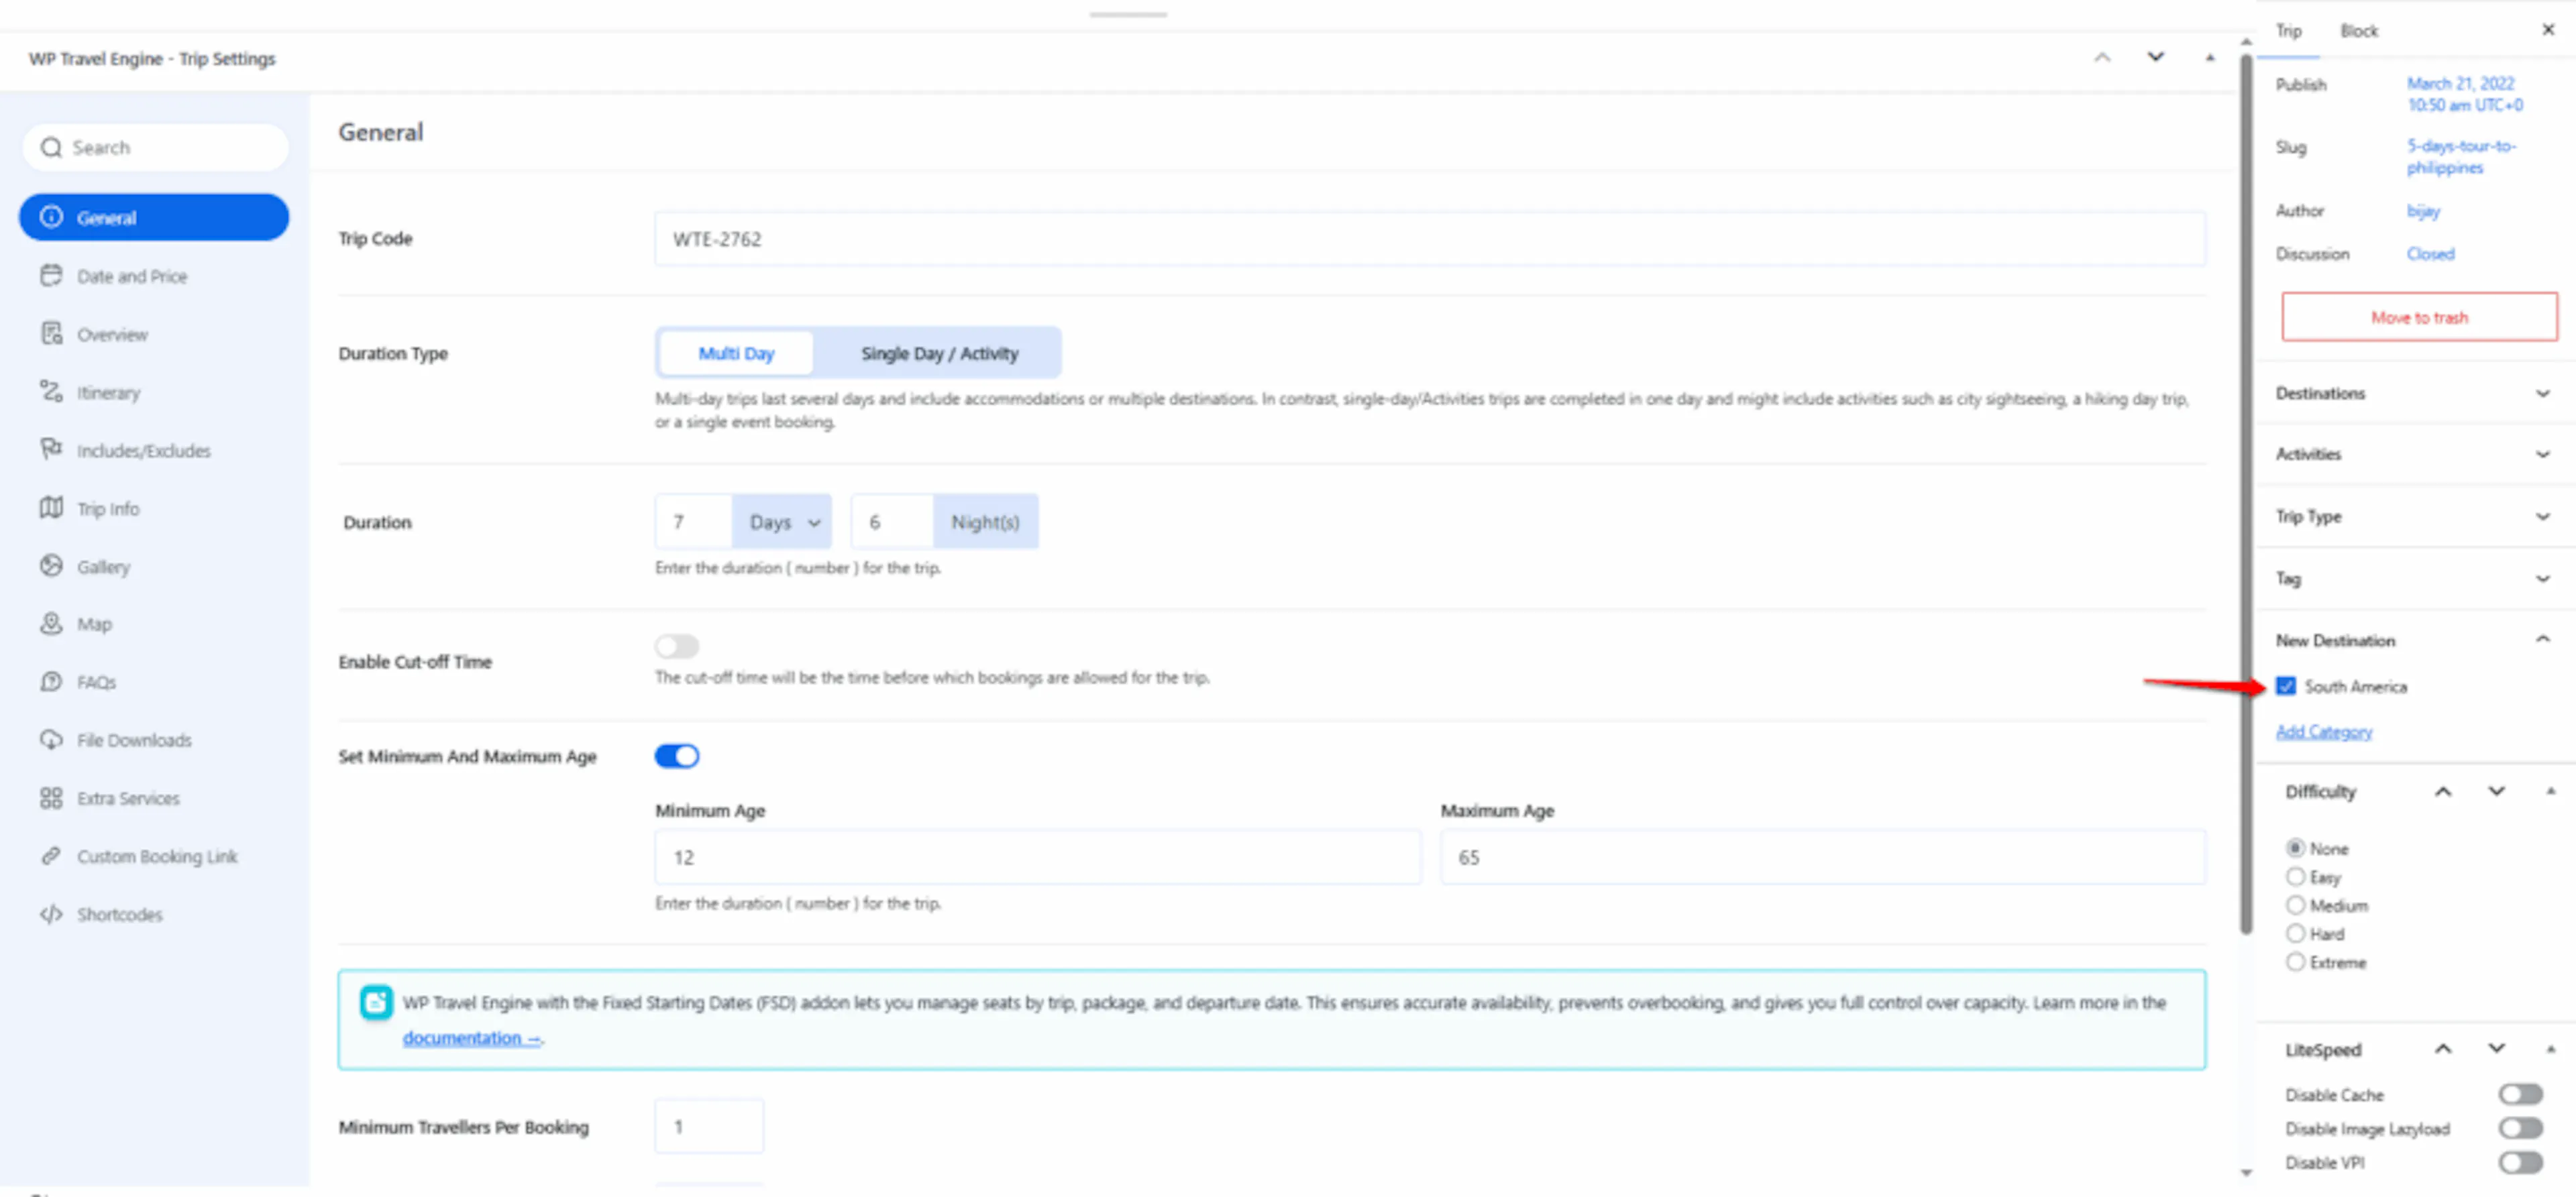
Now that your filter has categories or tags, tell each trip which option it belongs to. This assignment makes the filter work on your site.
Open the trip list
In the left-hand menu of your dashboard, go to Trips and then All Trips.
Edit the trip
Click on the trip you want to assign a filter to.
Find the custom filter panel
On the right side of the trip editing page, find your custom filter. It appears alongside other taxonomies such as Destination, Trip Type, and Pricing Categories.
Select the category or tag
Check the box or select the category or tag that fits the trip.
Save the trip
Click Update to save your changes.
After you assign the filter, it appears on the Trip Archive page. Travelers can use it to narrow down their search and find the trips that match their preferences.
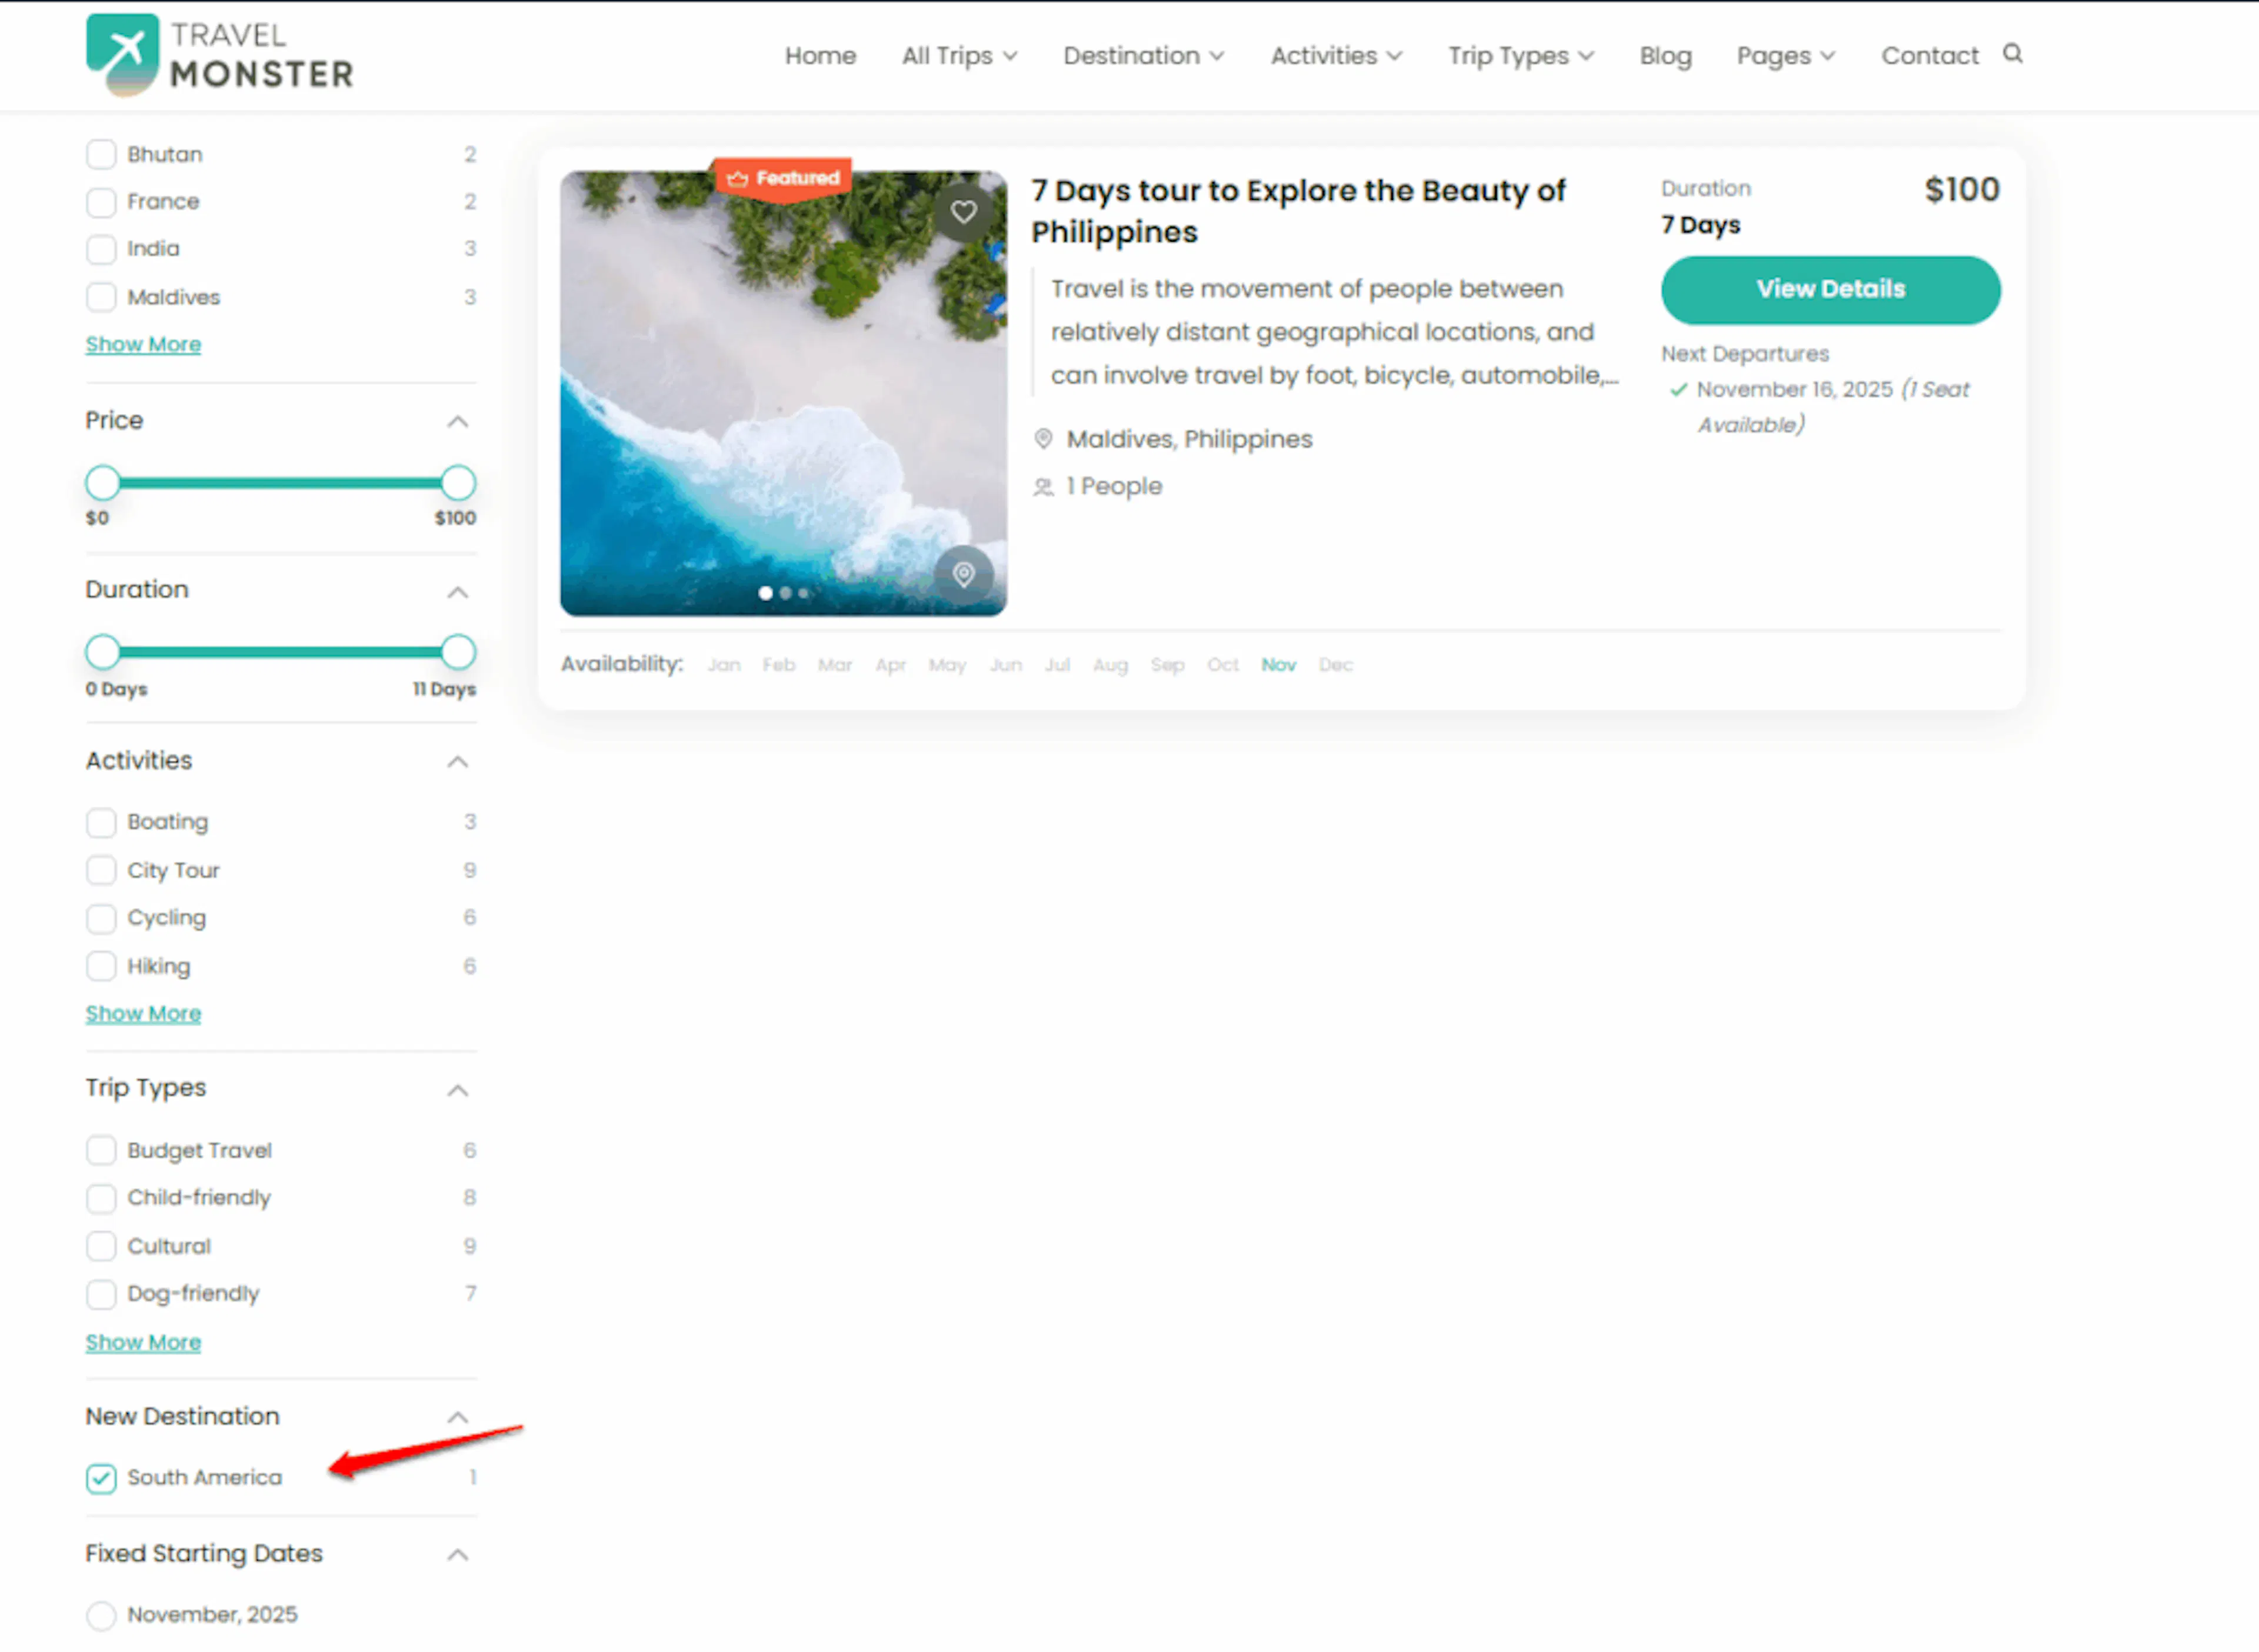
You can adjust the filter or its options later if your trip offerings change.
Editing or removing a filter later
You can update or delete filters anytime through the dashboard.
- Edit: Change the filter's name, slug, or settings when you need to.
- Remove: Delete the filter completely if you no longer need it.
Your changes take effect right away, so you can keep your trip filters up to date.
Benefits of using Custom Filters
- Organize trips in ways that fit your business, such as by Difficulty, Season, or Travel Style.
- Help travelers find the right trip faster by giving them more useful ways to narrow their search.
- Increase bookings because travelers who find what they want quickly are more likely to book.
- Choose filters that match your business needs, whether you offer treks, day tours, multi-day packages, or seasonal pricing.
If you're still stuck or have a question we didn't cover, our support team is happy to help. Reach out at our support page and we'll get you sorted.