

Fix: Trip Facts Not Appearing on the Trip Page
Find out why your trip facts aren't showing on your trip page and turn them on in a few steps.
Trip Facts, also called Trip Info, is the section on your trip page that shows key details in one place. Say you run a 5-day trek to Everest Base Camp. Before booking, travelers want to know the starting point, group size, accommodation type, and what's included. Trip Facts puts all of that in one clean section on your trip page.
If yours aren't showing up, don't worry. This guide walks you through how to fix it, step by step.
What you'll need before you start: WP Travel Engine installed and active on your WordPress site, and at least one trip already created.
Set up your Trip Info fields
Trip Info fields are created in one central place first. Then you can use those same fields on any trip. This means you set up your fields once and reuse them across every tour you create.
Open the global Trip Info settings
First, go to the place where all Trip Info fields are managed.
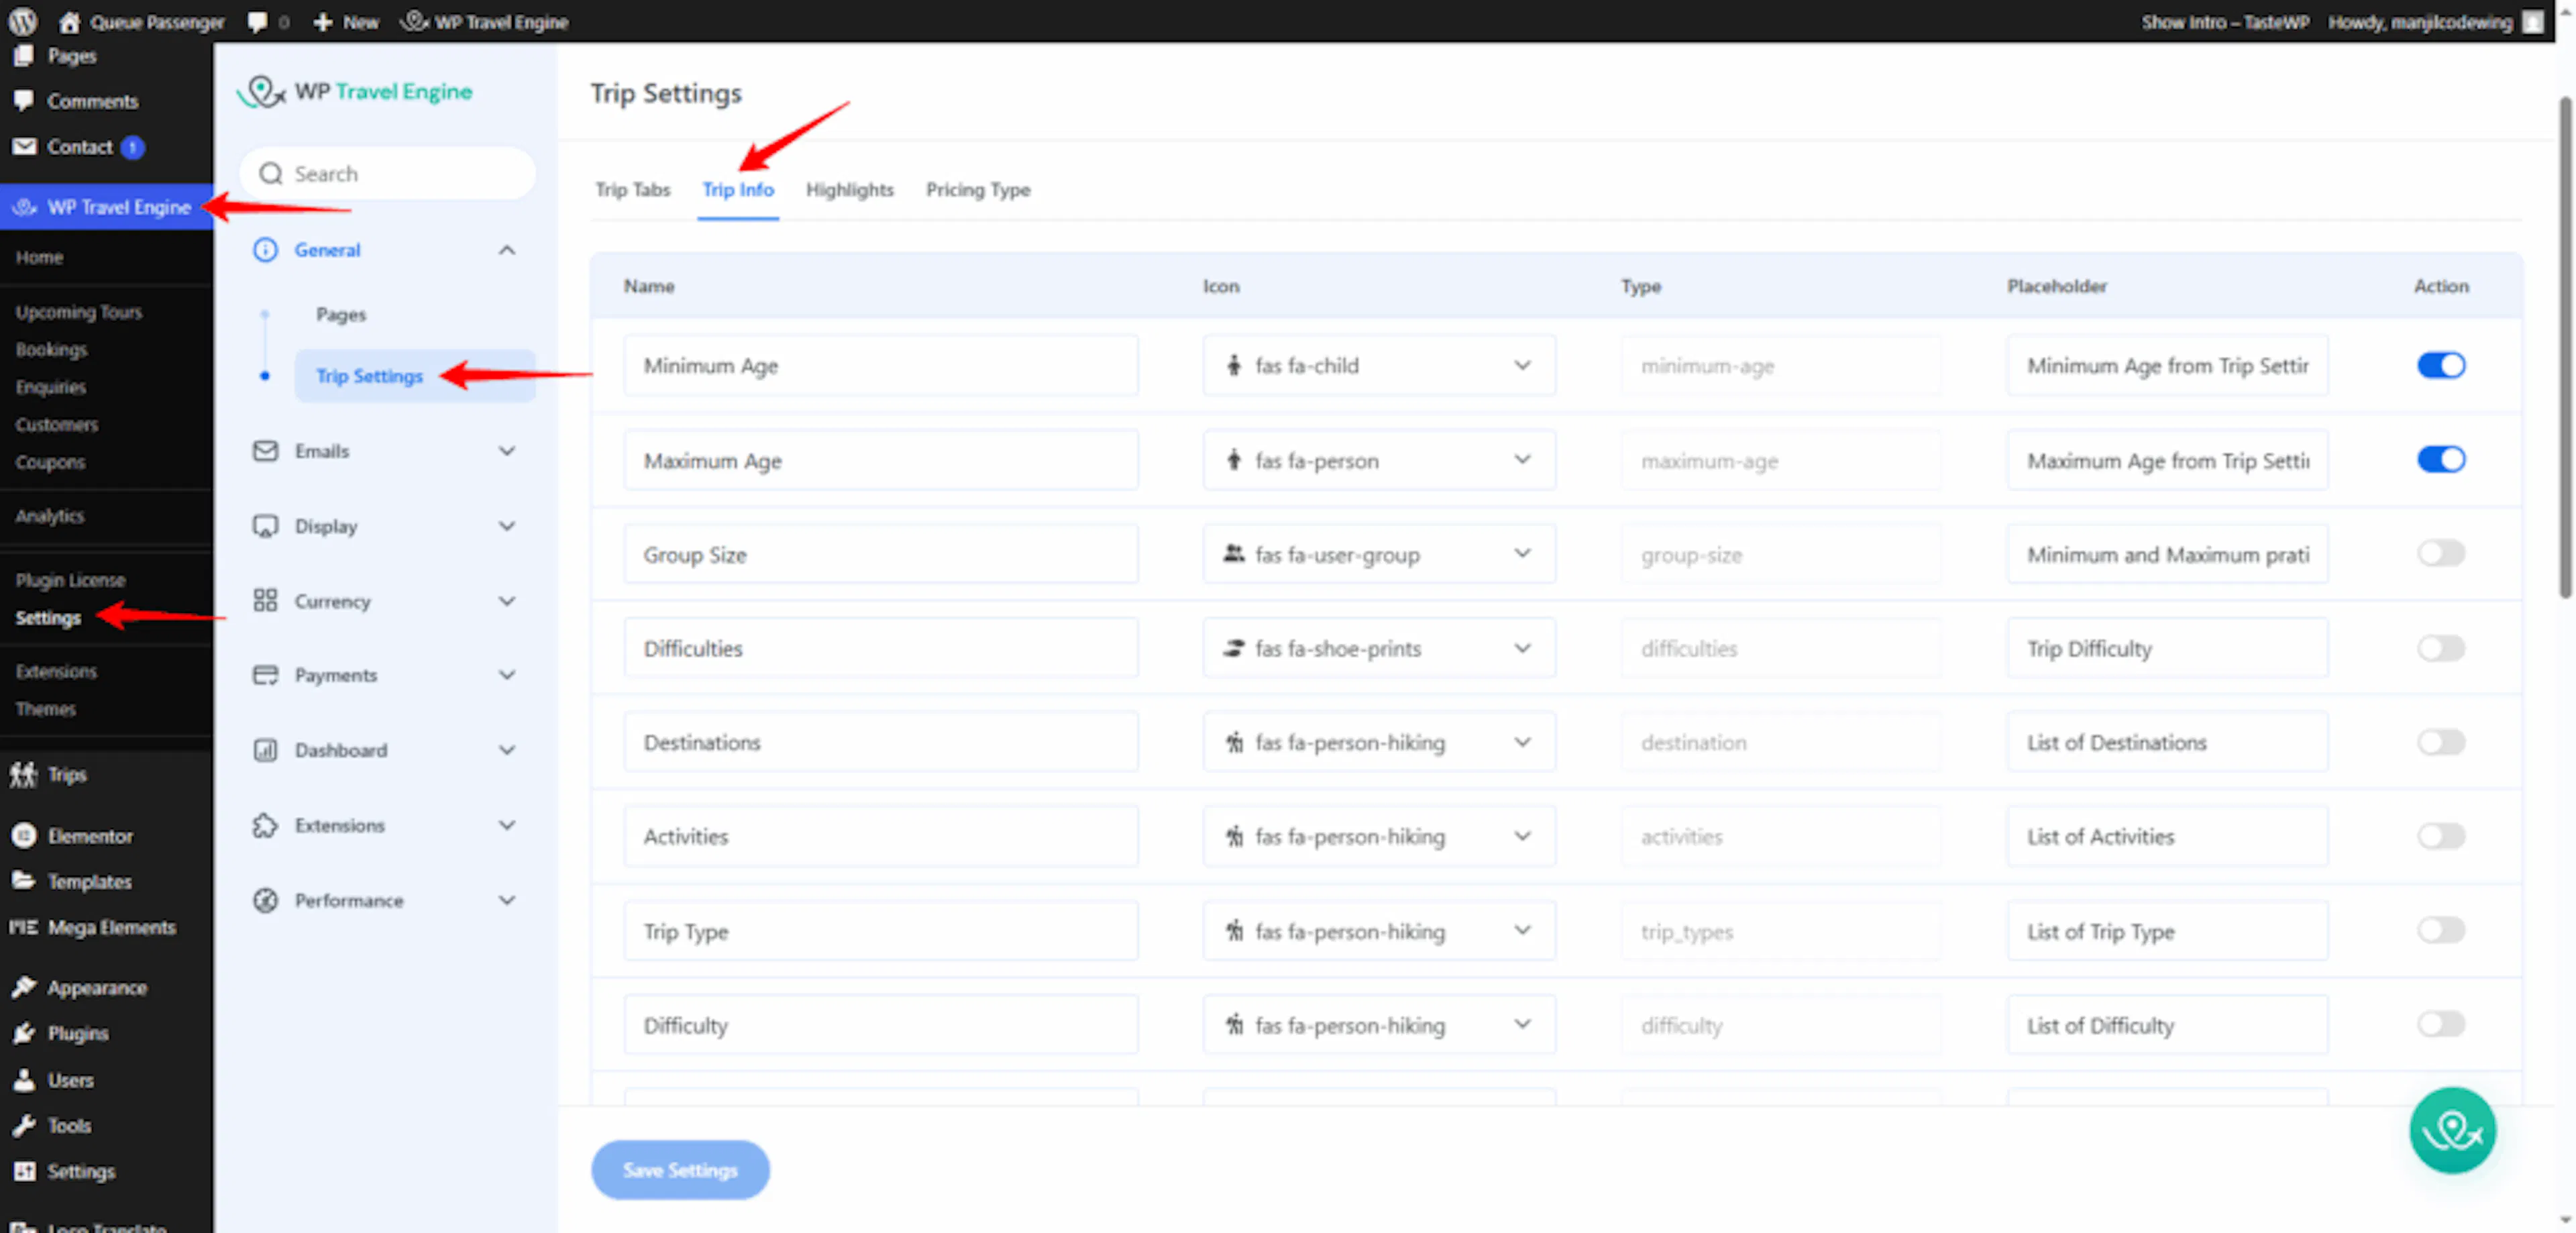
Go to Dashboard → Settings → General → Trip Settings → Trip Info.
The dashboard is the main screen you see after you log in to WordPress. The menu runs down the left side of that screen.
This is where you create, edit, or delete the Trip Info fields available across your site.
Add a new Trip Info field
Now you'll set up the field names you want to reuse on your trips.
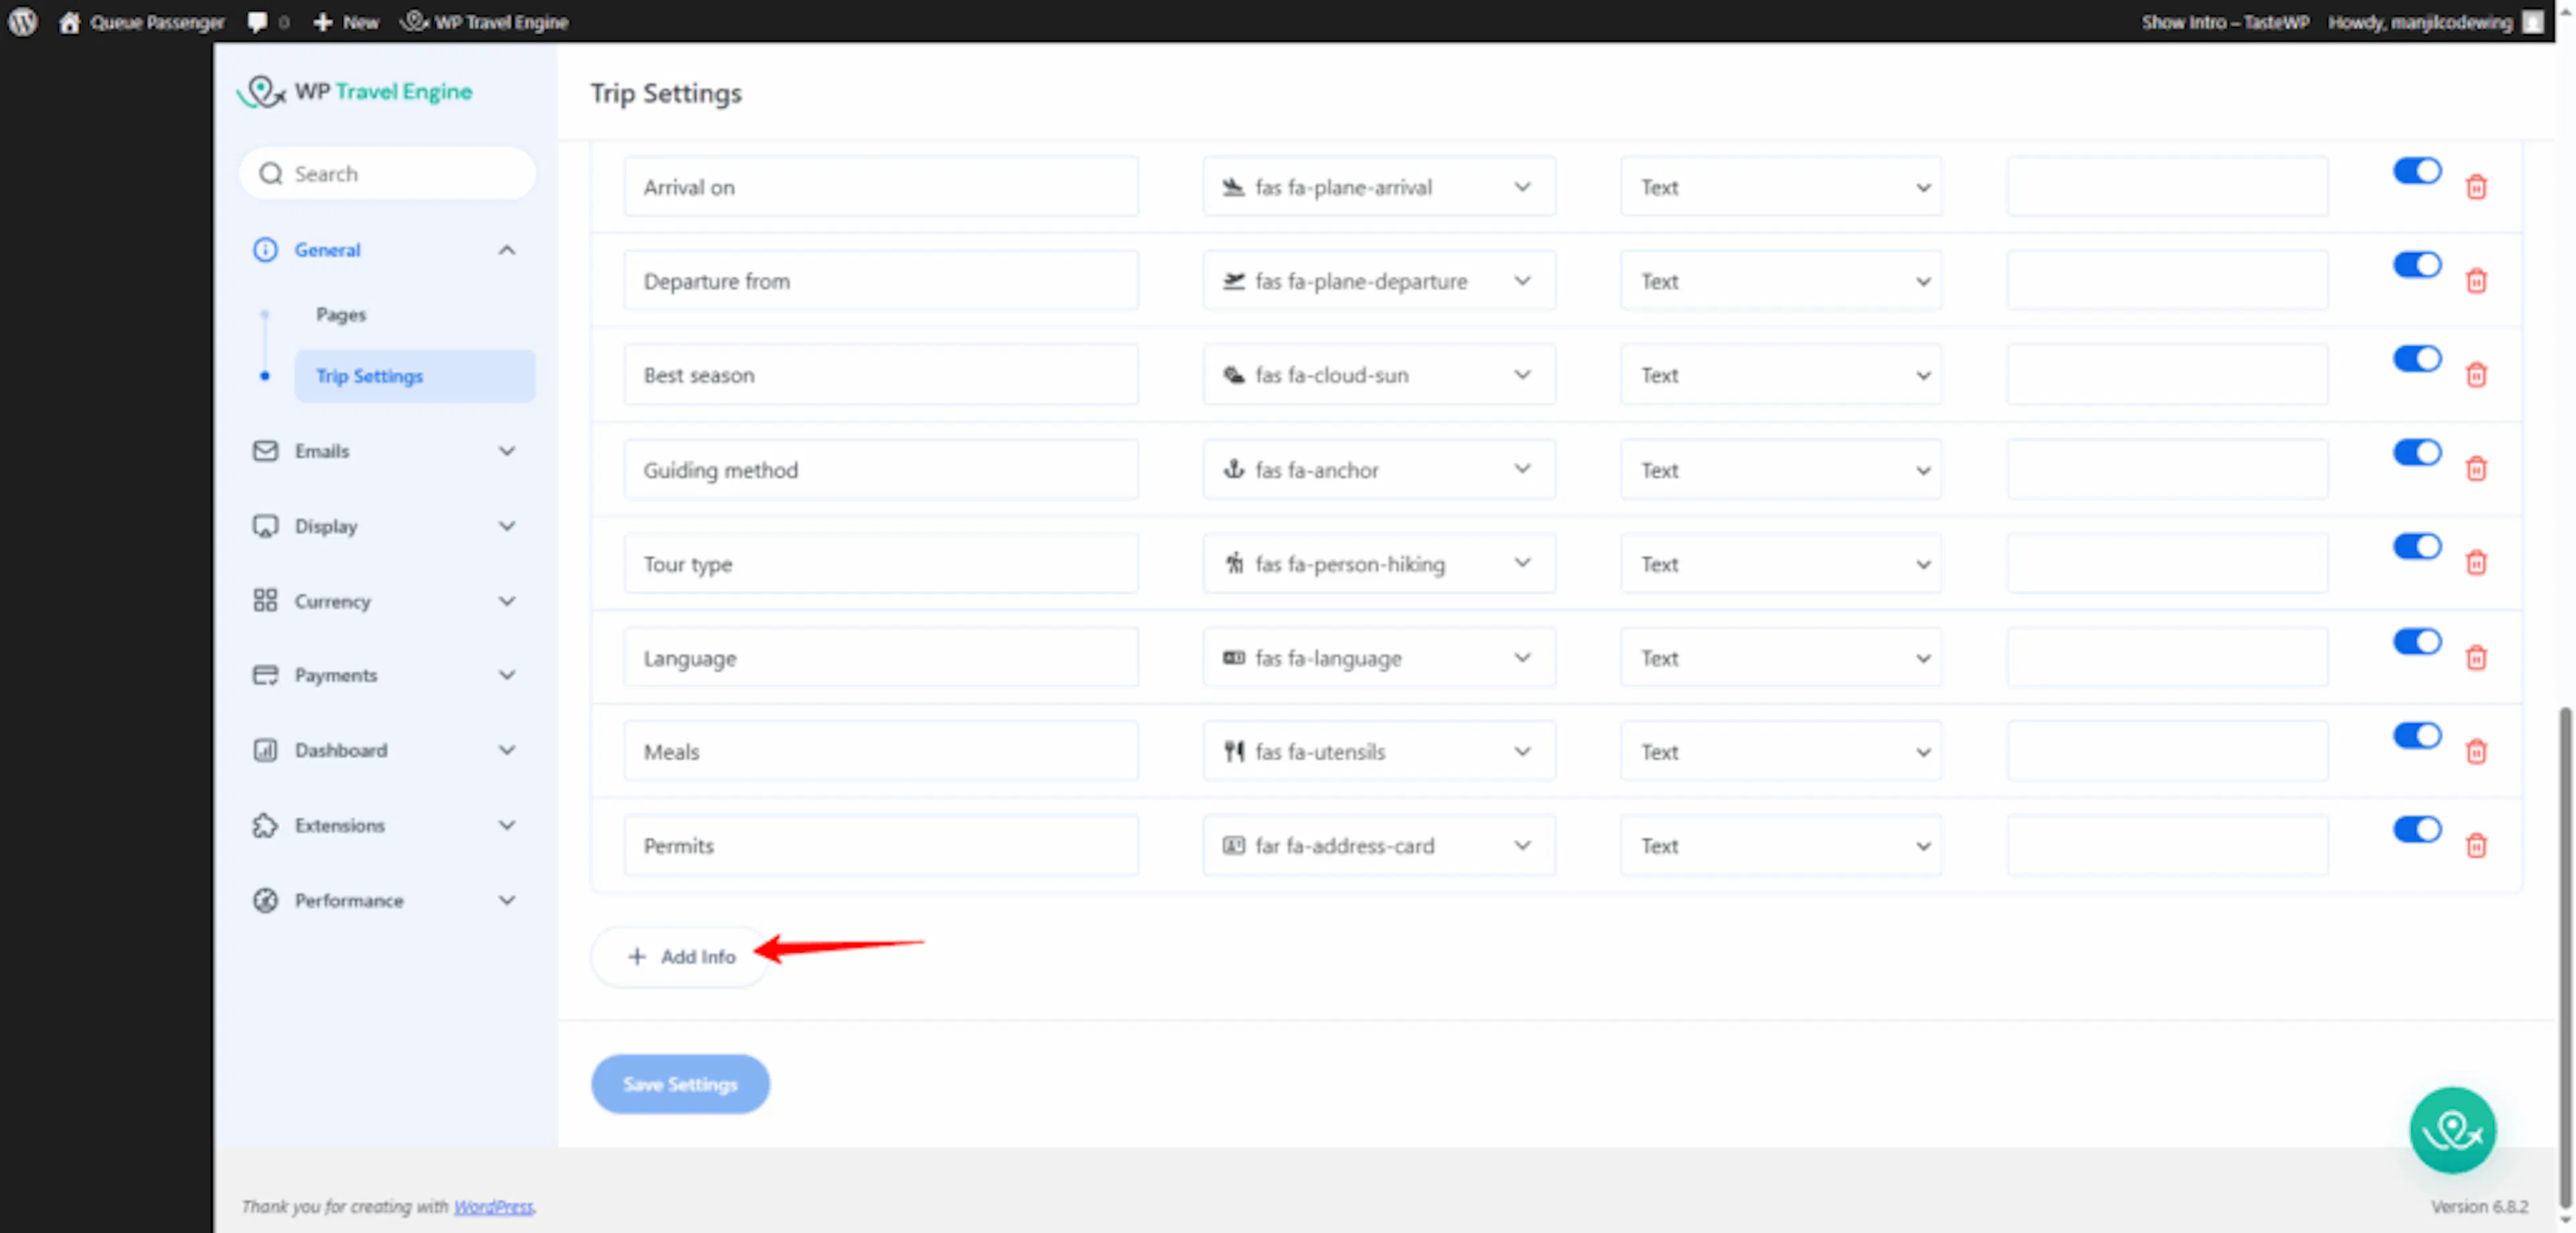
Click Add trip info. Then fill in these details:
- Field name - This is the label travelers will see. For example, Group Size or Accommodation.
- Field icon - This is the small symbol shown next to the fact on the trip page. For example, a bed icon for accommodation.
- Field type - This decides what kind of information the field accepts. For example, a text field lets you type any answer, while a dropdown gives travelers a set list of choices to pick from.
- Field placeholder - This is the hint text shown inside the field before you type anything. For example, if your field is about accommodation, the placeholder might say Tea house lodges to show you what kind of answer to type.
Add the info to a specific trip
Once the field exists, you still need to fill it in for each trip that should show it.
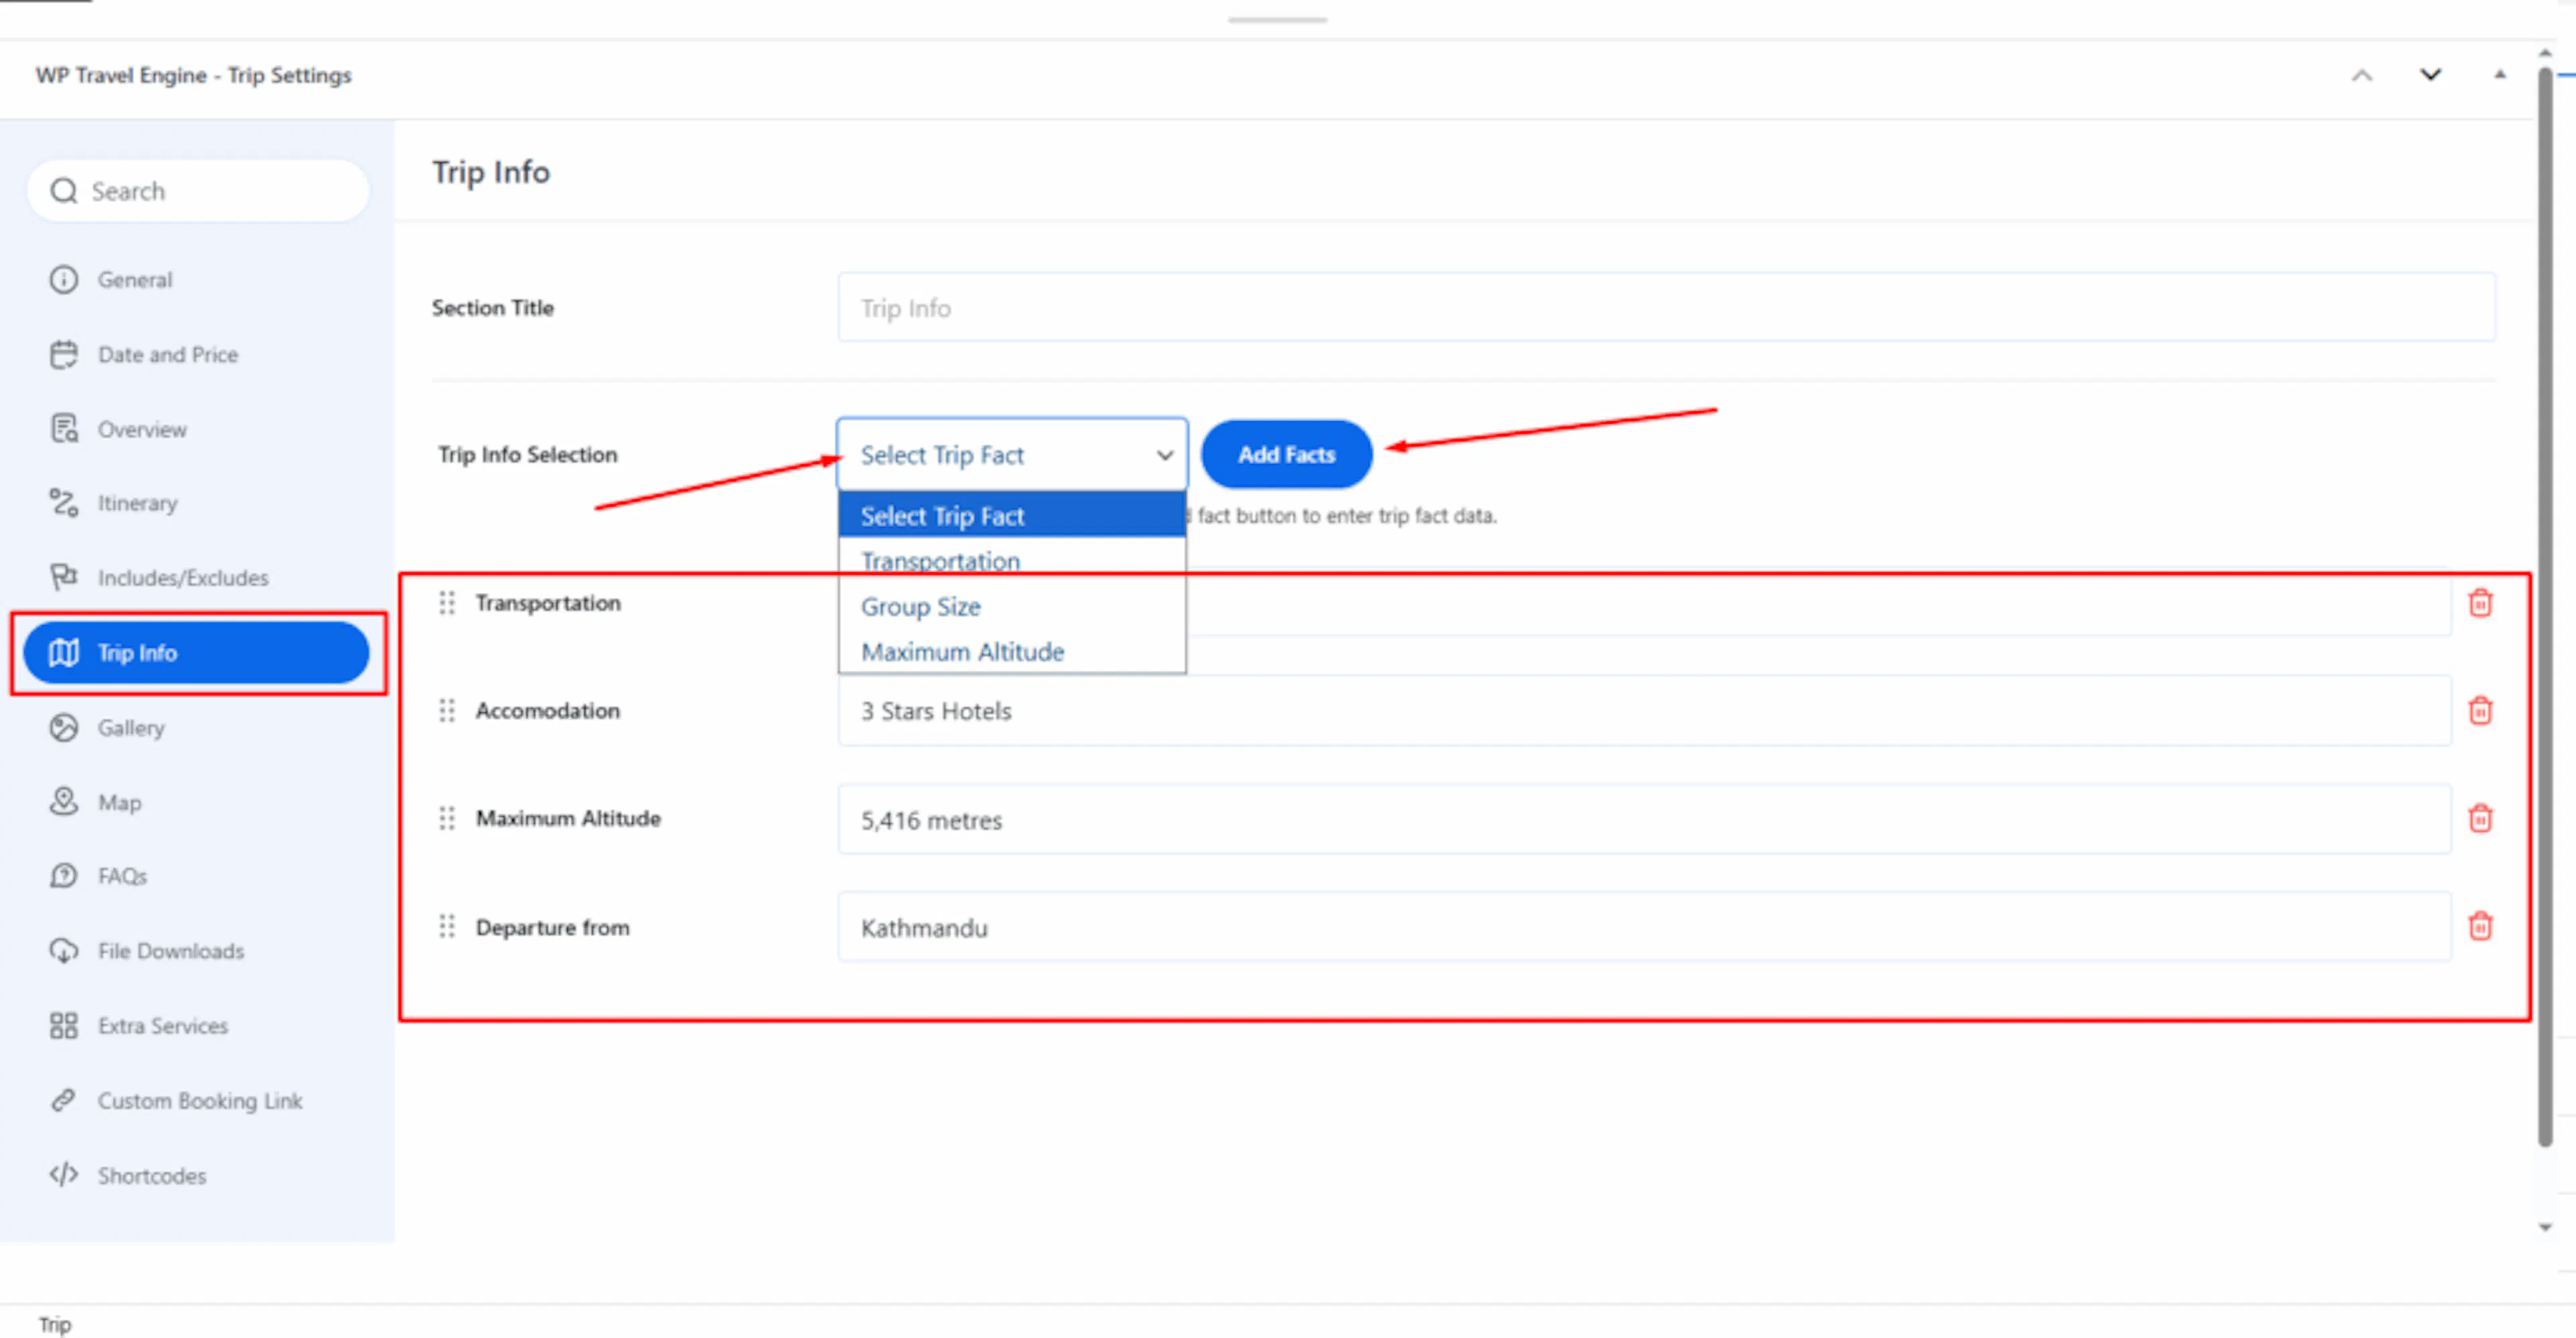
Open the trip you want to edit. Then enter the value for that trip in the Trip Info field.
For example, if you created a field called Accommodation, you would open your Annapurna trek and type Tea house lodges in that field.
Once your fields are set up, the next thing to check is whether they are turned on to display.
Turn on the Trip Info display
There is a separate switch that controls whether Trip Facts appear on the trip page your visitors see. Even if you've added all the fields, they won't show up unless this is turned on.
This is the most common reason Trip Facts don't show up. If you've added your fields and they're still not appearing, check this setting first.
Open the Single Trip display settings
Next, go to the display settings for your trip page.
Go to Dashboard → WP Travel Engine → Settings → Display → Single Trip → General.
You'll find WP Travel Engine in the left-hand menu of your WordPress dashboard.
Enable Show Trip Infos
Turn on Show Trip Infos.
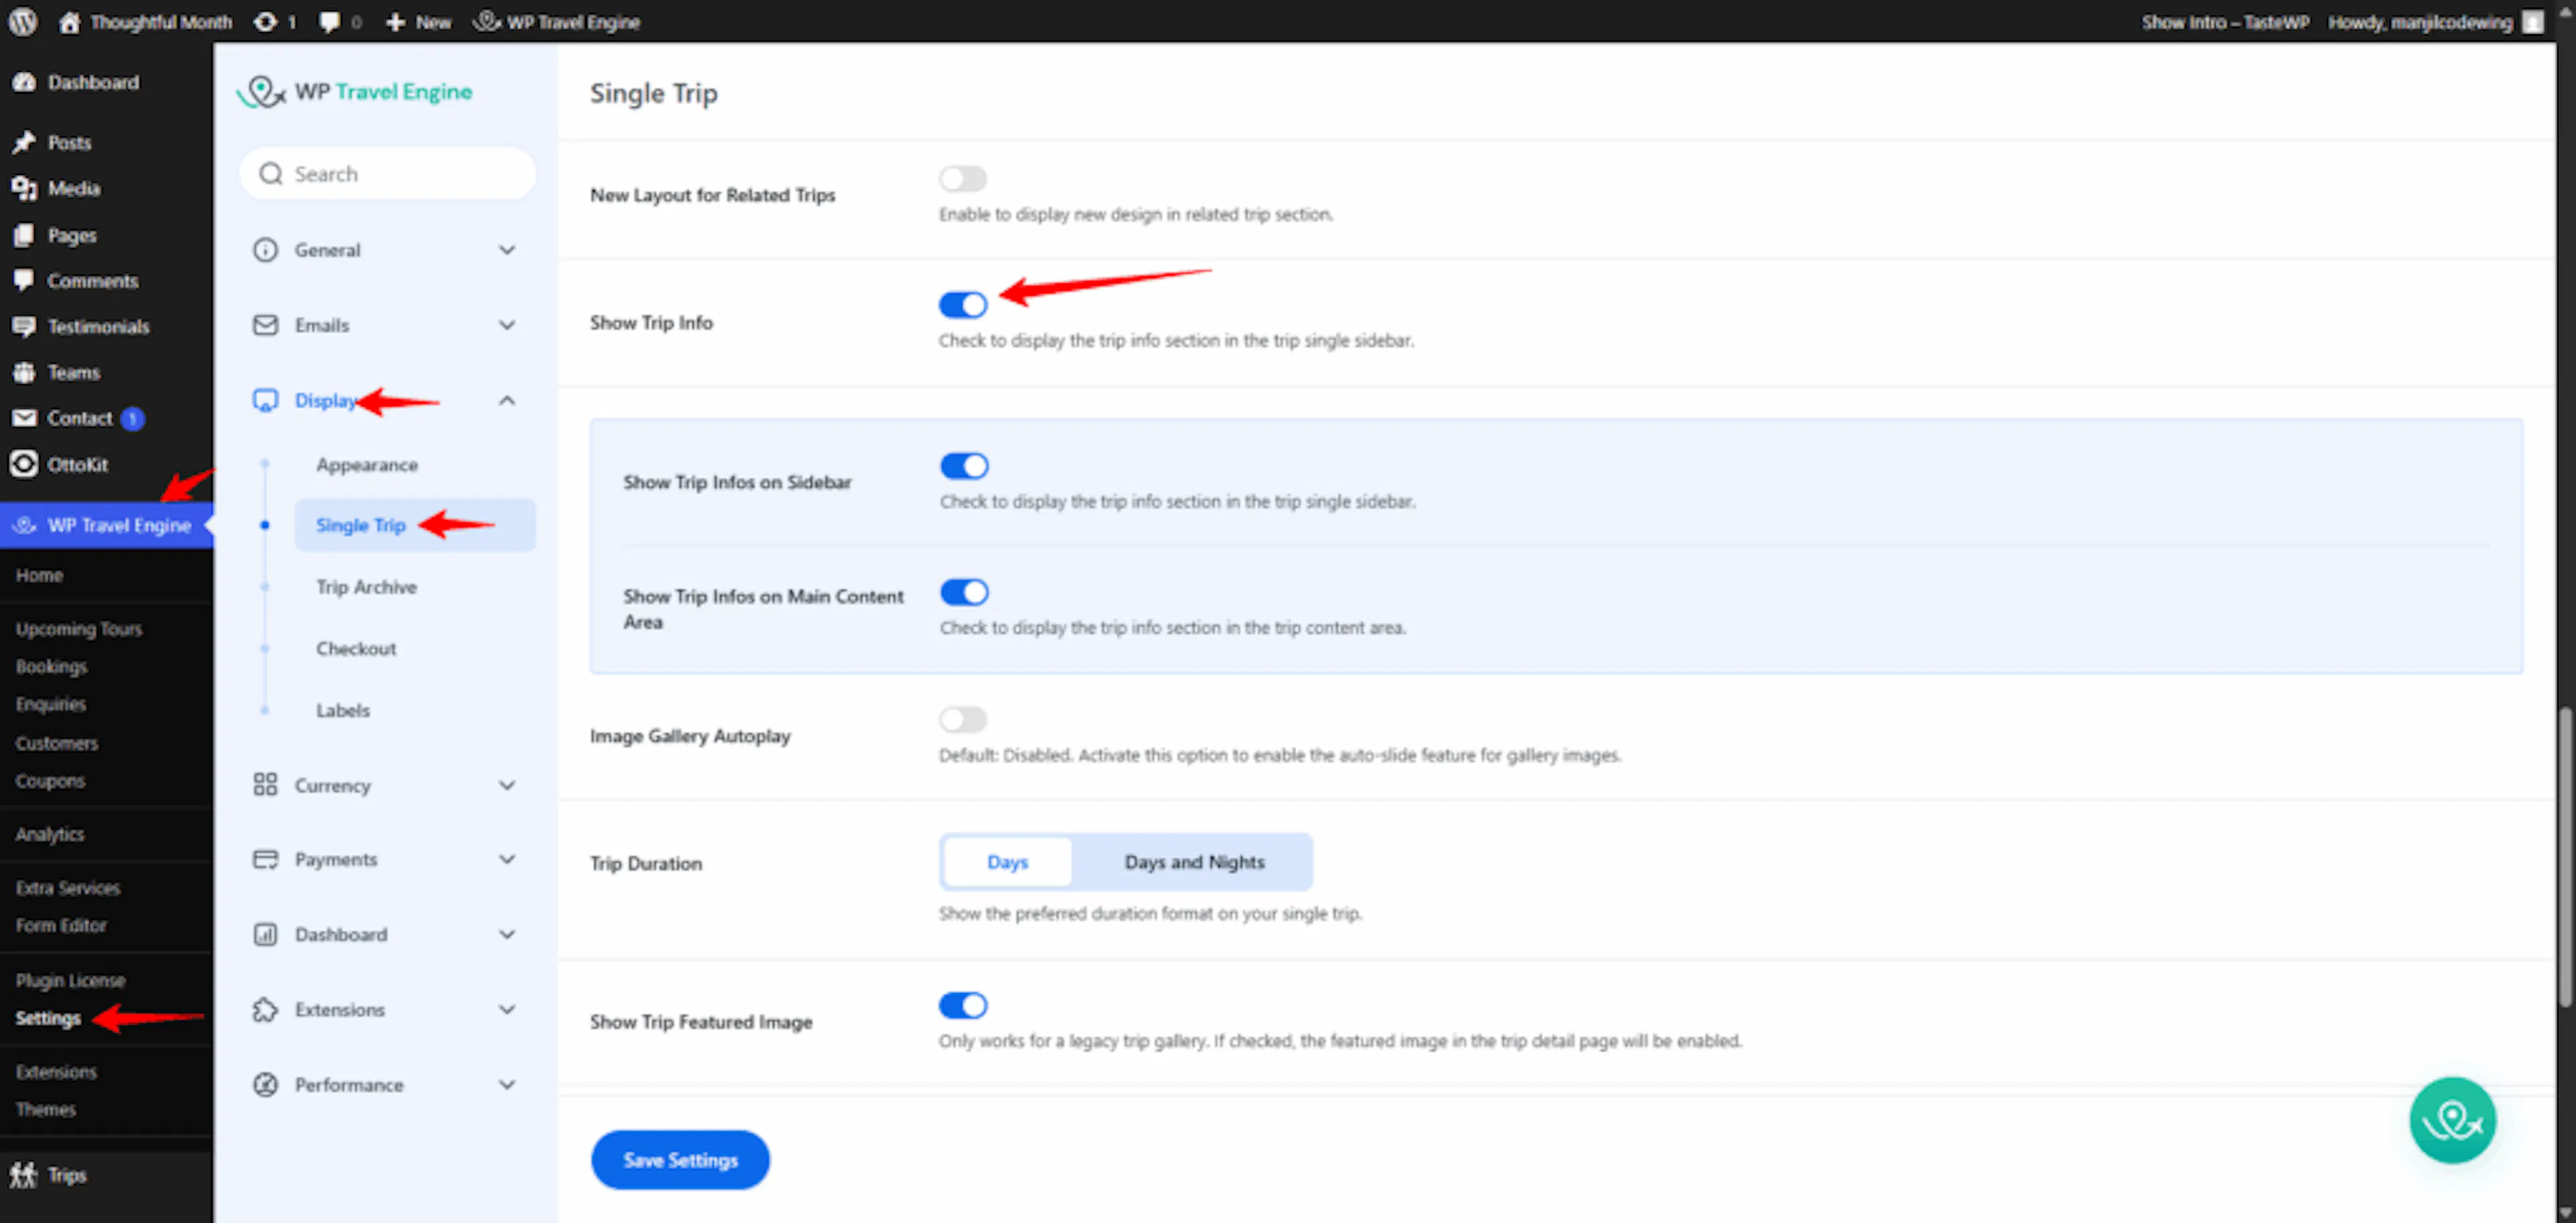
When you turn this on, you'll see two more options. One shows Trip Facts in the sidebar. The other shows them in the main content area.
Now let's look at where on the page your Trip Facts will appear.
Show Trip Infos on Sidebar
Use this option if you want Trip Facts to appear in the sidebar. A sidebar is the narrow column that runs beside the main content of the page.
If your trip page has a narrow column on the right side with a booking form, that is the sidebar. Turn this on to show your Trip Facts in that column.
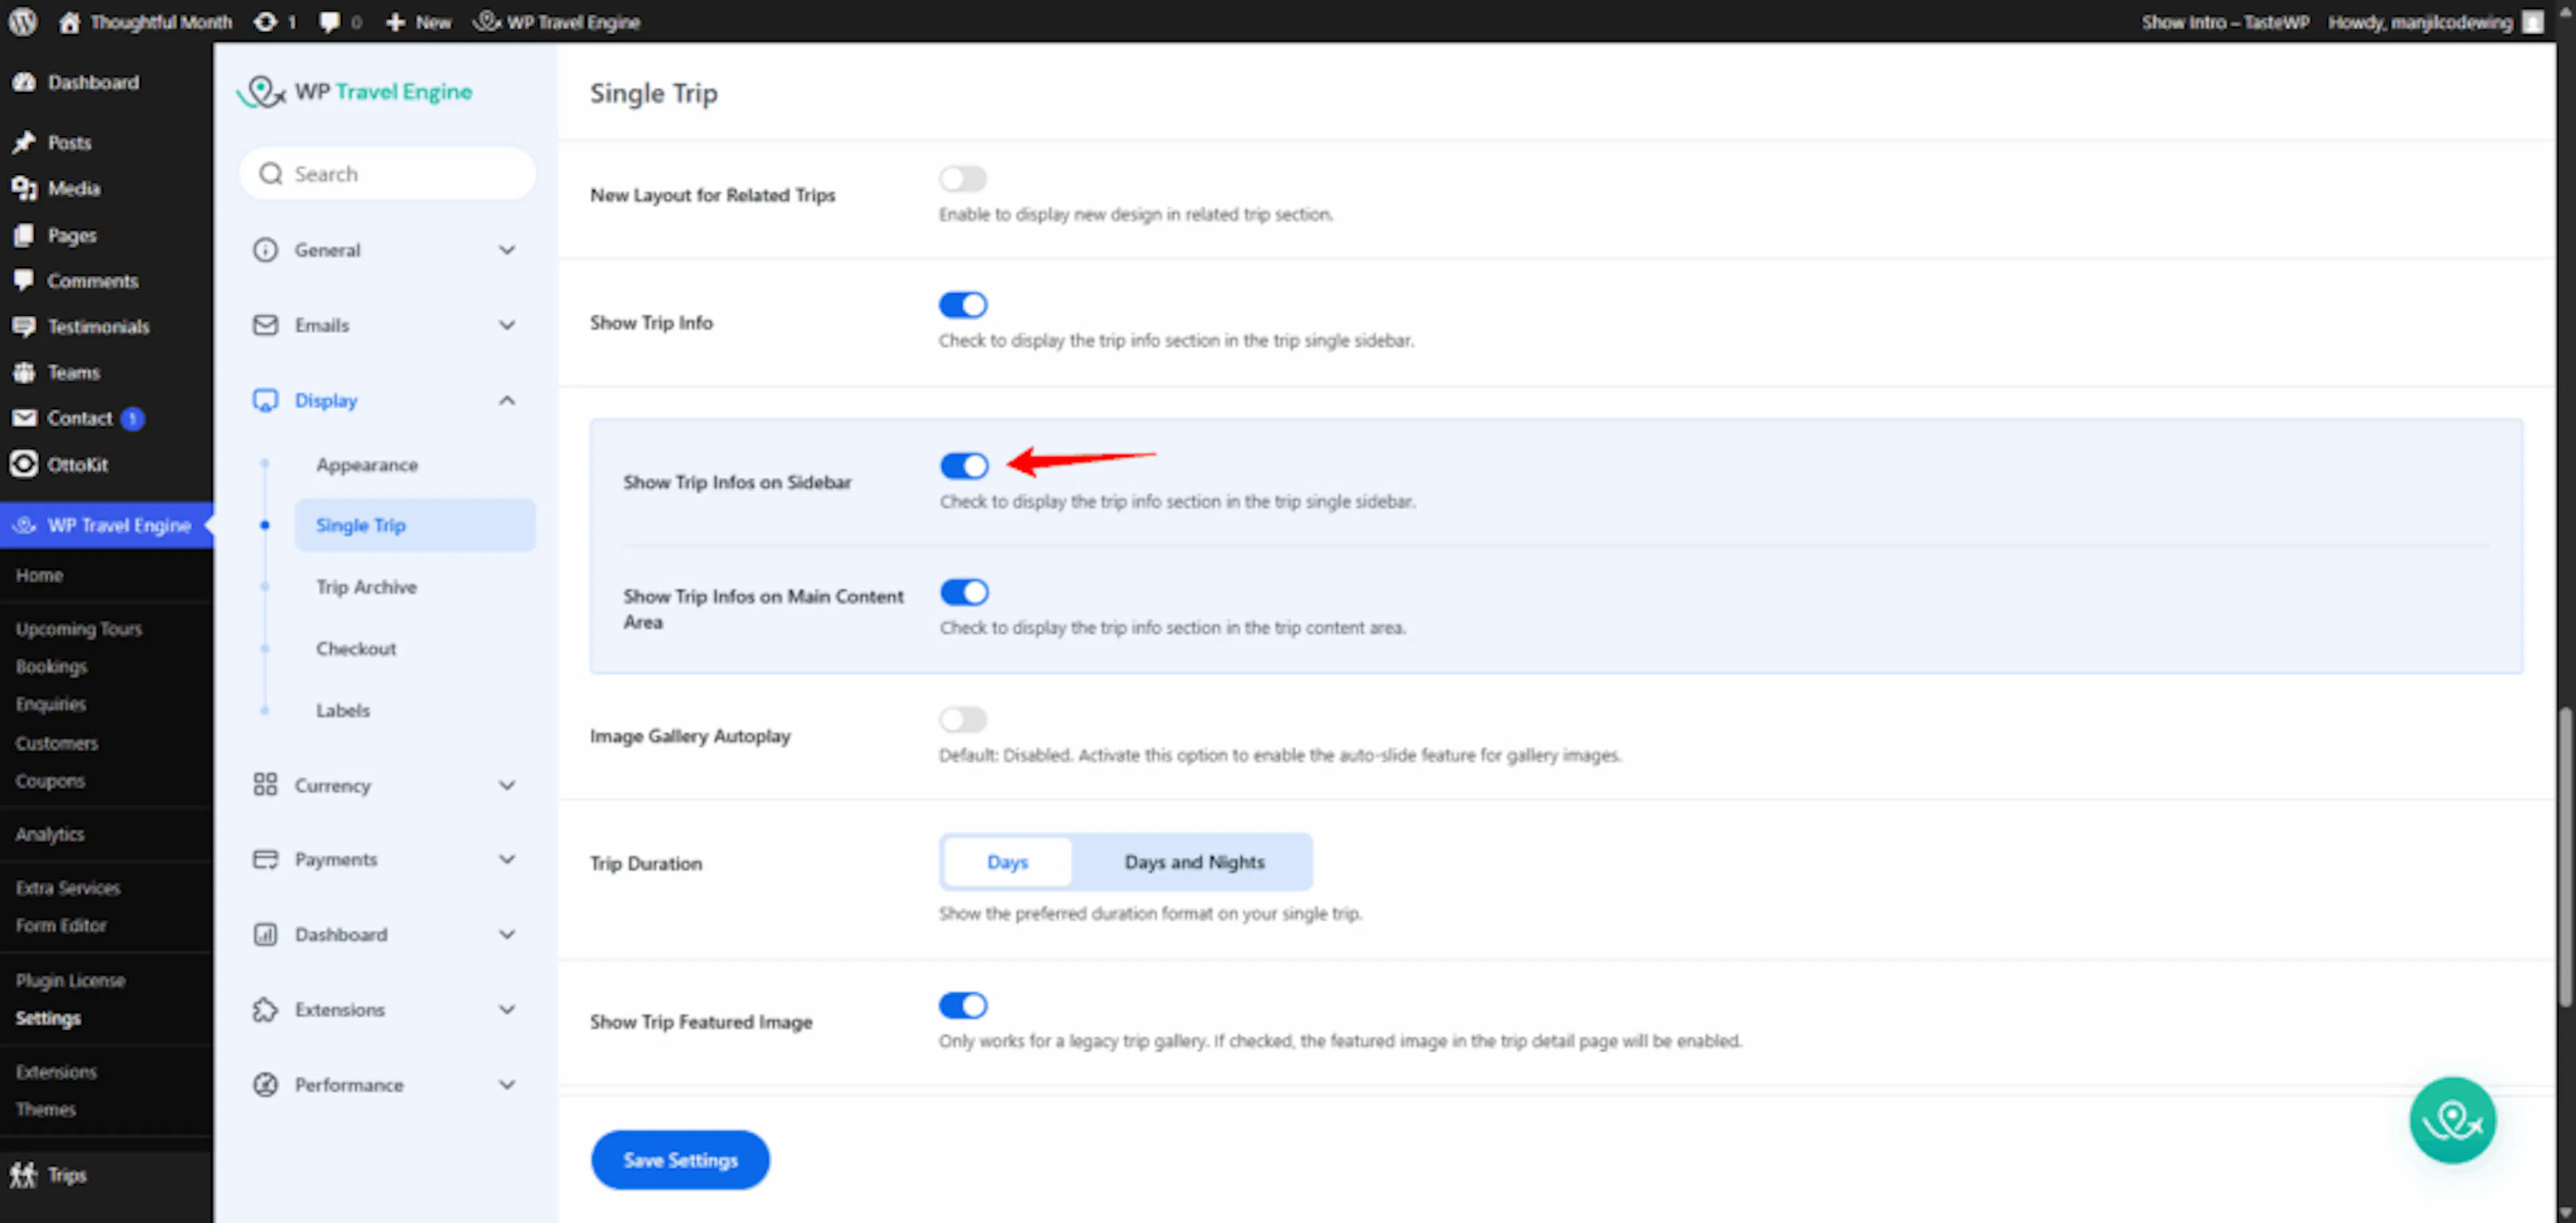
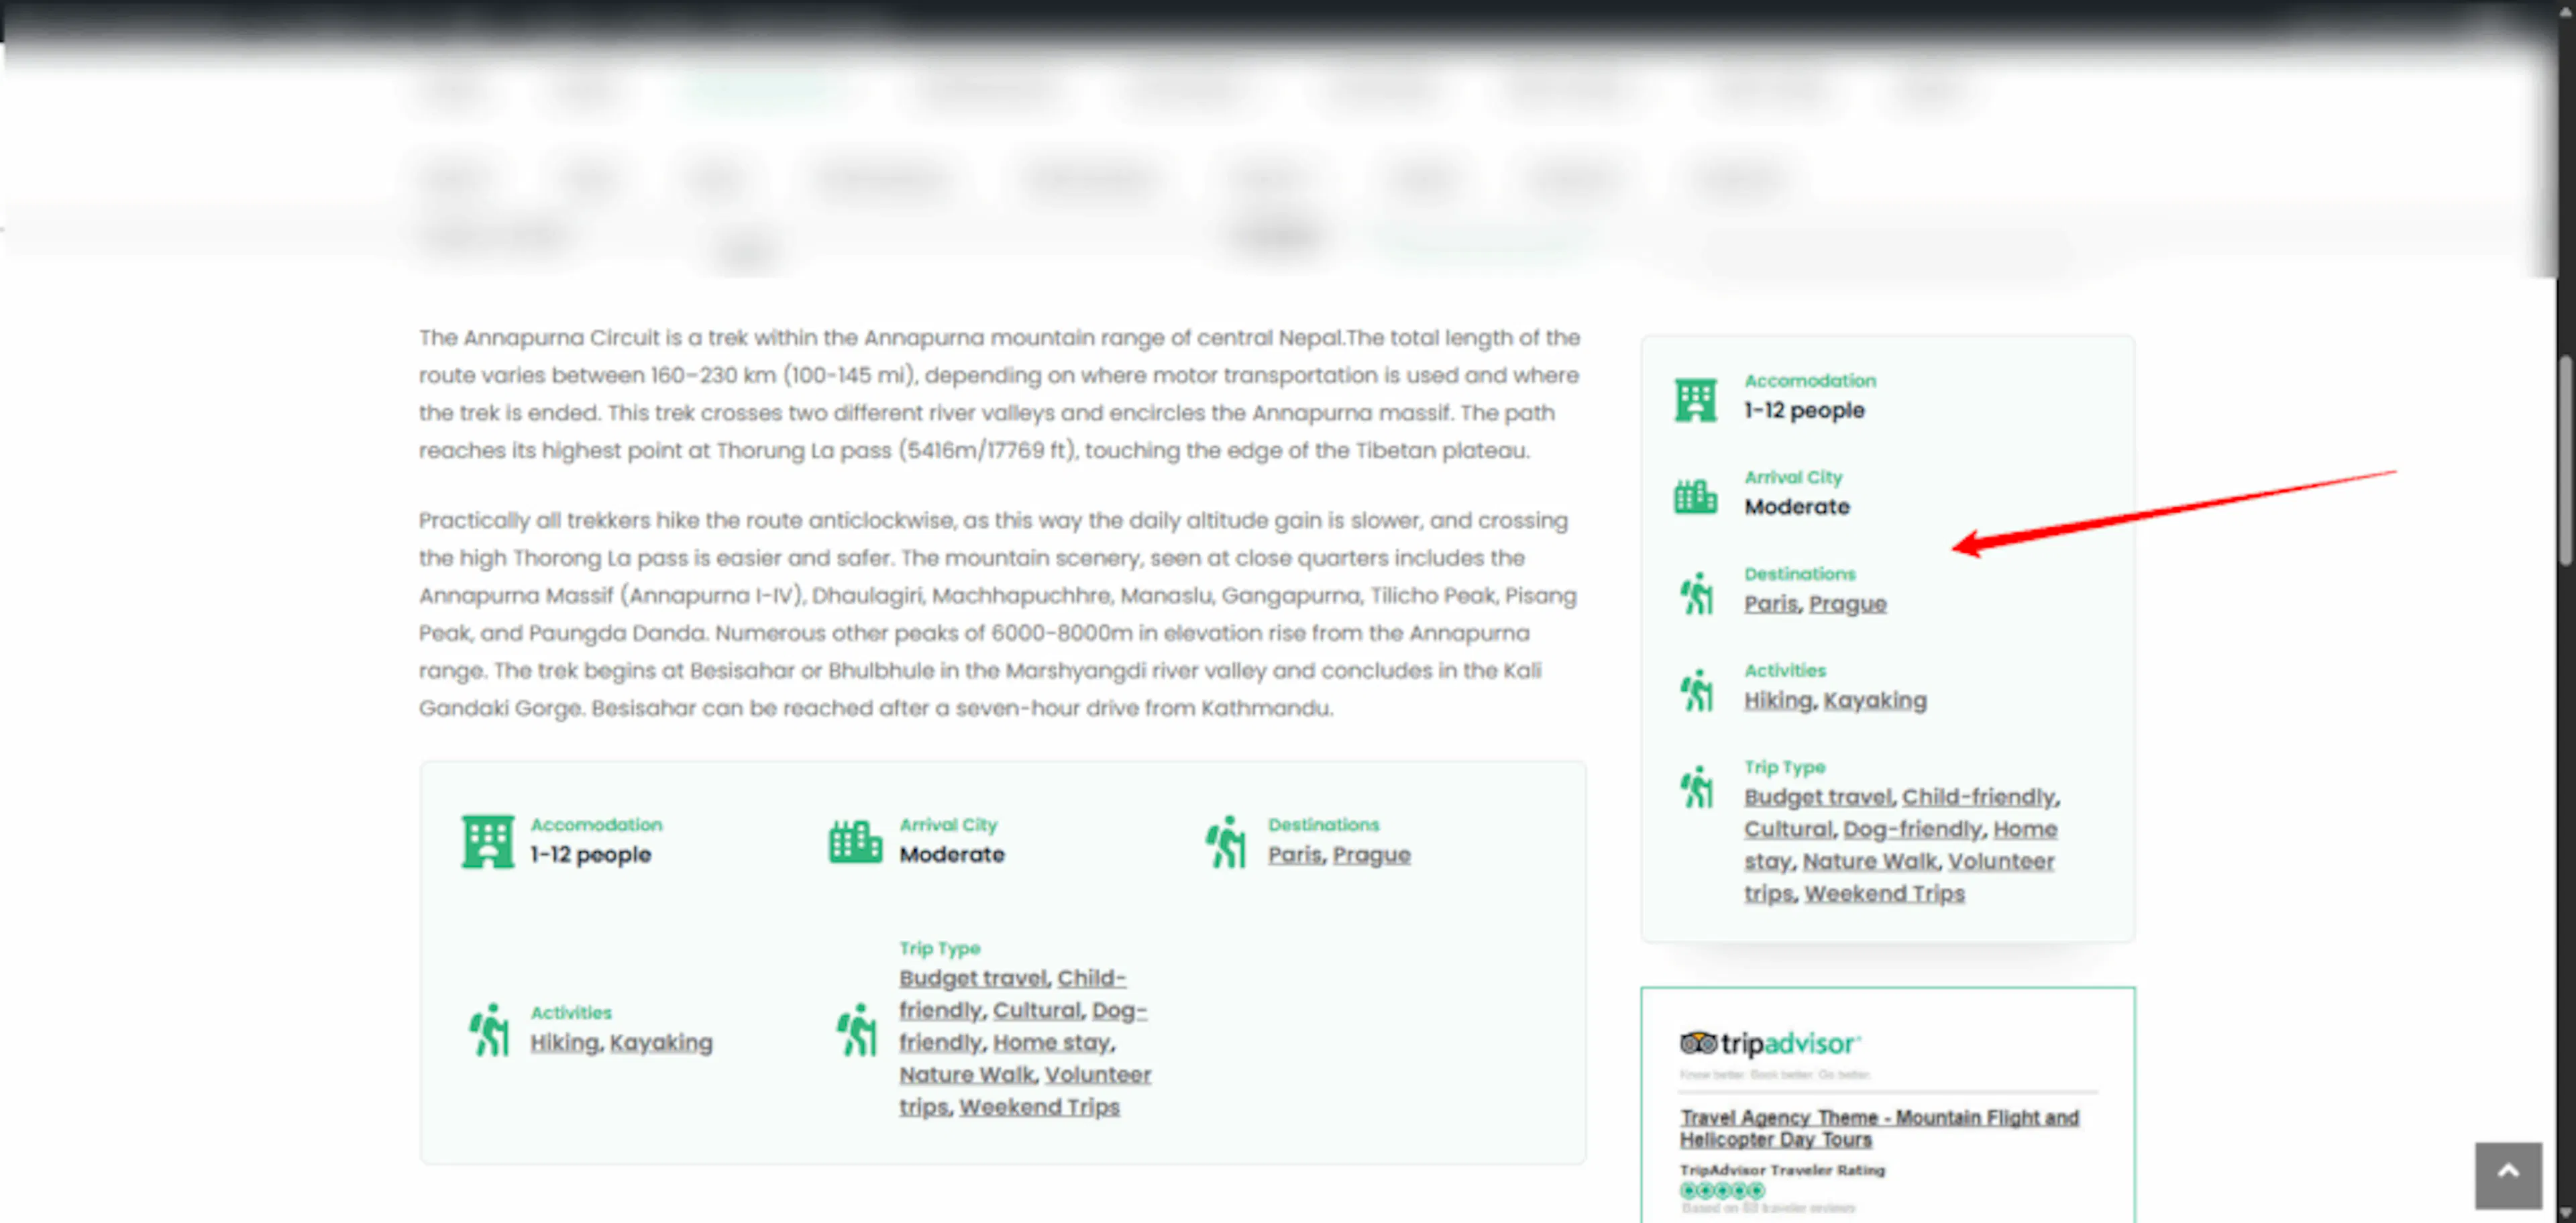
If this looks right for your layout, keep it on. If not, try the main content area option below.
Show Trip Infos on Main Content Area
Use this option if you want Trip Facts to appear in the main part of the page where your trip description goes.
If your trip page does not have a sidebar, turn this on instead. You can also use this if you want the facts to be the first thing travelers see.
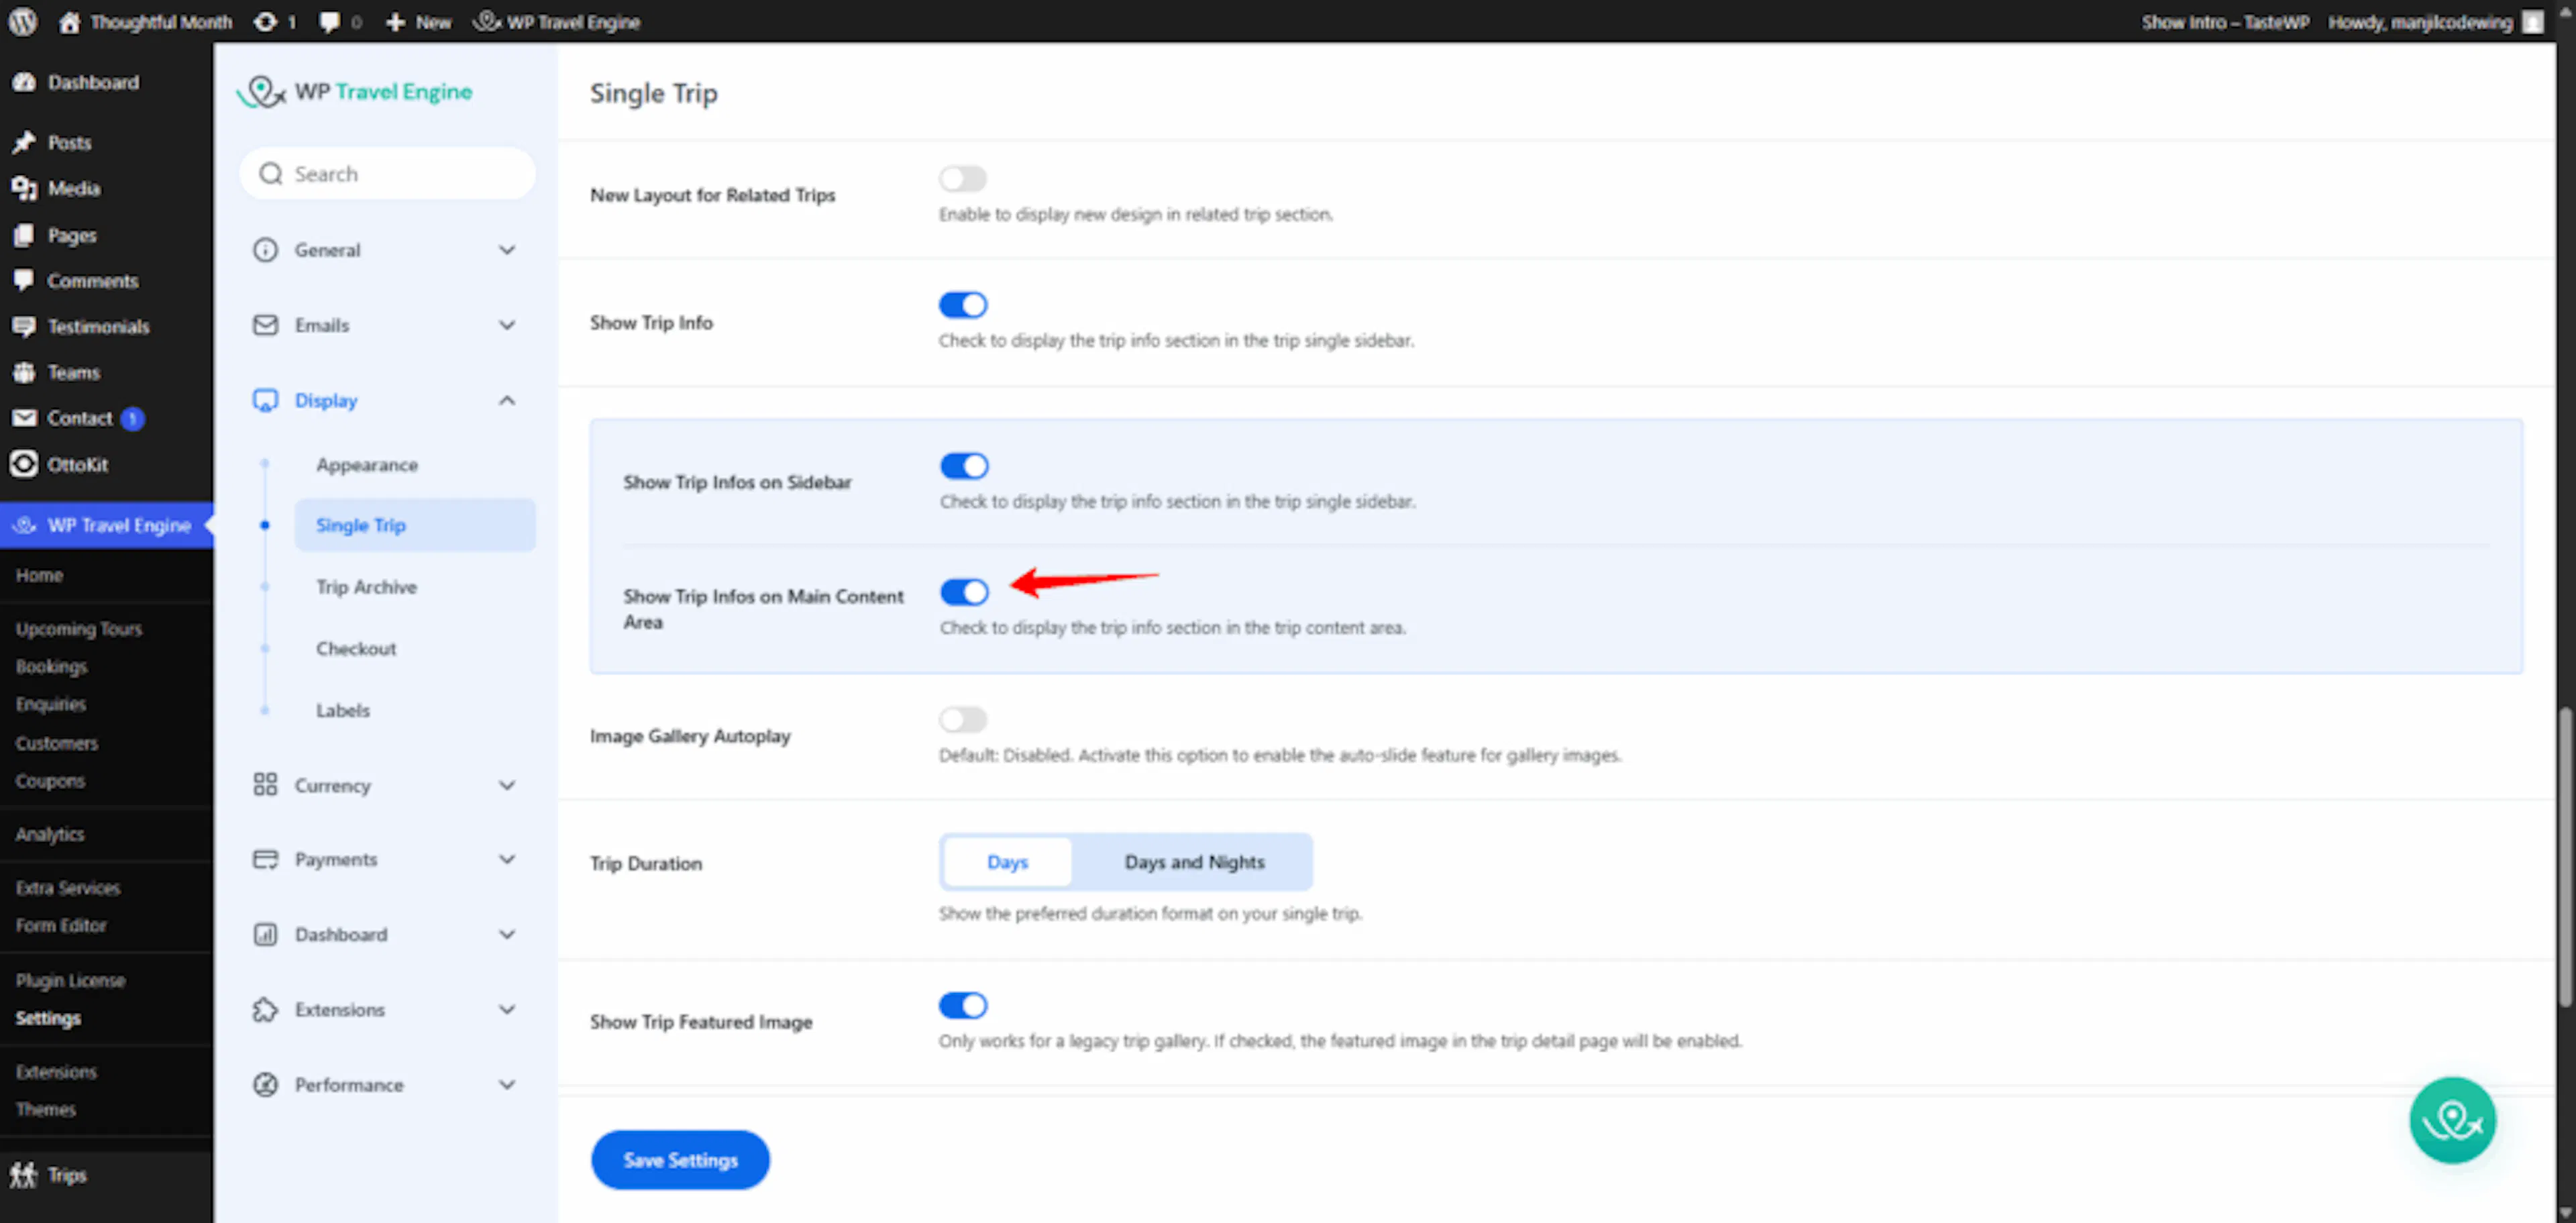
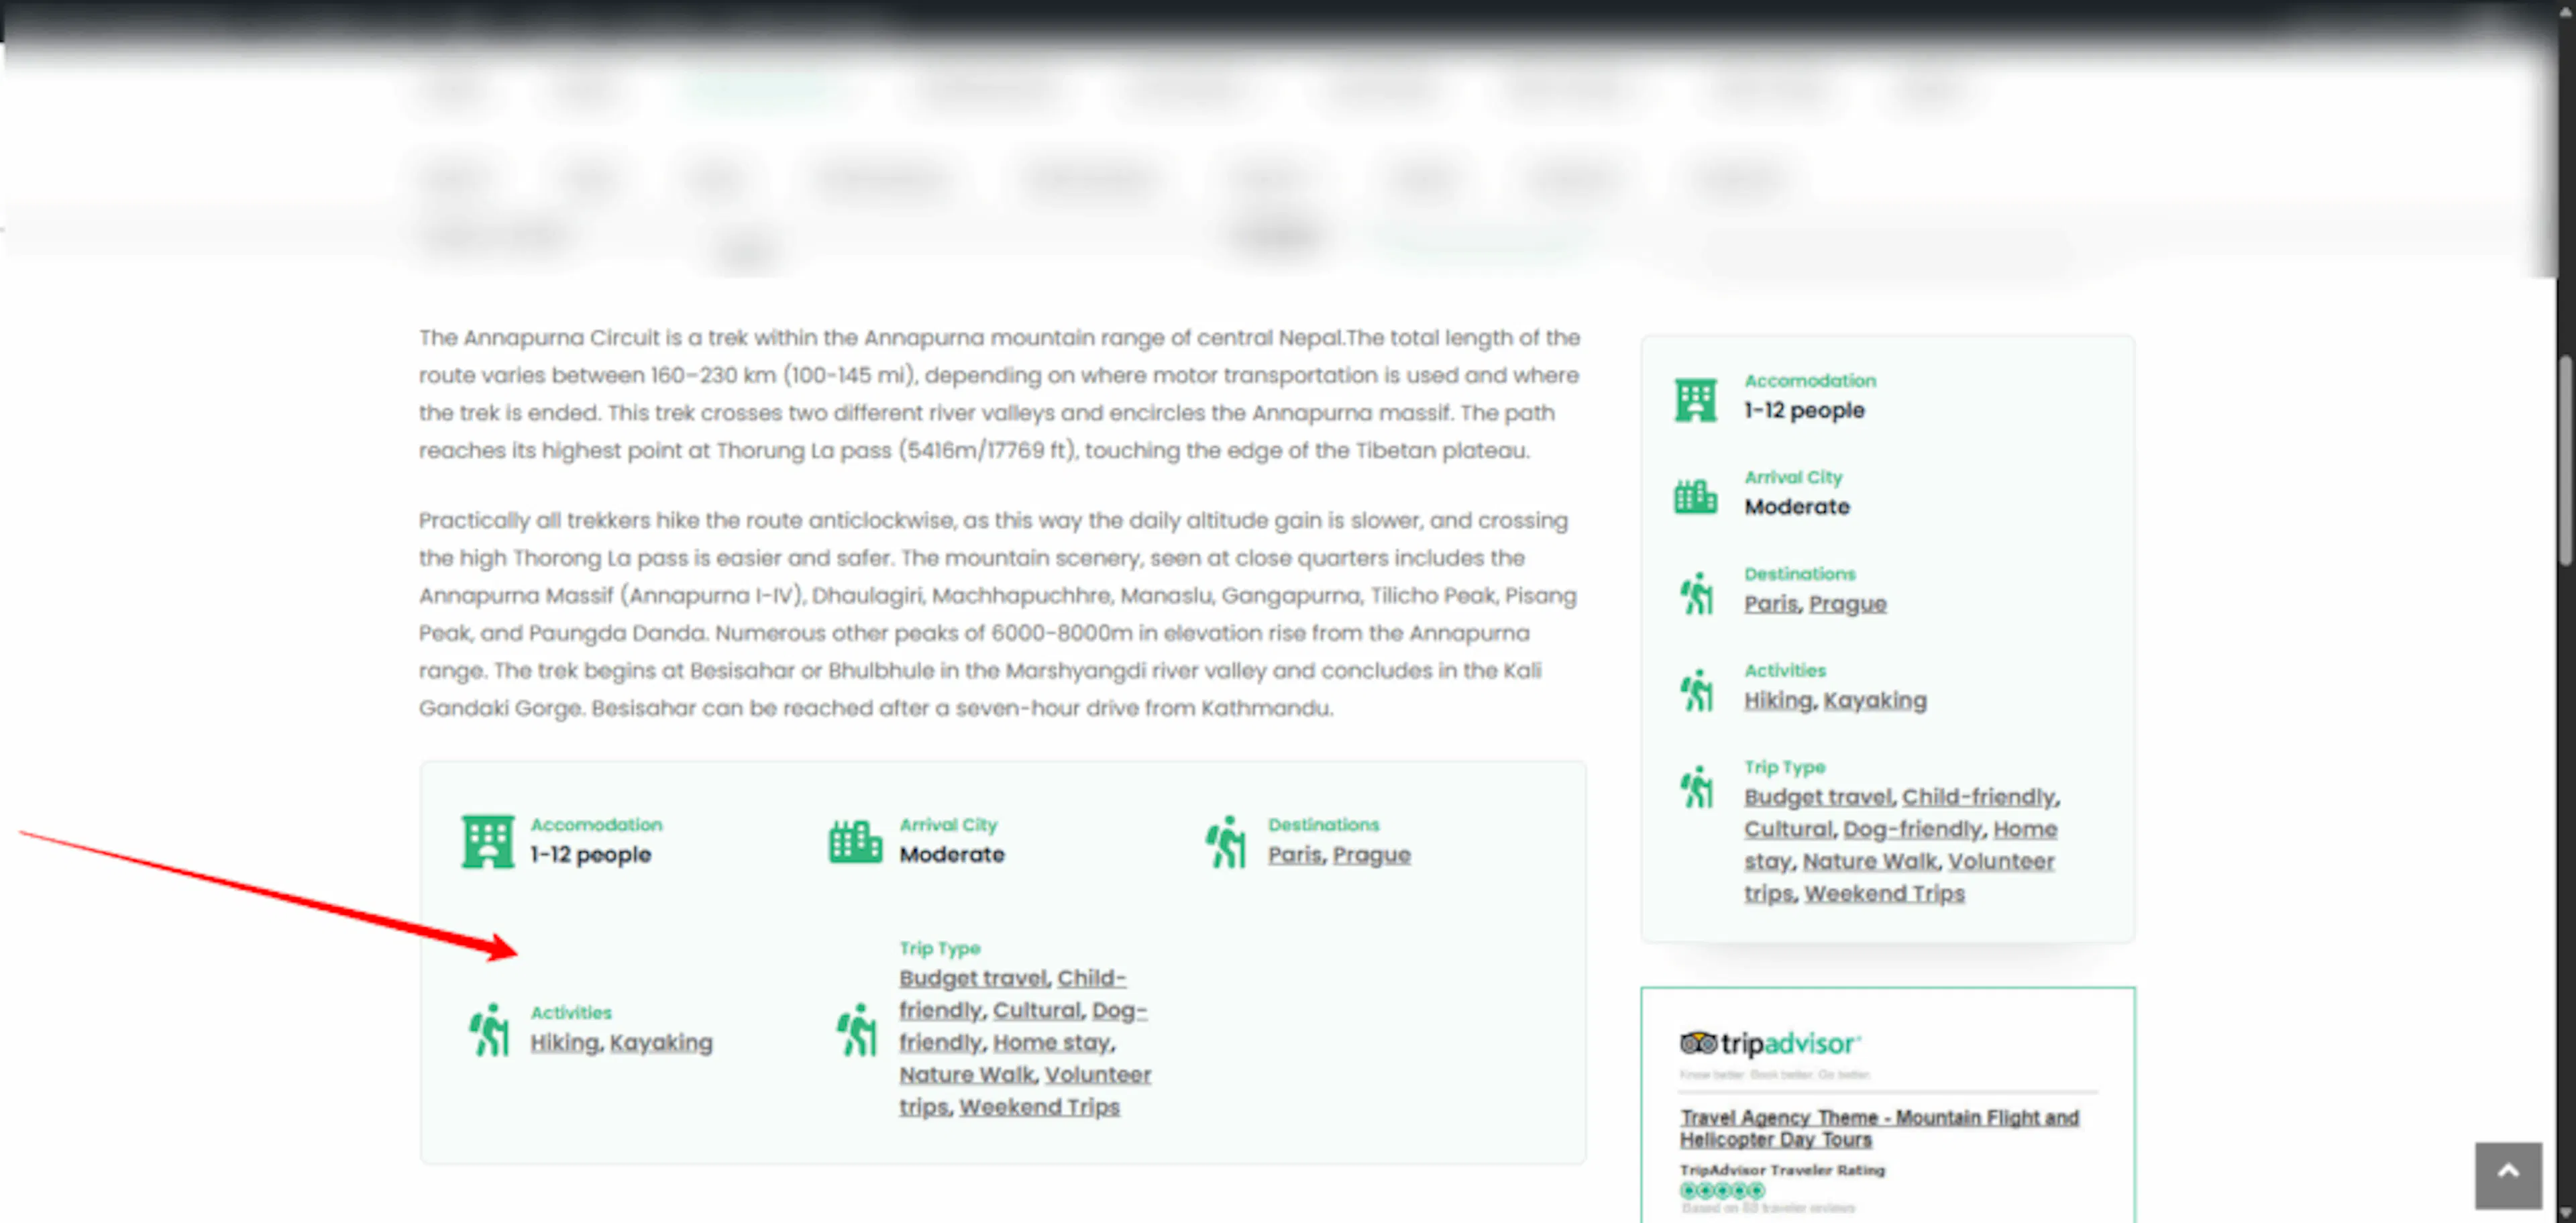
Once you've picked where Trip Facts should appear, save your settings and check your trip page again. Your facts should now be visible to your visitors.
If you're still stuck or have a question we didn't cover, our support team is happy to help. Reach out at our support page and we'll get you sorted.